The dropController makes it very easy to capture water drop collisions. Here is an introduction to photographing 2 drop collisions.
After you have picked up the basics you can experiment with different heights, different liquids, different trays, more drops, etc.
Basic Steps
1 – work out when to trigger the flash
2 – get the second drop to hit the first drop at the desired time.
The first step is to work out when to fire the flash. An easy way to do this is to capture a Worthington Jet and then pick a time that gives a good column.
Set Up
Here is a very simple dining room table set up using one valve and a retort stand. The liquid is milk which is fed from a plastic lab bottle with a piece of drinking straw glued through a hole near the bottom of the bottle. The reservoir is a Chinese tea cup filled with milk. Since I am using milk which is opaque the flashes point at the point of impact rather than at the background. When using transparent liquids like water you would light the background.
The controller is a breadboard version of the dropController.
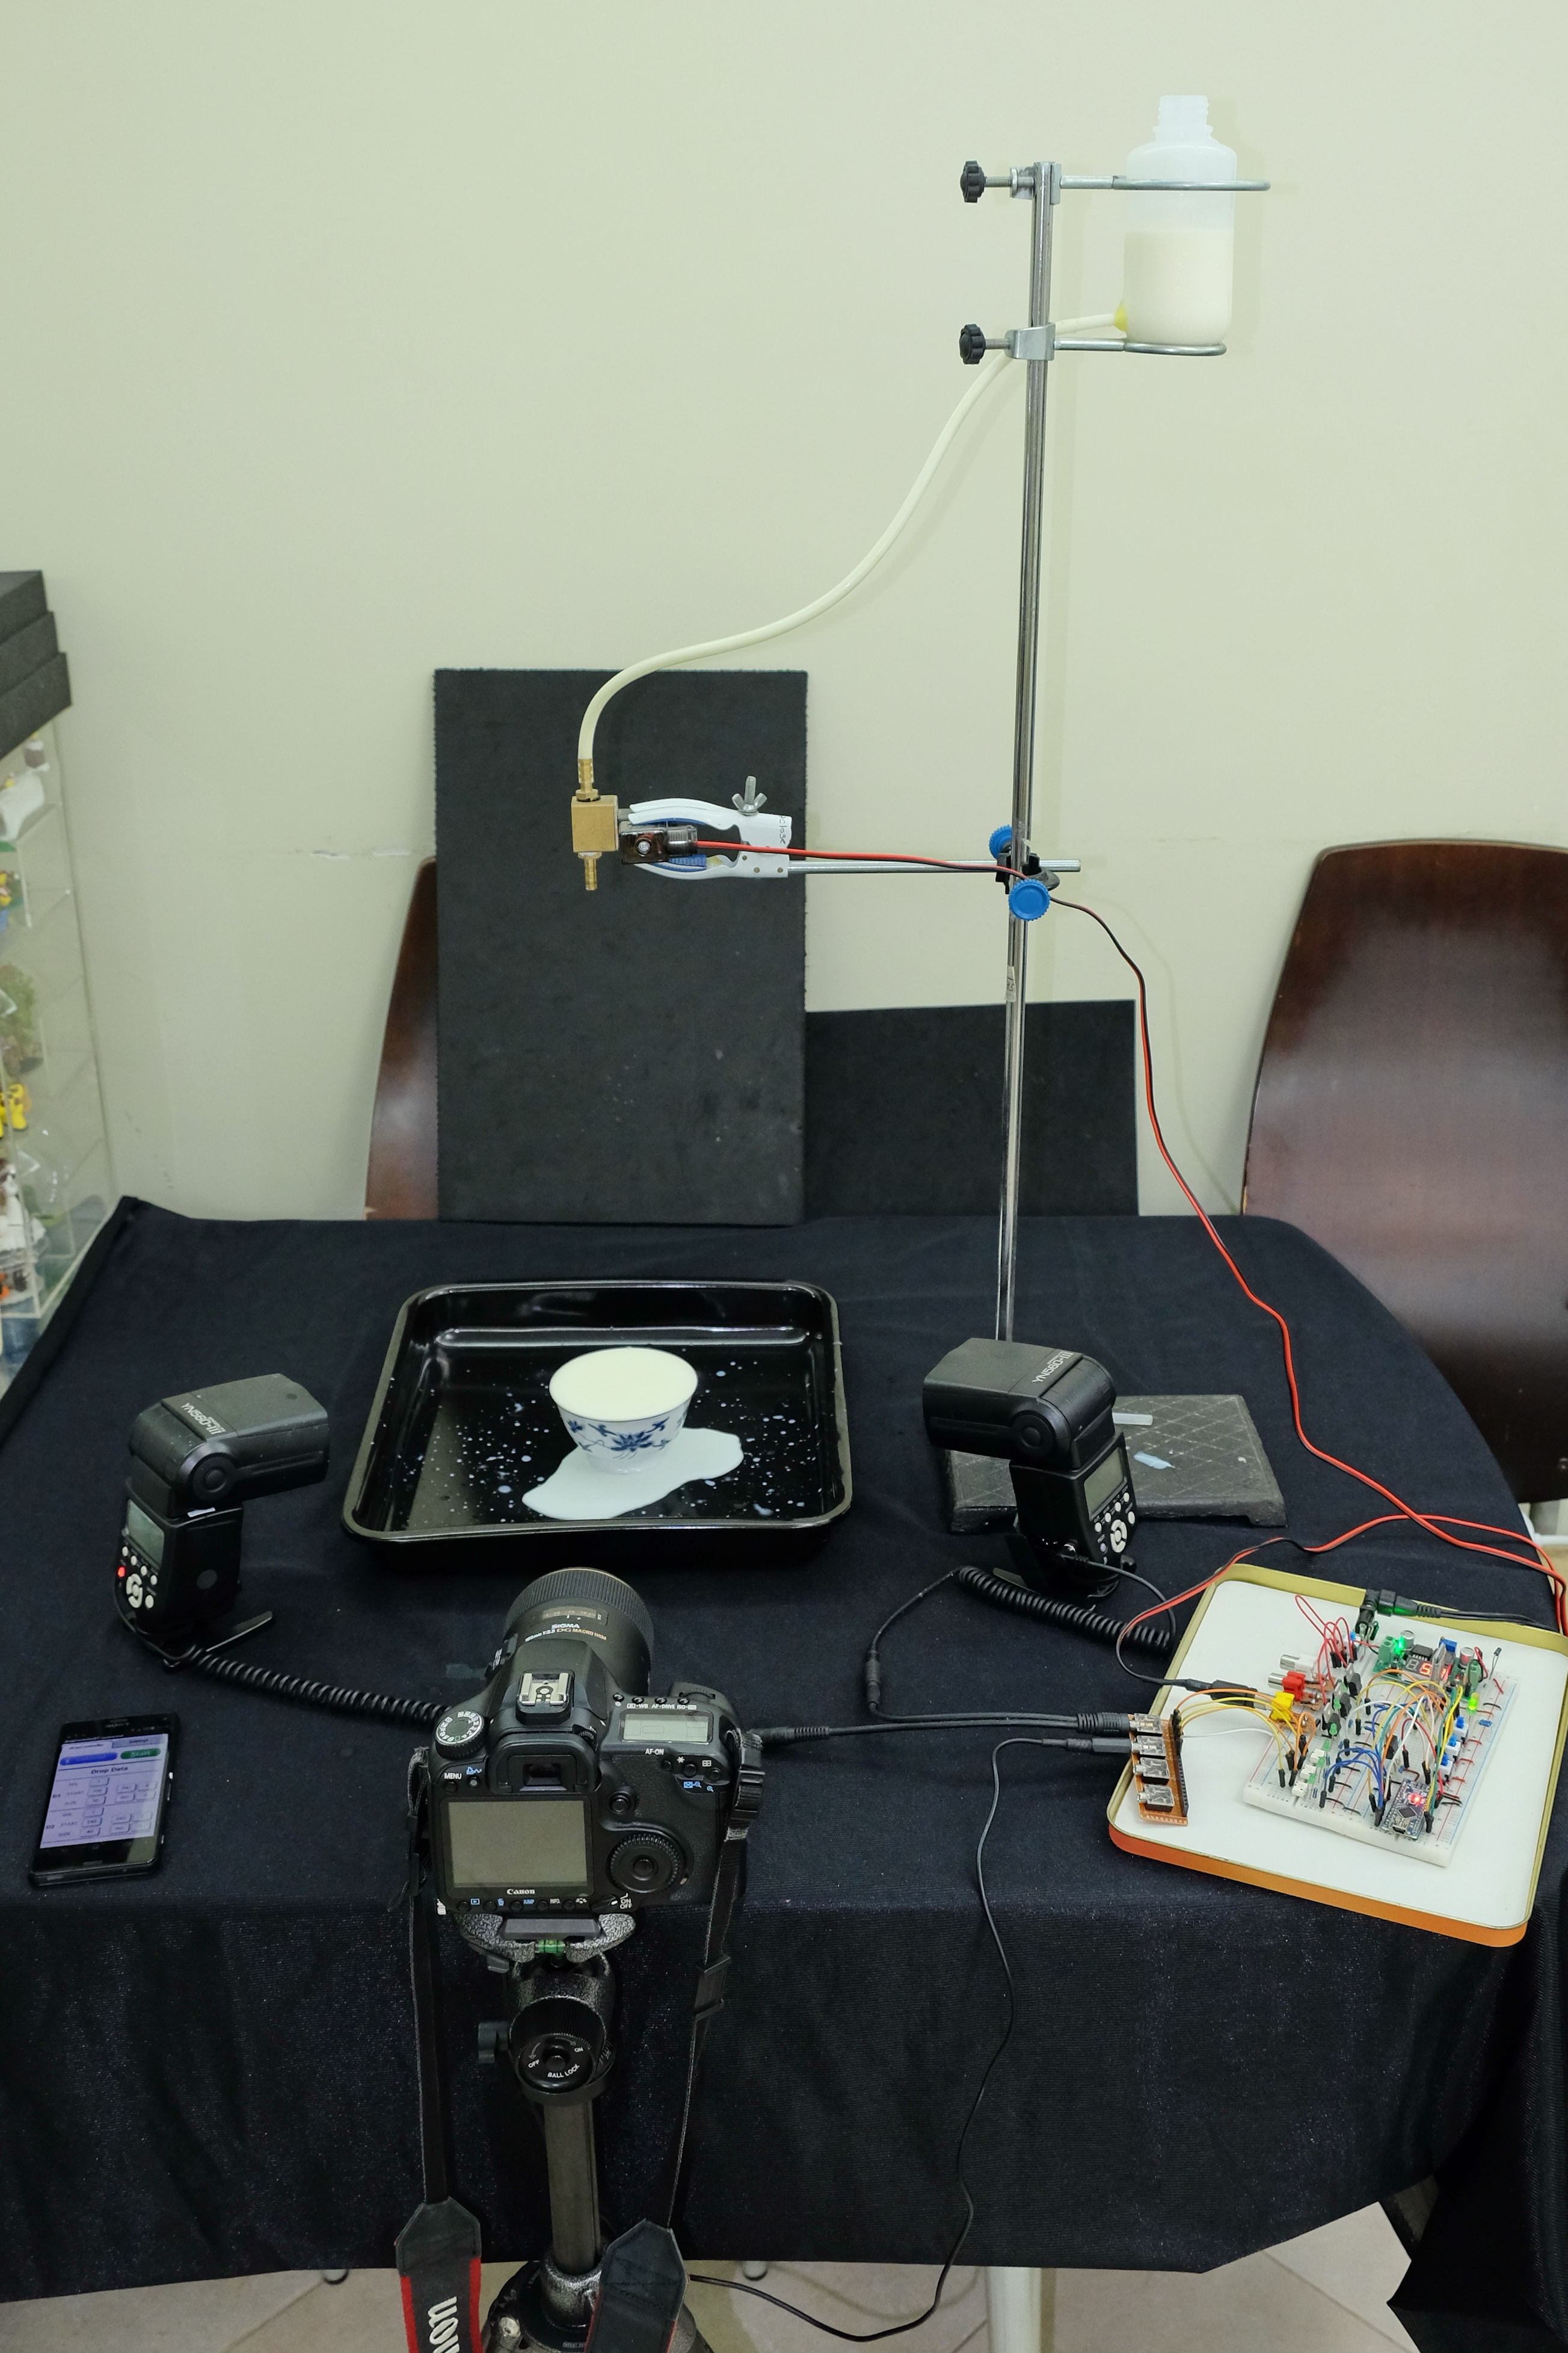
The valve is about 40cm from the table top. The milk in the cup is about 5.5cm deep. The camera is in manual mode, f14 with a shutter speed of half a second. The lens is a Sigma macro. The flash guns are set to manual at 1/64th power and connected to the dropController by a headphone splitter cable.
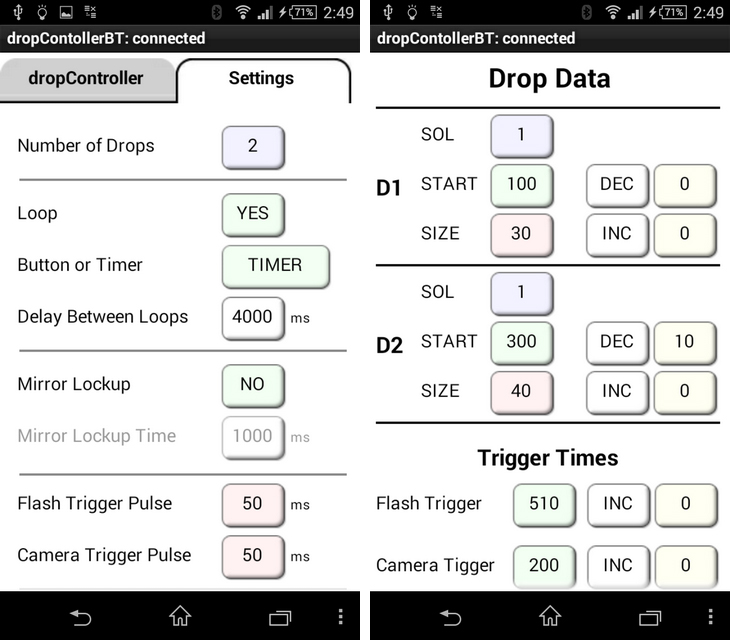
Drop Settings
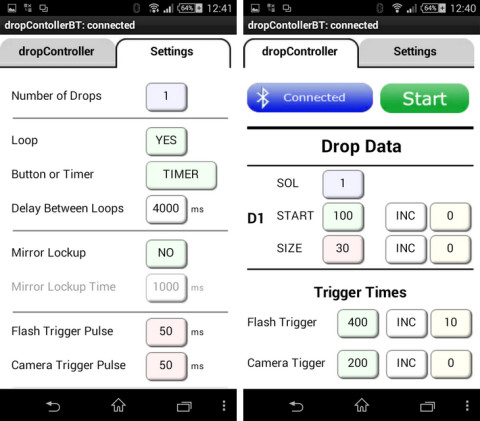
Loop mode with a pause of 4 seconds between drops.
1 drop. Start time = 100ms. Drop size = 30 ms
Flash trigger time = 400ms and the flash trigger increments by 10ms every loop.
Camera shutter trigger = 200ms and the shutter speed is 0.5 seconds (500ms). This means the shutter is open from 200ms to 700ms.
Using the above settings I captured the following Worthington Jet.
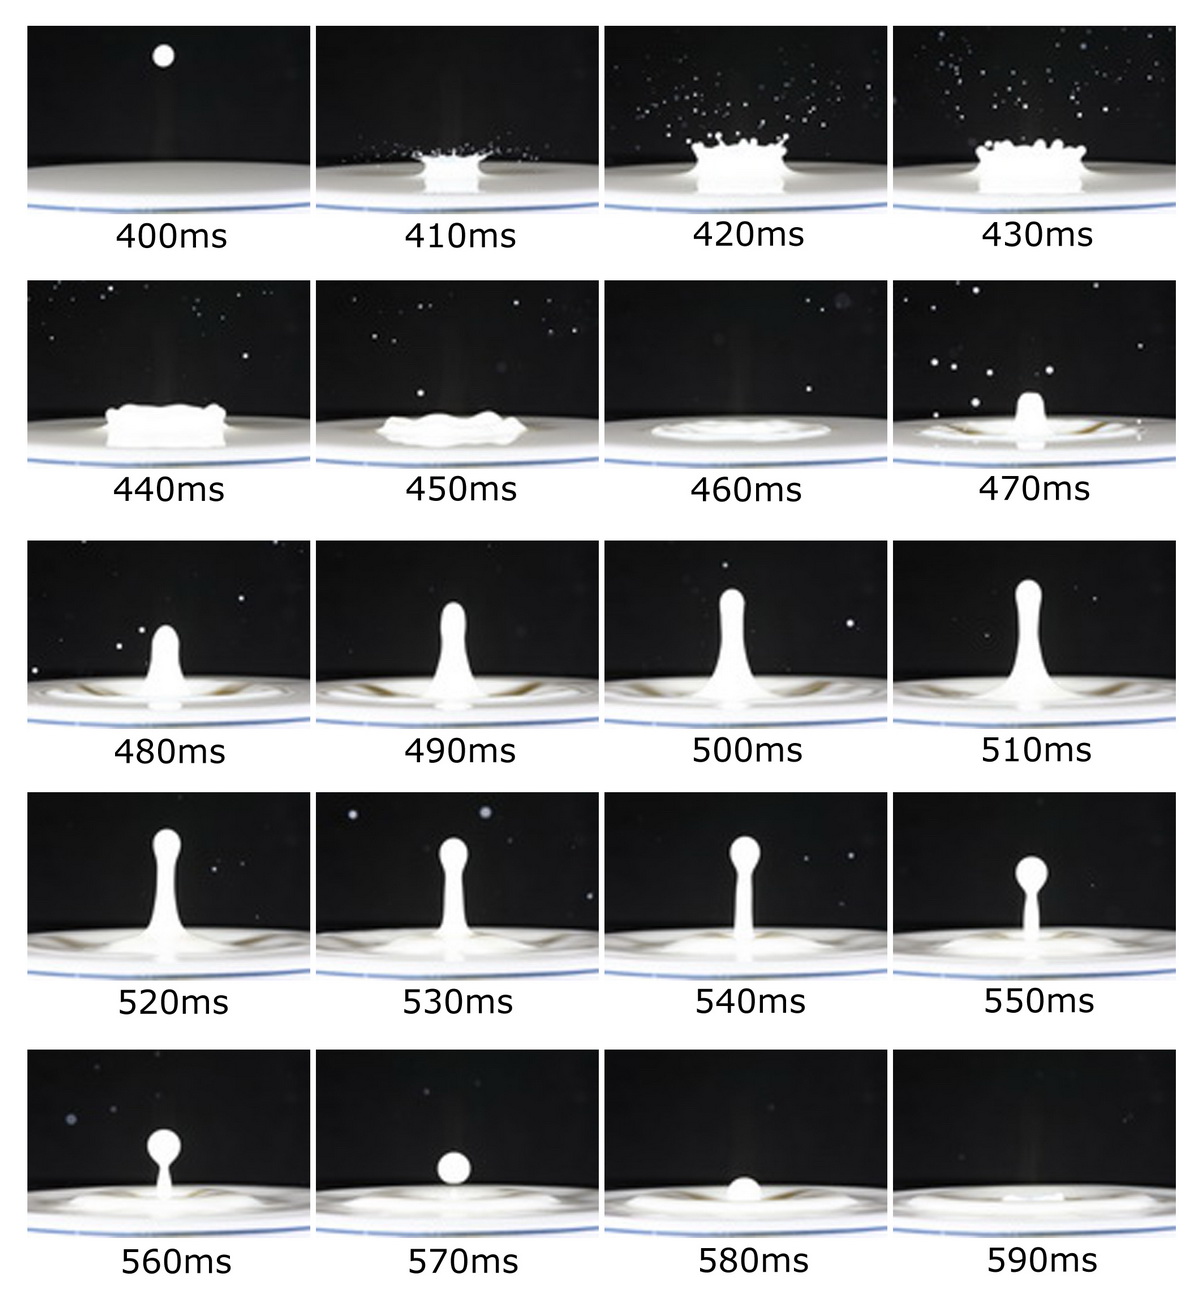
Worthington Jet Sequence
From the photos I think the columns at 510ms and 520ms would be good. I checked the times by doing another sequence with smaller increments.
This time the flash trigger time is set to 510ms with an increment of 2ms.
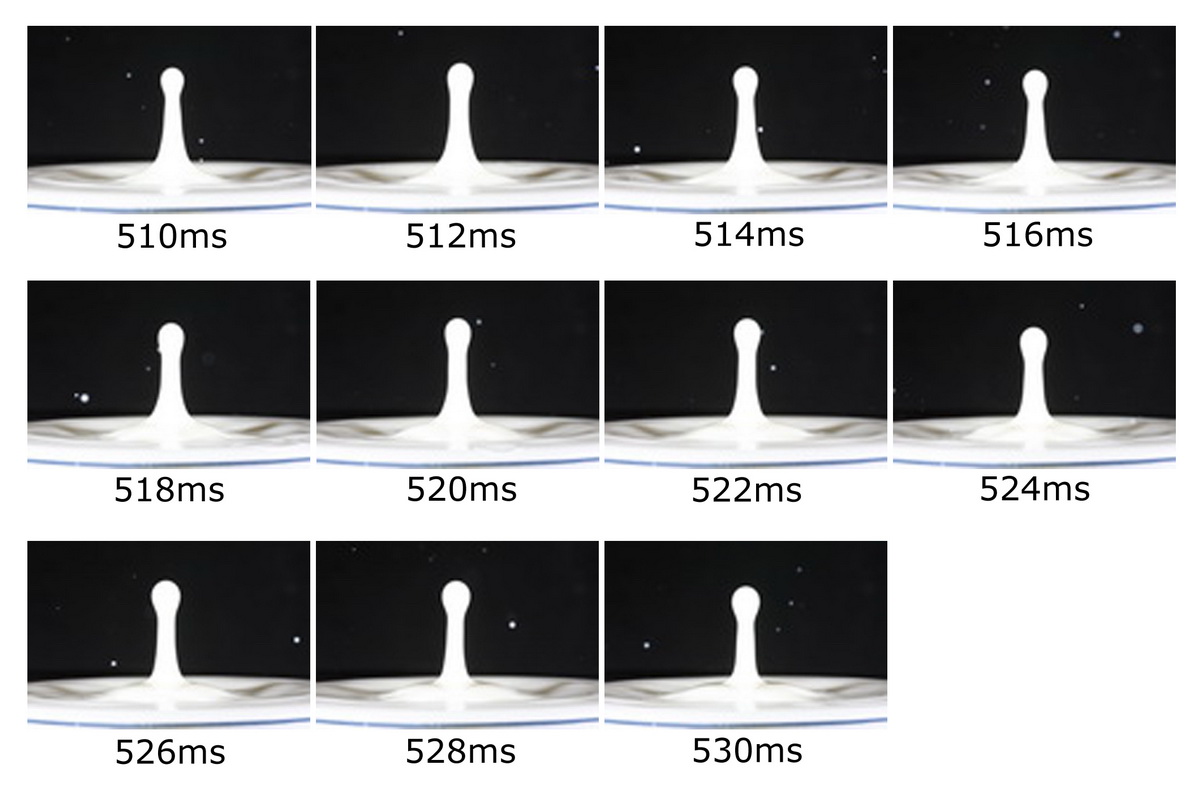
510ms still looks OK so this is what I will go with. Set the flash trigger to 510, set the flash INC to 0.
2 Drop Collision
Now we have the flash trigger time we need to get a second drop to hit the first drop sometime before 510ms*. This is fairly easy with the dropController. We simply add a second drop and walk it forwards in to the column using the START DEC value.
*Since I am taking the photo at 510ms I need to allow time for the collision to form a nice shape. If I have the drops colliding at exactly 510ms there would not yet be any splash.
For the second drop, start with fairly large START TIME and set the START DEC time to 10ms or 20ms. Start the sequence and note when the second drop hits the first drop. What we want is the second drop start time for when the drop collides with the column, not the collide time.
Although we are looking at the collision, what we actually need is the drop start time, not the collision time.
The second drop starts at 300ms, has a size of 40ms and the START TIME decrements 10ms every loop.
If you have problems finding the second drop, move the camera back so that the photos capture both drops. As the sequence progresses you will see the second drop slowly move down.
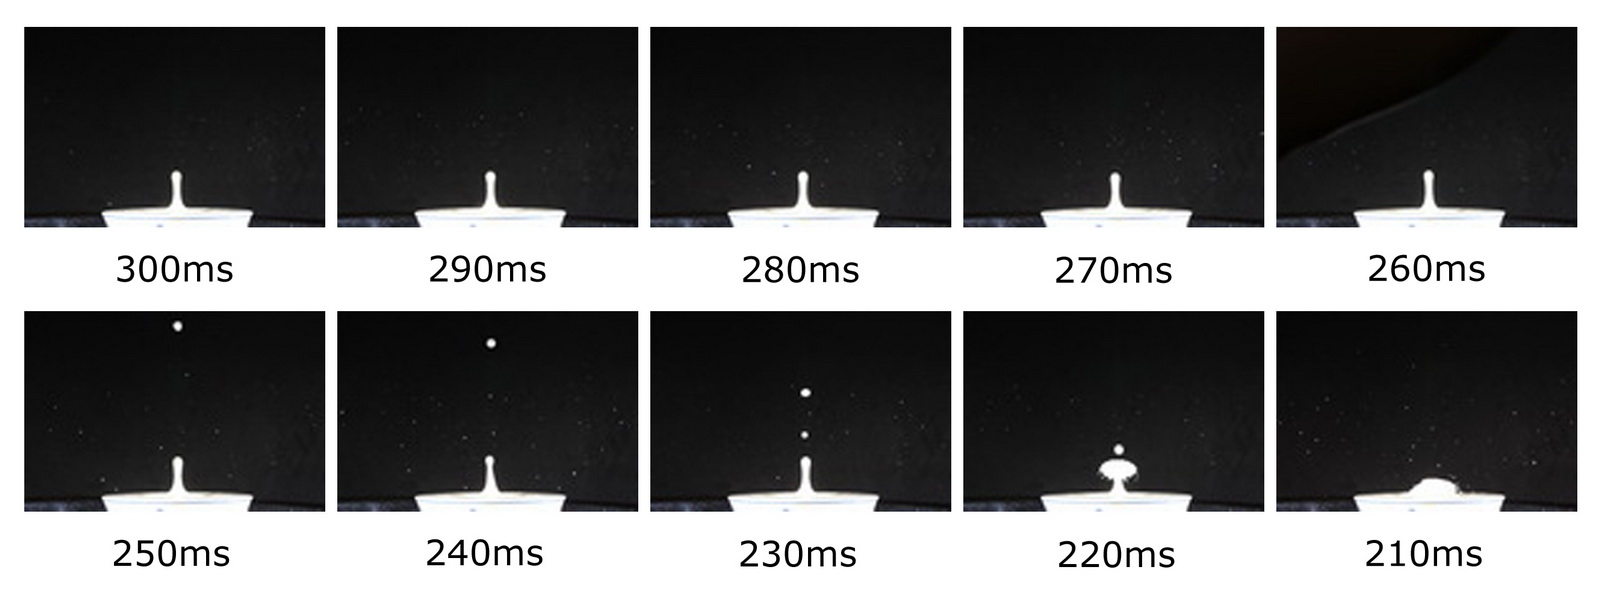
I started with a start time of 300ms and a DEC time of 10ms. From this I determined that the drops collided when the second drop started at about 220ms. Once you know this you can fine tune the times.
Next step; set the drop start time for the second drop to 220ms and the DEC time to 1ms or 2ms.
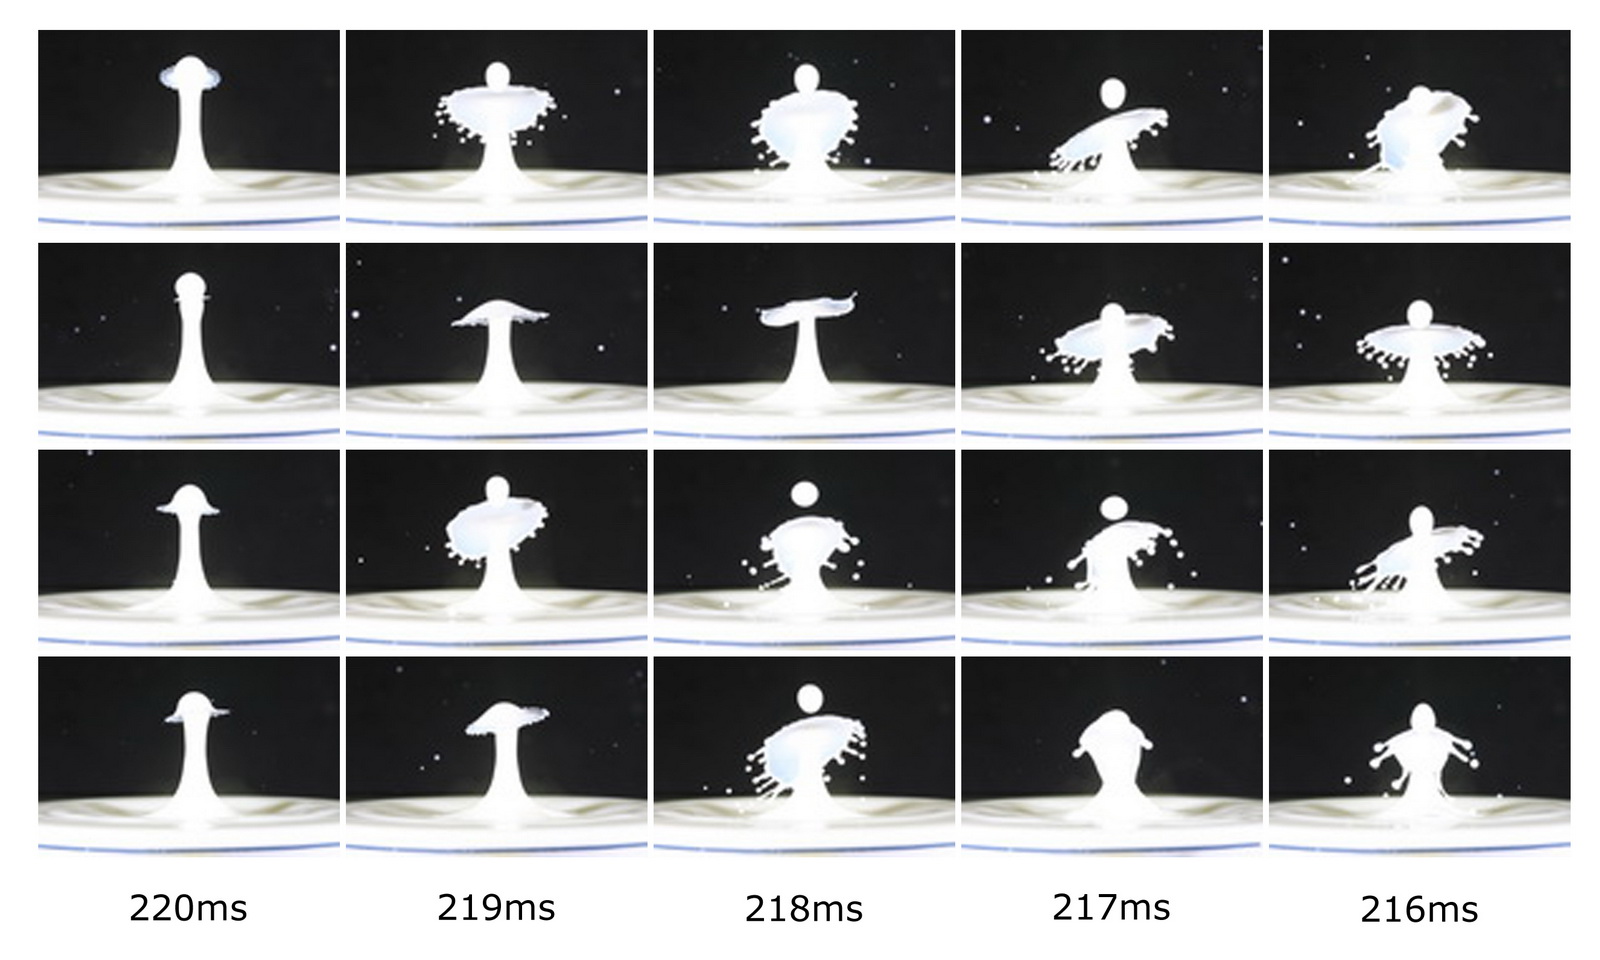
From this I can see that a drop 2 start time of 219 ms is pretty nice.
You can now set the drop start time for the second drop to 219 ms and remove the INC/DEC value, or, like me keep the start time to 220 ms and a DEC time of 1 ms. Then simply run the sequence several times with 5 or 6 pictures per sequence.
Here is the drop data from the Loop Page
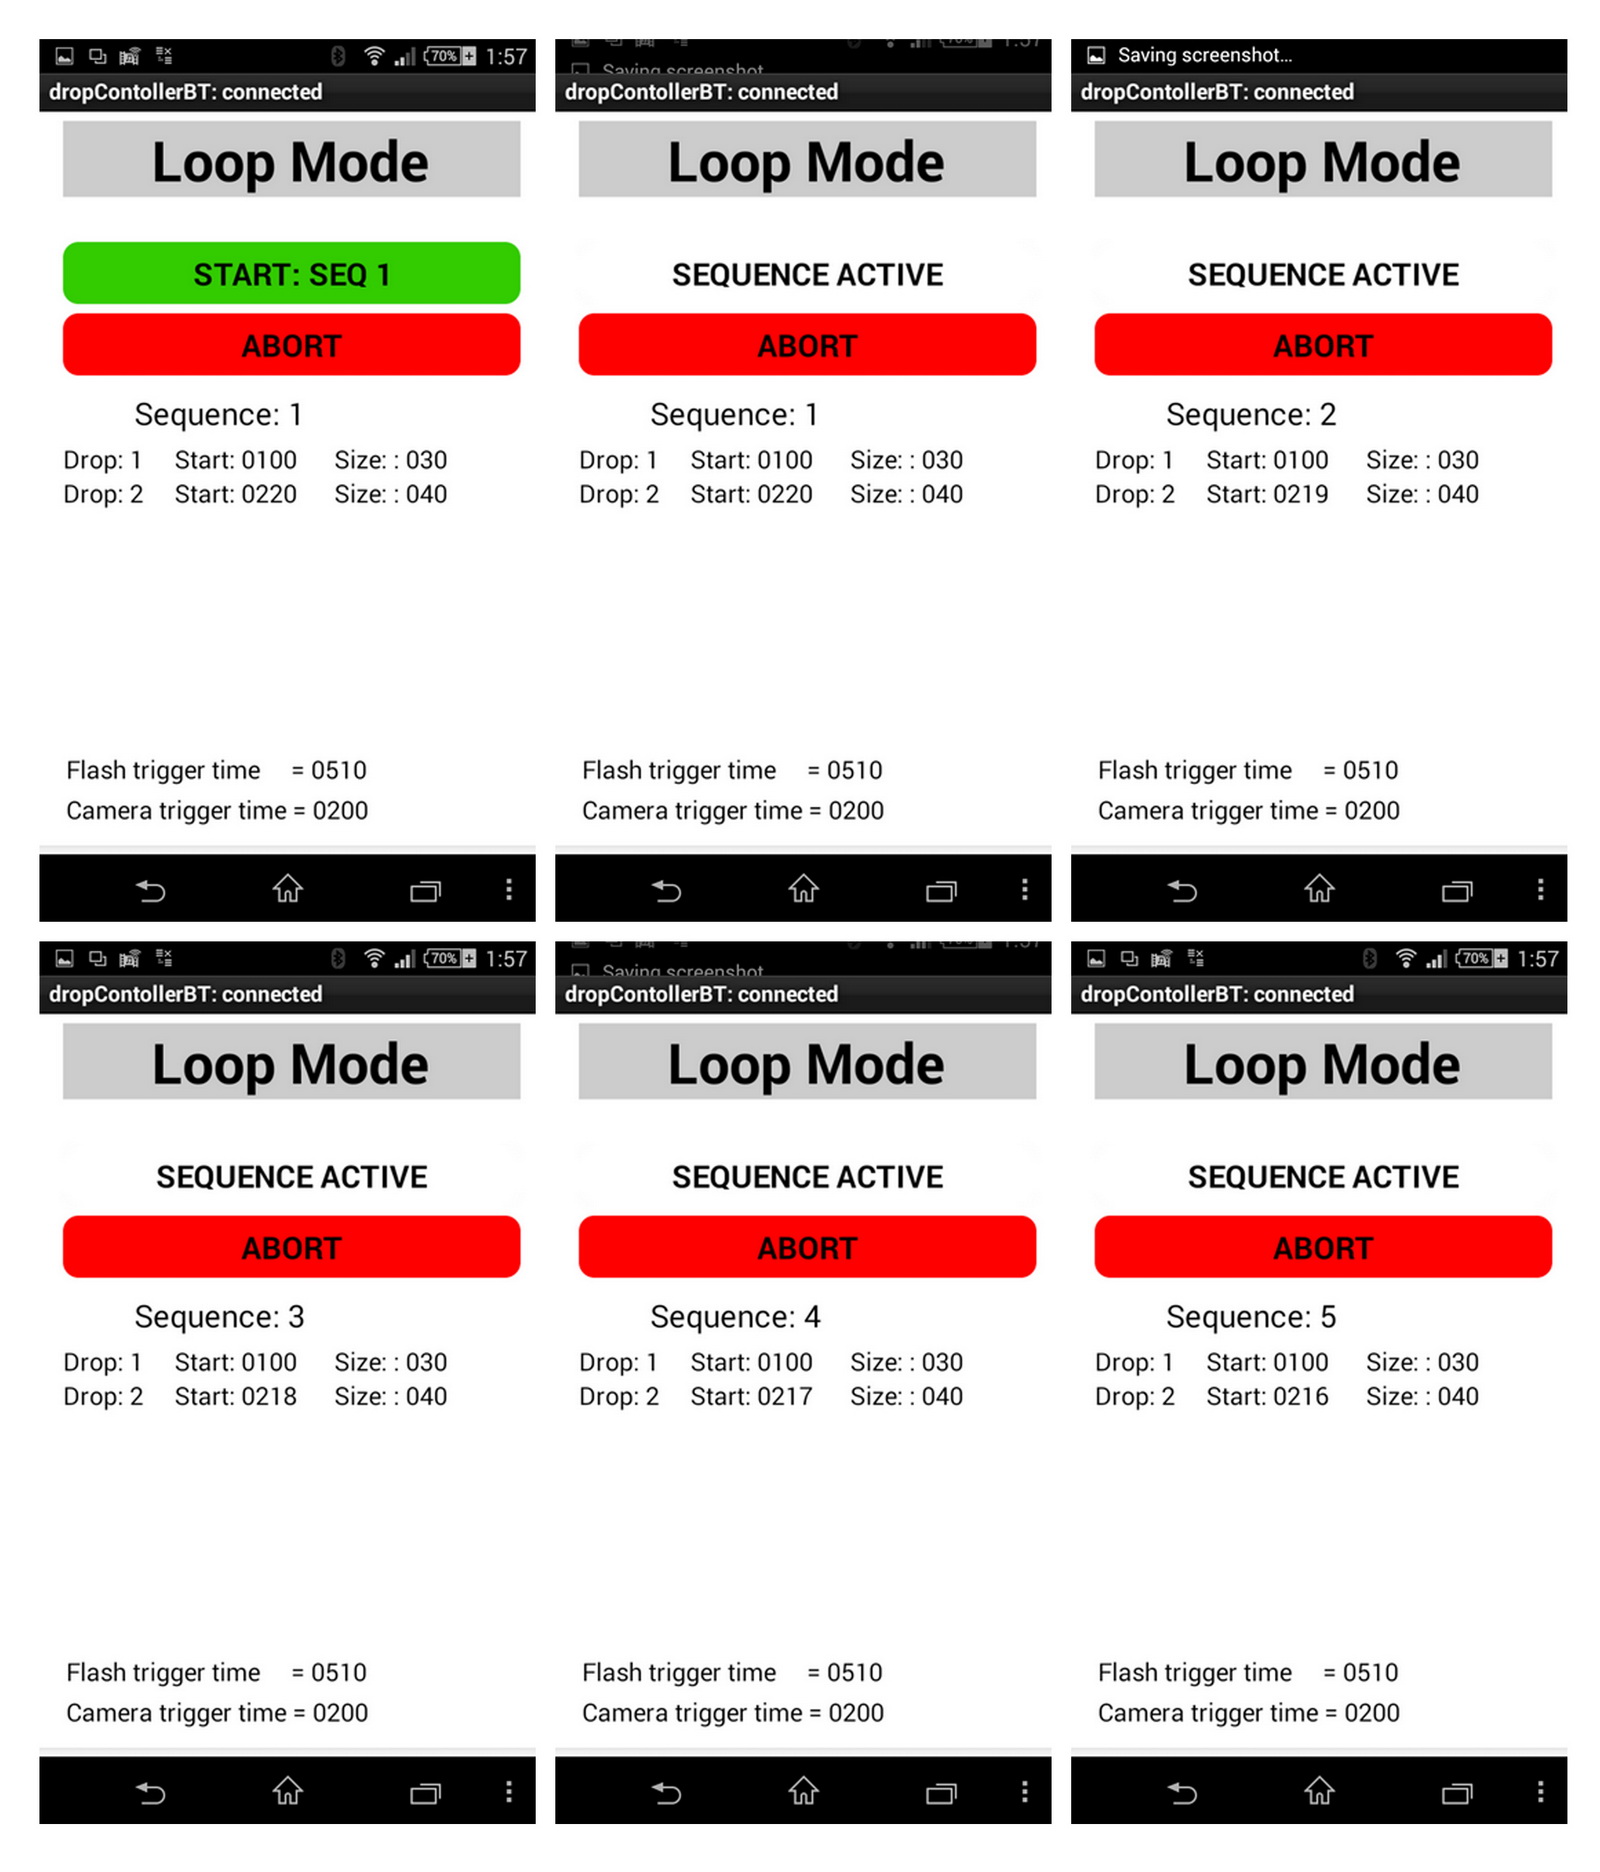
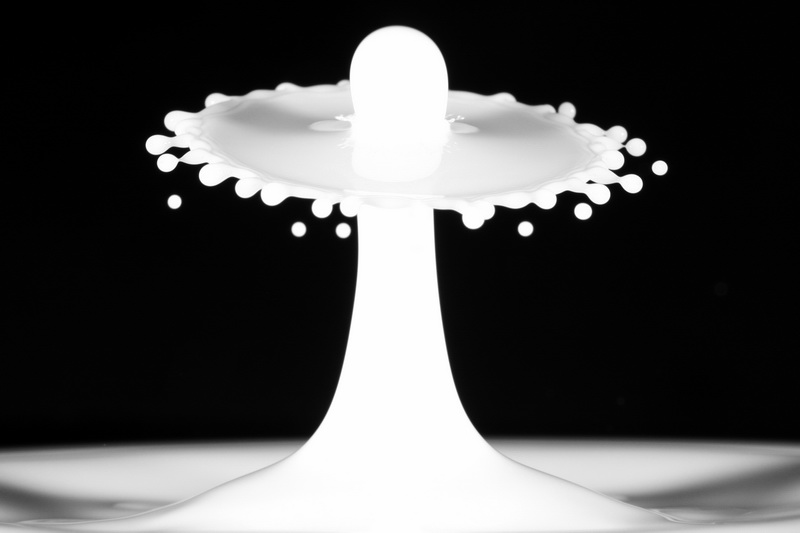
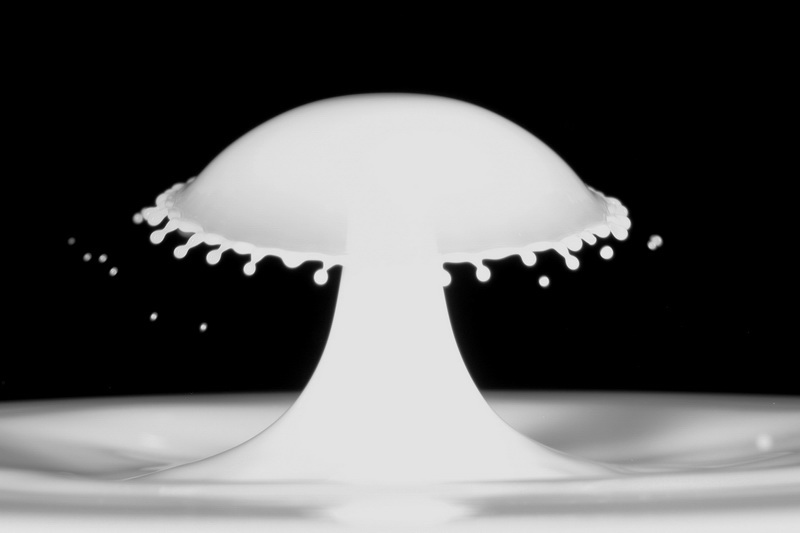
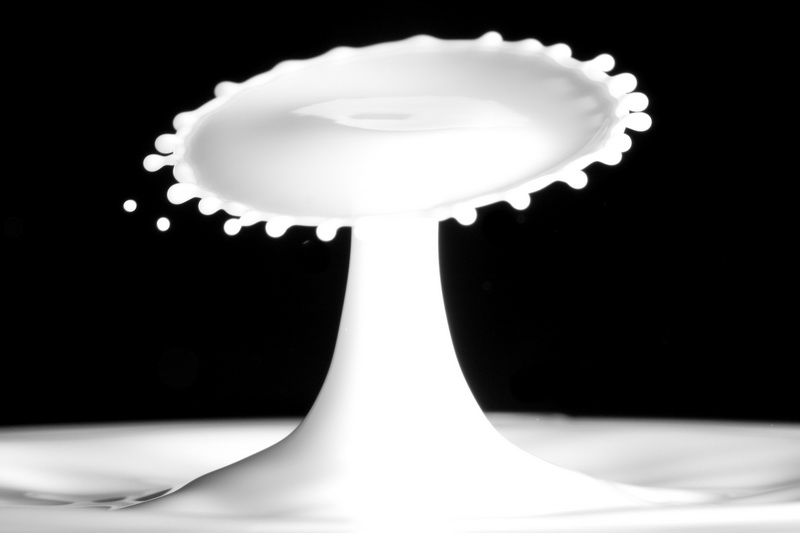
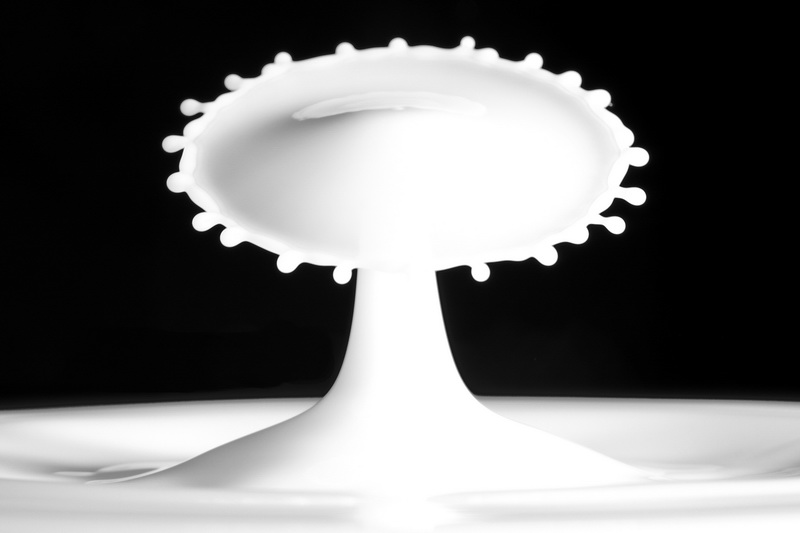
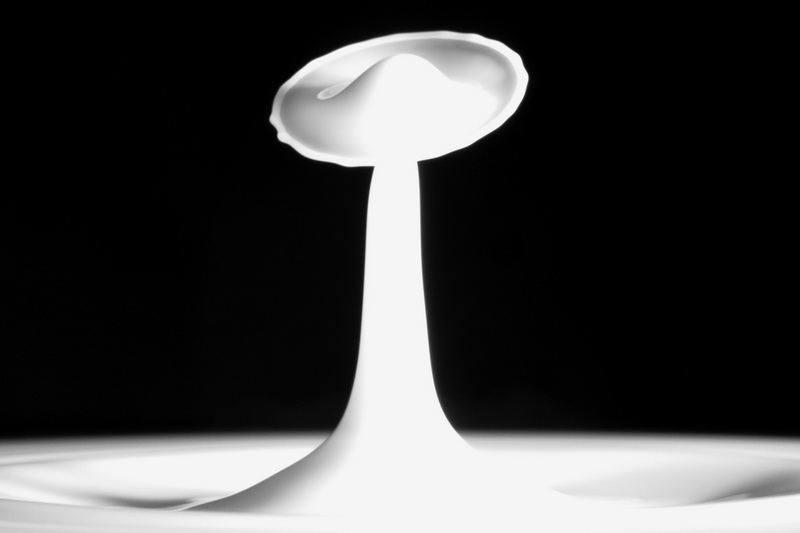
Here are some of the photos

Things to try
- Change the height of the valves. The faster the drop falls the bigger the splash.
- Change the drop sizes
- Change the depth of the reservoir. Different depths can have a big effect on the column height (deeper is not always better).
- Change the size of the second drop while keeping the collision time the same (increase the size of the drop, decrease the drop start time).