To get drops to collide and then photograph the collision at exactly the right time can be very challenging. The drop start times have to be timed exactly right, the drop sizes have to be just right, and the shot has to be taken at exactly the right time. To do this with most drop systems is time consuming and can be frustrating. Wouldn’t it be nice if you could loop the drop sequence and move the flash trigger time slightly every loop. Or, make the drops start at different times every loop. Or, automatically make the drop sizes larger or smaller. Using the dropController and Loop Mode you can.
Loop Mode is the heart of the dropController series of controllers. There has been a version of Loop Mode in every controller built, including the very early prototypes.
Loop Mode Control
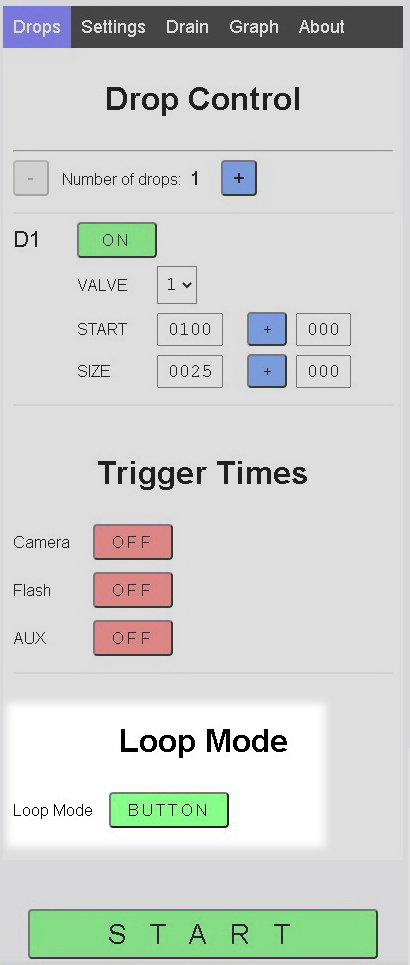
Loop Mode is activated using the Loop Mode control on the main Drop Data Page.
Clicking the Loop Mode control button cycles through the options; OFF, BUTTON, TIMER


OFF
Loop Mode is off and Single Sequence Mode is used.
When Loop Mode is OFF, Single Sequence Mode is used.
When Loop Mode is set to either BUTTON or TIMER, clicking the main START button opens the Loop Page
BUTTON
Loop Mode is active.
To start each drop sequence the Loop Page START button has to be clicked.
When BUTTON is selected. Each drop sequence is started by clicking the Loop Page START button.
After each sequence is finished, the app will wait for the user to click the START button again.


While the drops are dropping the START button changes to ACTIVE and is disabled.
The EXIT button remains active. Clicking EXIT returns you to the main Drop Page
RESET resets the sequence back to 1. RESET is only active between sequences.
In between sequences the sequence number will increase and any delta values will be added or subtracted.
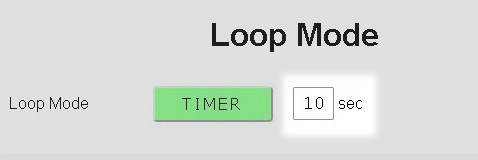
TIMER
Loop Mode is active.
The wait between sequences is controlled by a timer. The TIMER time is in seconds.
The first drop sequence is started by clicking the Loop Page START button and then subsequent sequences are started automatically when the TIMER reaches 0.
Click START to start the first drop sequence.
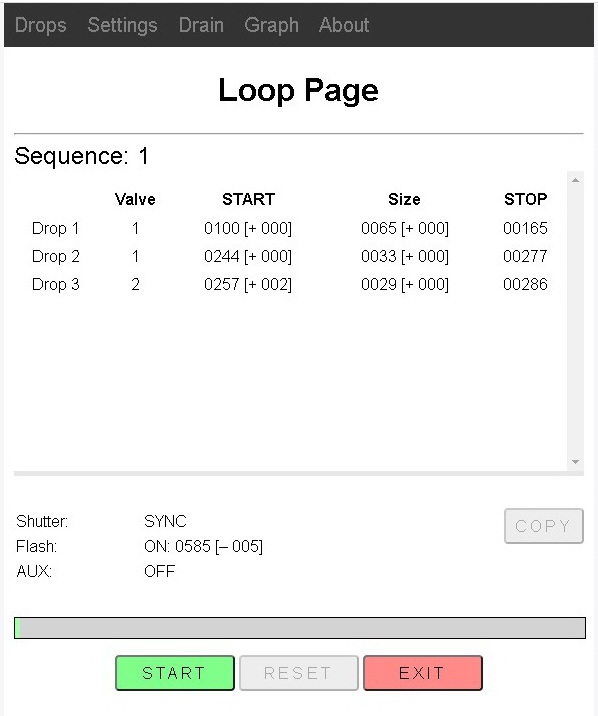
While the drop sequence is active the START button changes to ACTIVE and is disabled.
Clicking EXIT returns you to the main Drop Page. The EXIT button remains active. Clicking EXIT mid sequence does not stop the sequence.
RESET resets the sequence back to 1. RESET is only active between sequences.
After the first drop sequence completes, the ACTIVE button changes back to STOP and the TIMER starts its countdown.
When the TIMER gets to zero the next sequence is started automatically.
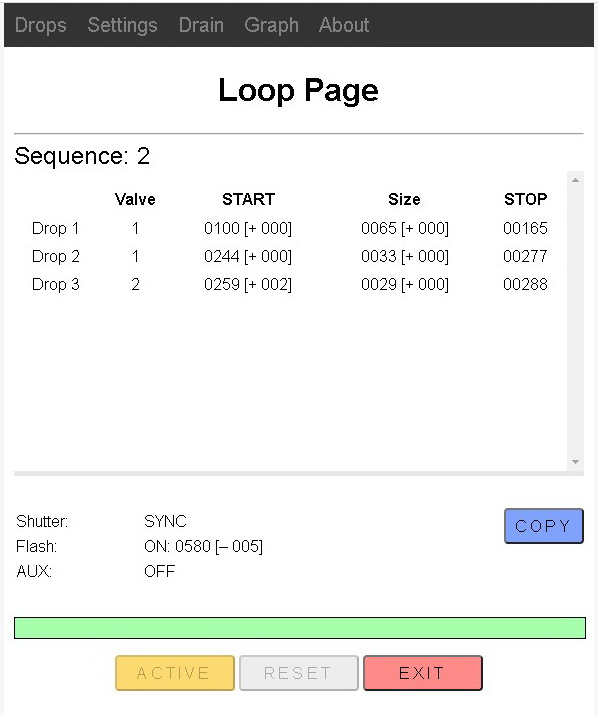
Sequence 2 has started.
The STOP button has changed to ACTIVE
RESET is disabled.
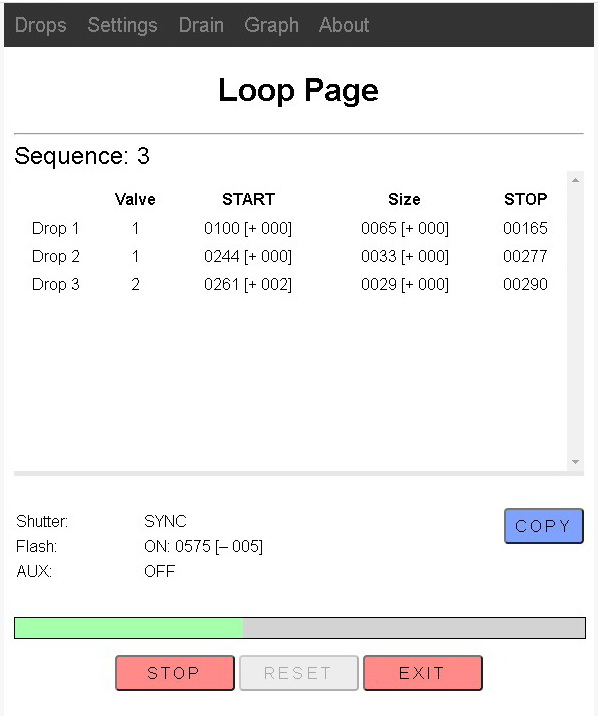
After the sequence has completed, the screen is updated,
– the sequence number is increased.
– any delta values are added or subtracted.
– the STOP is back
– the TIMER starts its countdown.
STOP Button
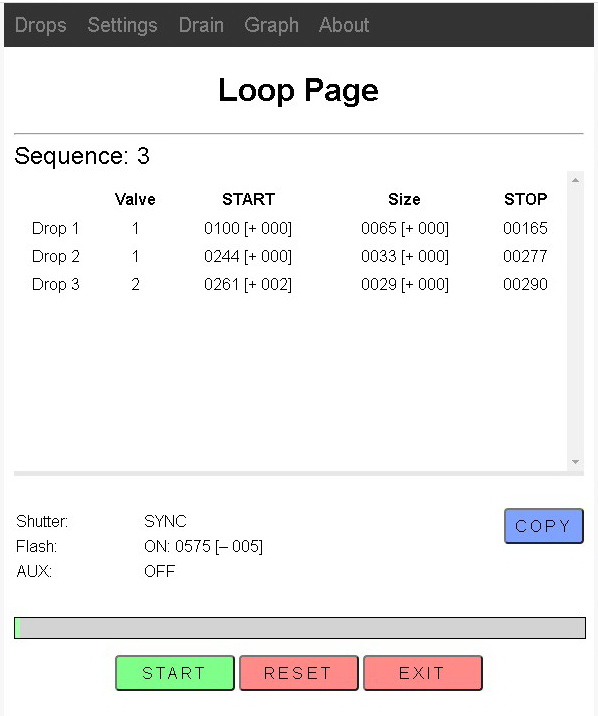
While the TIMER is counting down, clicking the STOP button stops the TIMER. To restart the sequence click the START button.
Timer Delay
When using a timer in Loop Mode you will need to experiment to see what wait time suits you. I generally use 10-15 seconds. This allows time for the water in the tray or bowl to settle and also allows me time to move any bubbles out of the way. If you find you are constantly removing bubbles or adjusting things then it is probably better to use the BUTTON option and manually start each sequence.
I find it generally better to use a slightly longer delay than a short one. For example, 4 seconds does not give enough time for the liquid in the nozzle or the water in the bowl to settle and results in inconsistent results.
Using Loop Mode
The easiest way to show how Loop Mode works is probably to use a simple example. Below is a 2 drop sequence where I want to let the first drop fall, create a Worthing Jet, and then have the second drop hit the Worthington Jet. An easy way to do this is to start the second drop later than actually required and then repeatedly reduce the drop start time until it hits the Worthington Jet. Using a manual system this would take quite a while to achieve. Using the DropController it takes a few minutes at most.

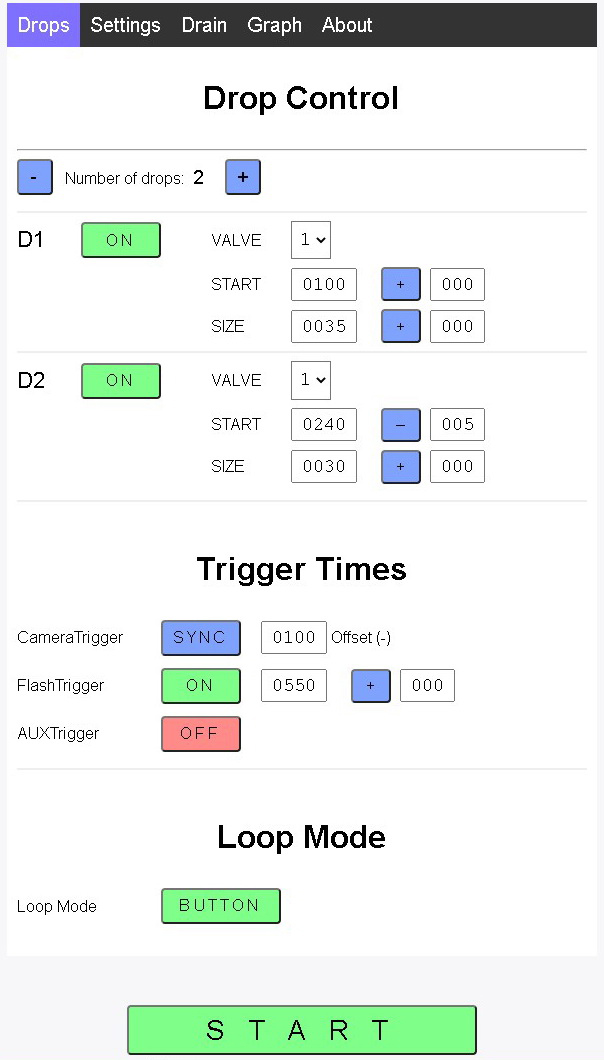
Two drops:
First drop
– Start time = 100ms
– Size = 35ms
– No delta values.
Second drop
– Start time = 250ms
– Size = 30ms
– A minus(-)5ms delta on the drop start time
The Camera Trigger is set to SYNC. SYNC offset is 100ms
The Flash Trigger is set to 550ms no delta.
Loop Mode: BUTTON is selected.
The first drop does not have any delta values, therefore, its properties will not change. It will always start at 100ms and the size will always be 35ms.
The second drop does not have a delta on the size, so the size will not change, but there is a delta of minus(-)5ms on the Start Time. This means the drop will start 5ms earlier every loop and the drop should appear slightly lower every shot.
The Camera Trigger and Flash Trigger times are fixed.
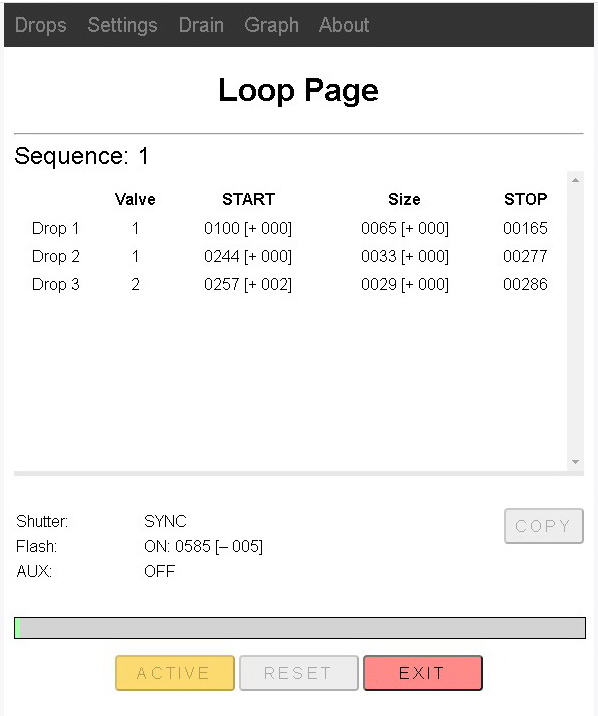
When the START button is clicked, the Loop Page opens

From here you can either start the first sequence by clinking the Loop Page START button or click EXIT to return to the Drop Data Page
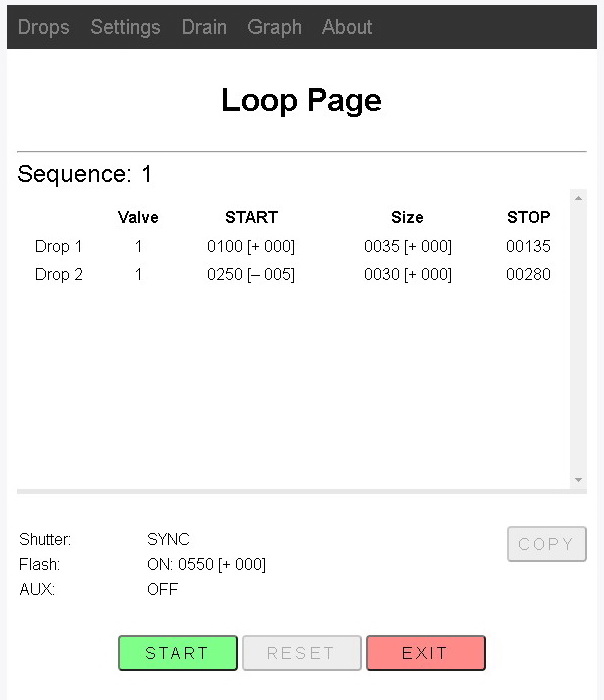
The Loop Page has 3 main sections:
– Sequence number + drop data
– Trigger data
– Controls.
Sequence Number

The sequence number is displayed at the top.
While looping, the sequence number will increment every loop.
Drop Data

The drop data shows the current times based on the delta values and the sequence number. On the first sequence, the delta values are not used and so the times are the same as displayed on the Drop Data Page.
Delta values are shown inside square brackets
To start the sequence, click the START button.
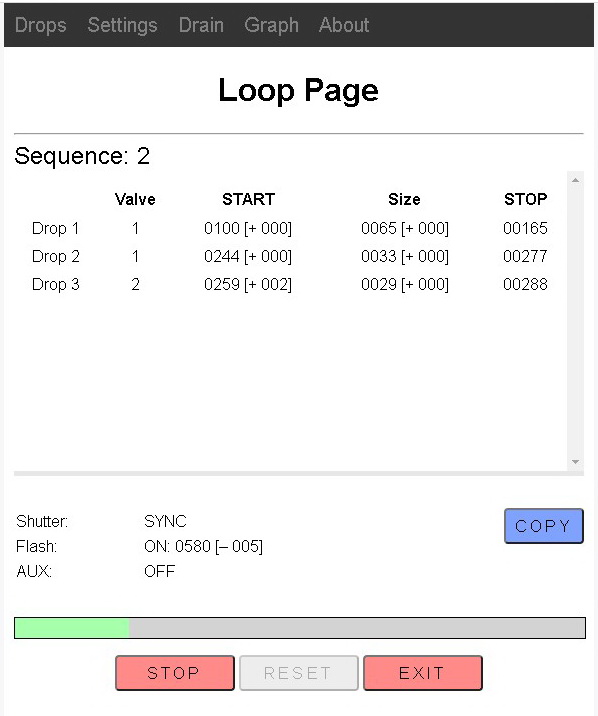
While the drop sequence is active the START button changes to ACTIVE.
After the sequence is complete, the ACTIVE button changes back to START ready for the next sequence.
A few other things change as well.
1 – The sequence number increases
2 – Values with delta values are recalculated and the new value shown
3 – The RESET button becomes active
4 – The COPY button becomes active
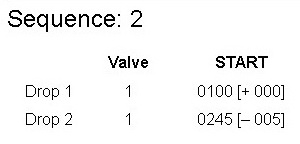
Drop 2 Start Time delta value has been deducted from the drop start time. The new start time is now 245ms.
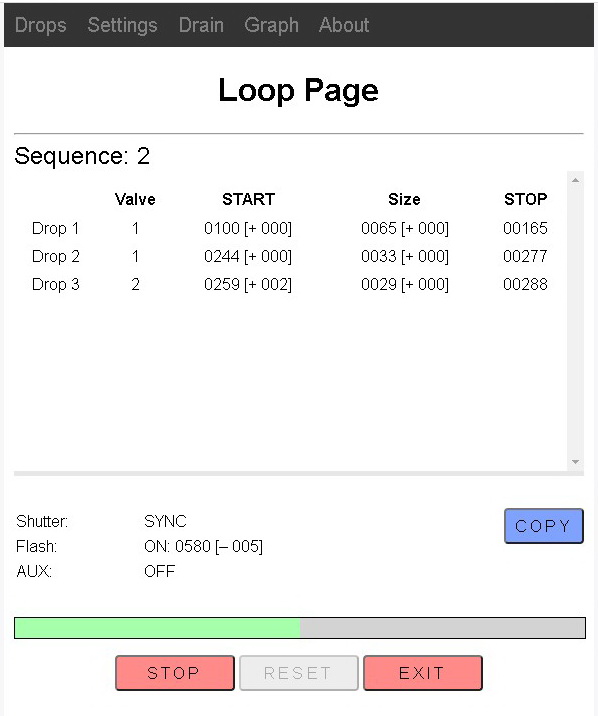
Clicking the START button again starts sequence 2.
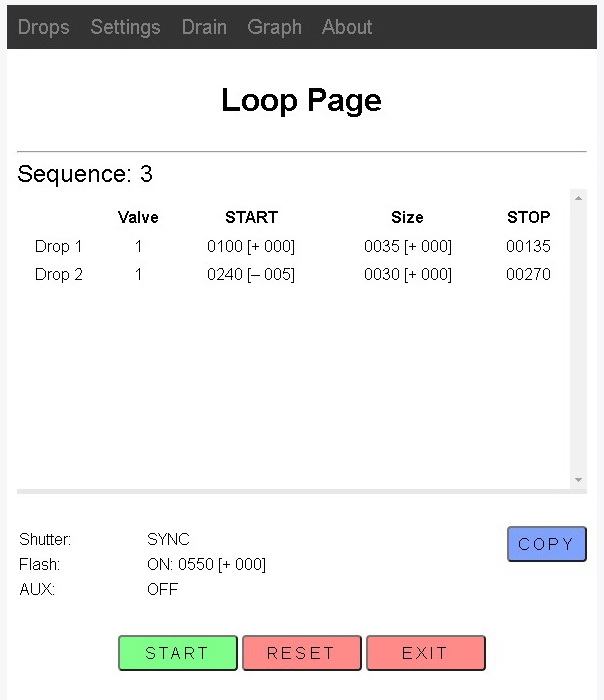
After the sequence finishes, the Loop Page is updated to show the drop times for sequence 3.
You can use the Graph to see what is happening to the second drop.
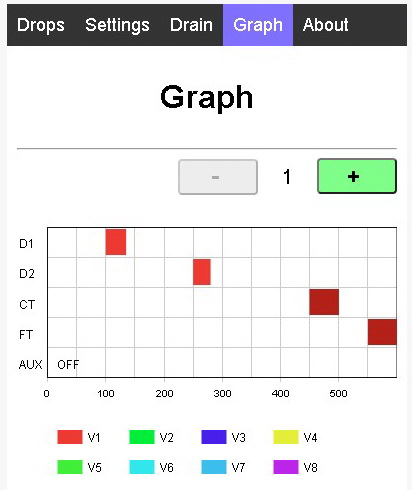
On the Graph Page, click the + and – buttons to increase and decrease the sequence number
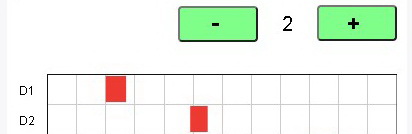

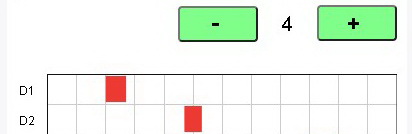
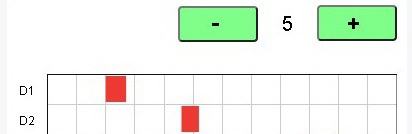
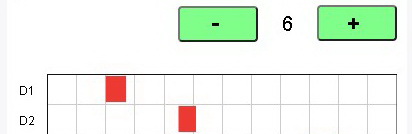
As the sequence increases the start time of drop 2 decreases slightly.


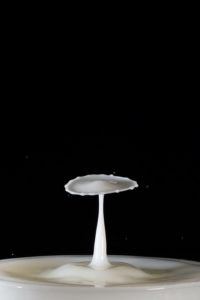


By using a delta value on the drop 2 start time you can very quickly capture a series of photos like the above.
Note: Each of the above photos is from a different sequence. They are not rapid fire shots from a single sequence.
RESET
The RESET button sets the sequence back to 1.
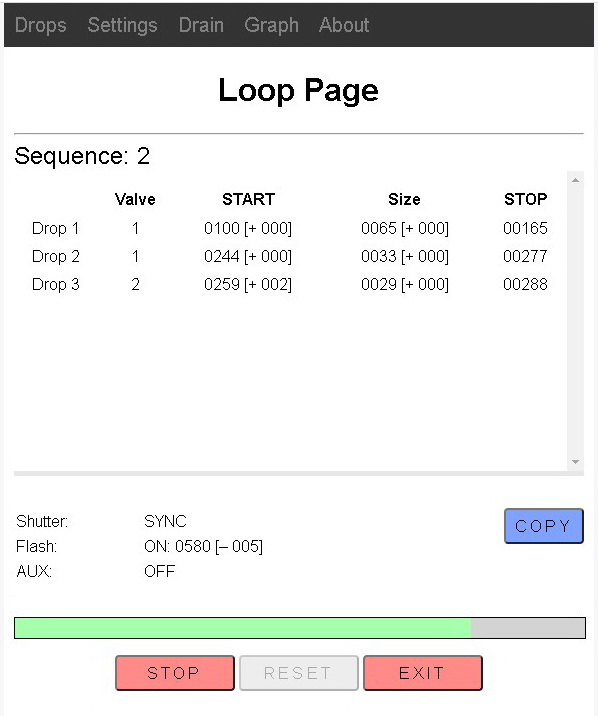
COPY
The COPY button copies the drop times from the current sequence to the main Drop Data page.
In this example, clicking COPY after sequence 2 (and before sequence 3) copies the drop times from sequence 3 (drop 2 start time of 240ms) to the main drop data.
The COPY function is handy when you find the perfect drop times in the middle of a sequence.
The drop times from sequence 2 have been copied to the main drop data.
For a detailed guide on how to capture a sequence of shots like the one above see the First Drops Guide