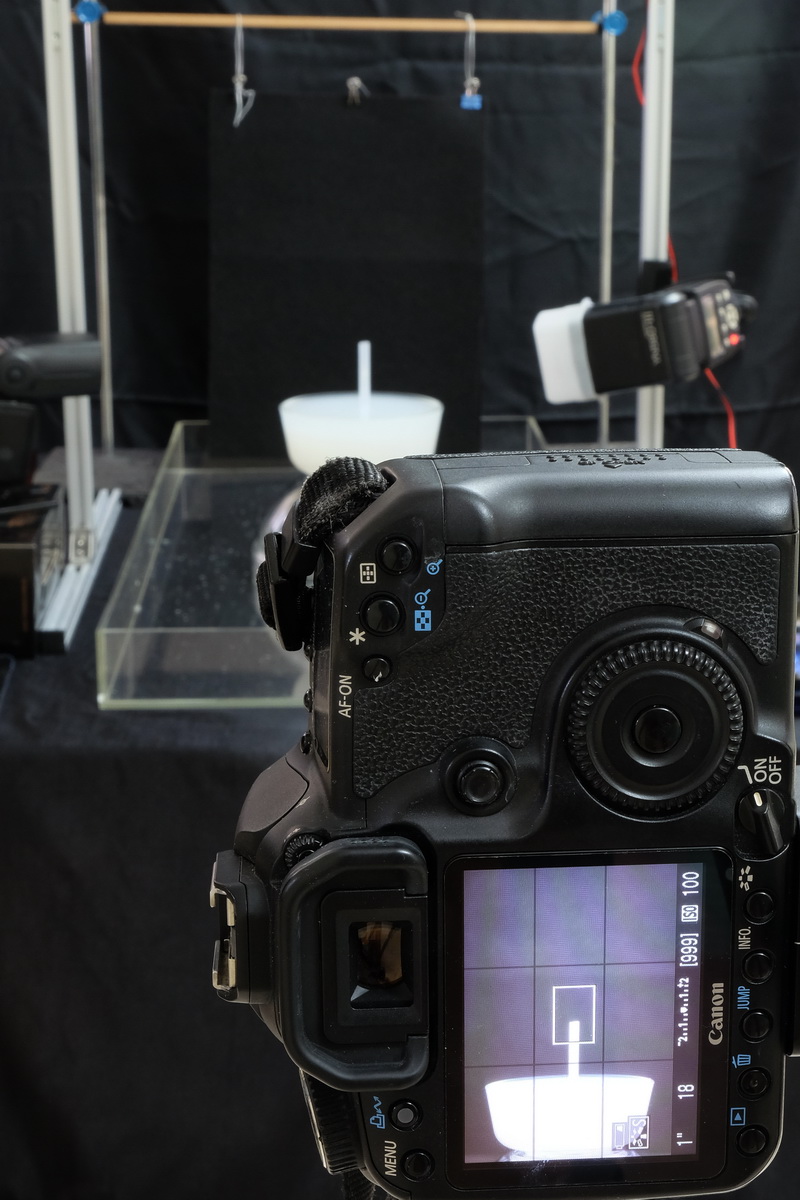
This guide uses a dropControllerV3 in an open case. The process and functions are exactly the same for the dropControllerV4.
In First Drops Part 1 we went through the basics of getting a Worthington Jet and then 2 drop collisions. In this part I keep with 2 drops and try to get more exciting shots.
Part 2 is a separate session and I have used a different set up.
Set Up
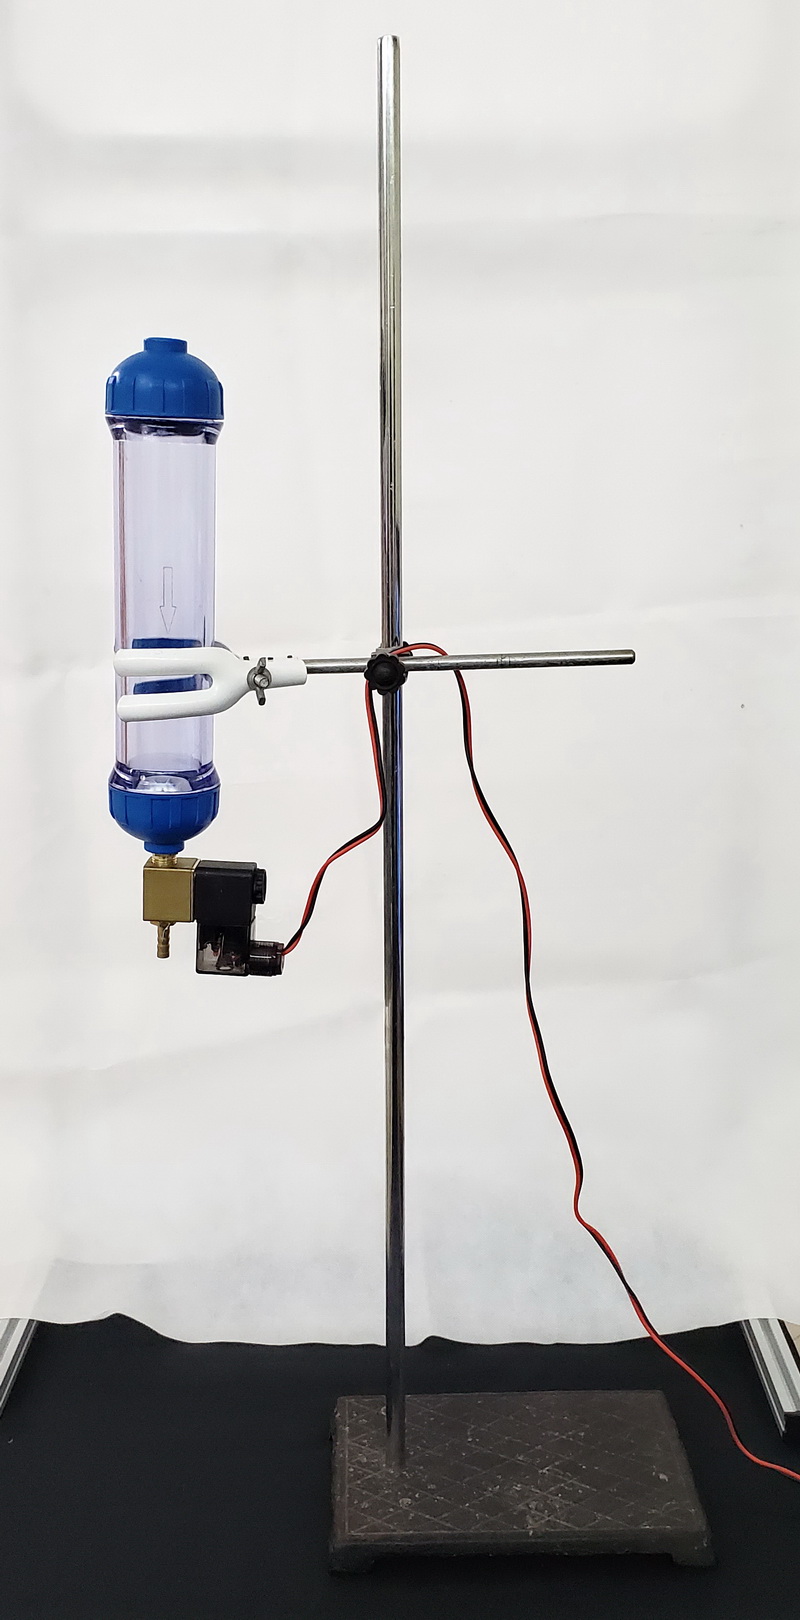
This time I am using a frame made from 2020 aluminium extrusion. 2020 (and 4040) is ideal for creating water drop frames. For more details see the other guides.
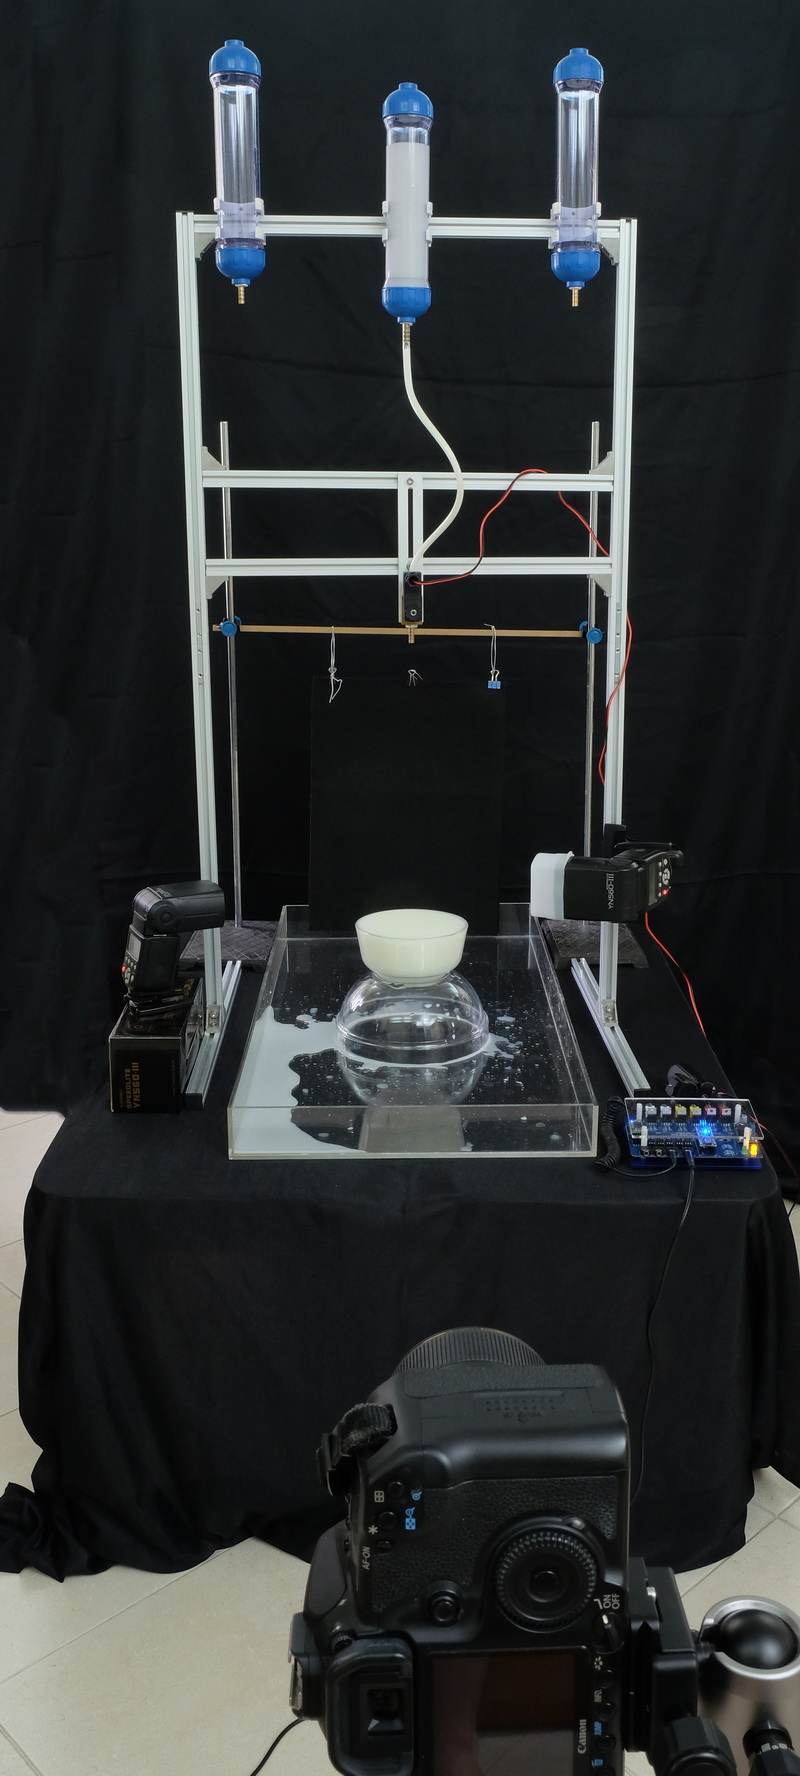
Here is the set up I am using for First Drops Part 2.
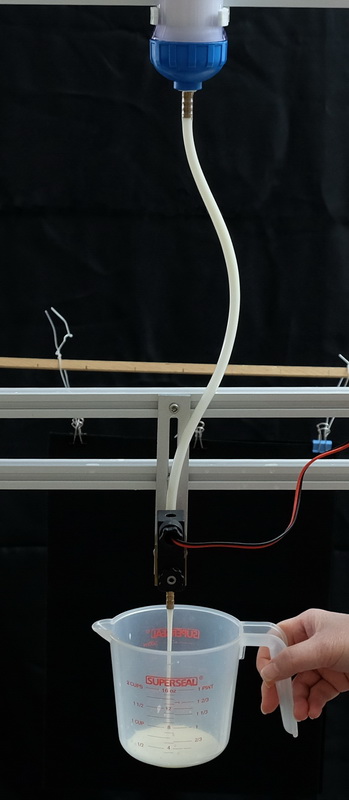
A single valve (Shako PU220-AR-02) which is connected to valve port 1 on the dropController. The valve is about 35cm from the water surface. The valve is fed from a bottle supported above it. The two outside bottles are not connected.
The camera is in manual mode, aperture set to F16, shutter is in bulb mode.
A wireless flash trigger is connected to FT1.
I have 2 flash guns, both are at the front and both are pointing towards where the drop hits the water.
The flash guns are set to 1/64. I have the left flash at 105mm zoom, no diffuser and the right flash at 50mm zoom with a diffuser. This should give me slightly more light on the right hand side and help create some depth. The flash are basically the same as in part 1.
The background is black felt.

The camera shutter lead is connected to the dropController CAMERA port.
The dropController is on and connected to the Android app.
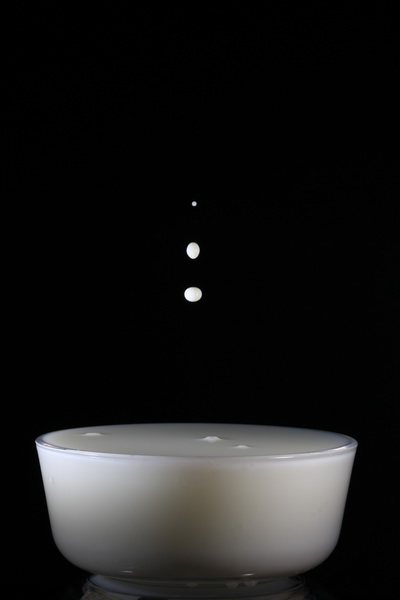
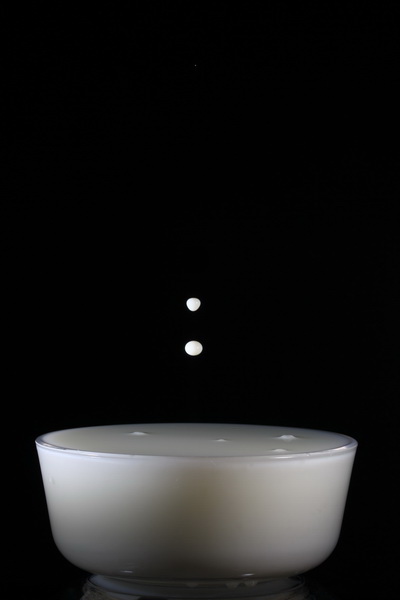
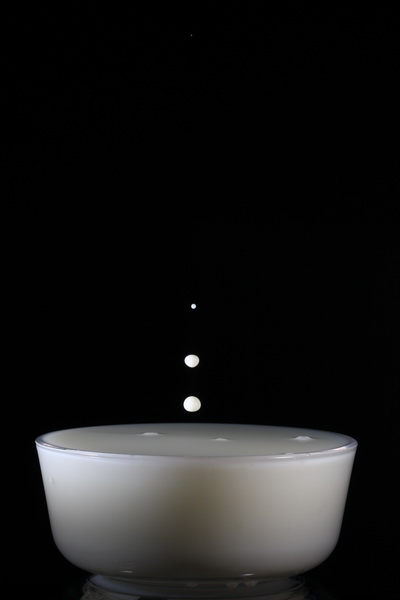
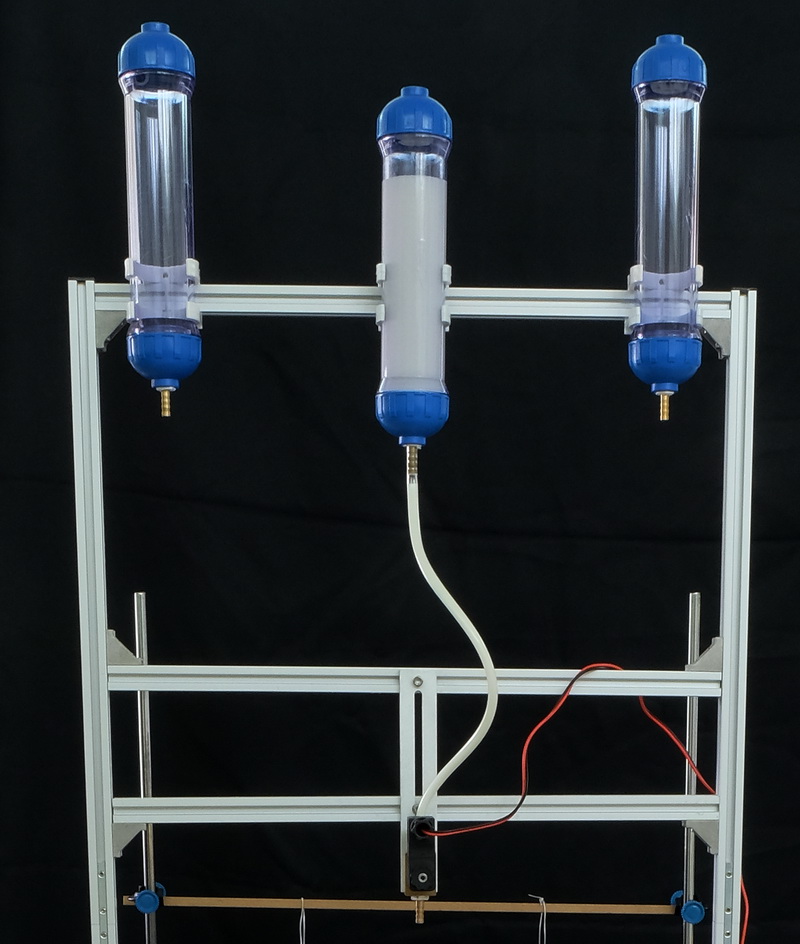 In the drop bottle at the top I have milk.
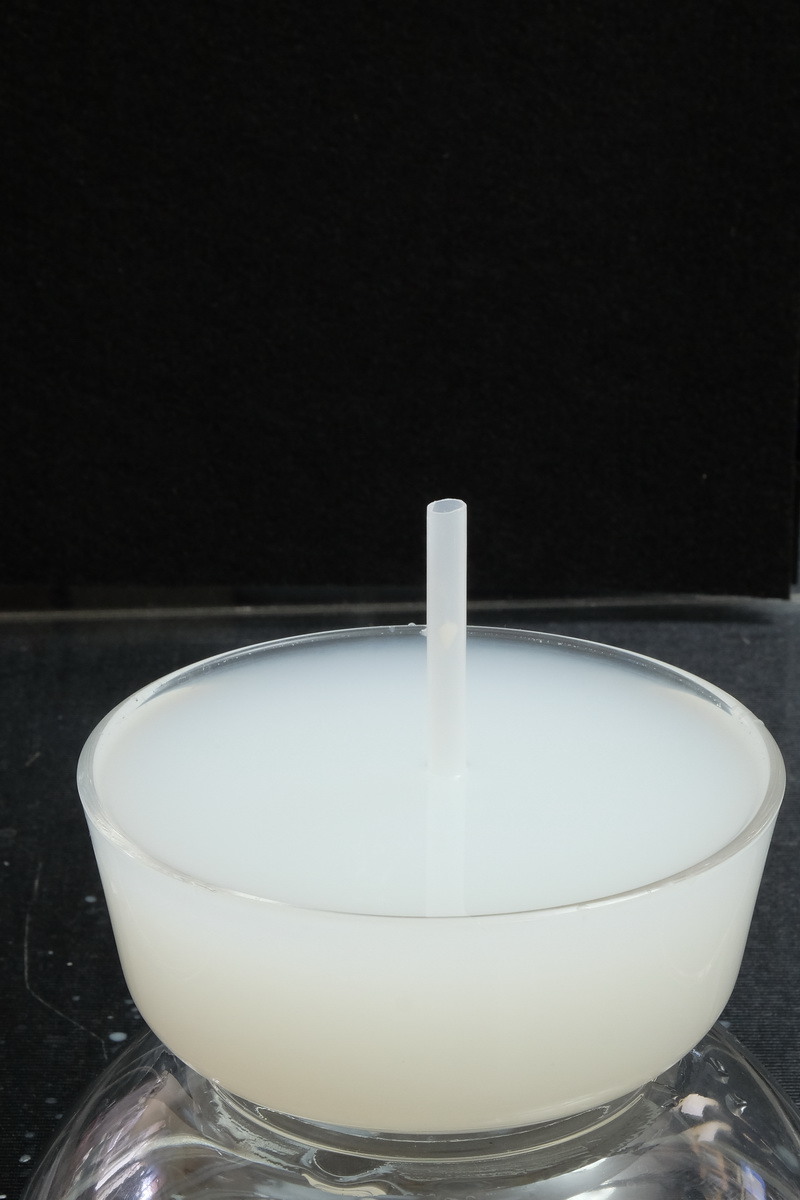
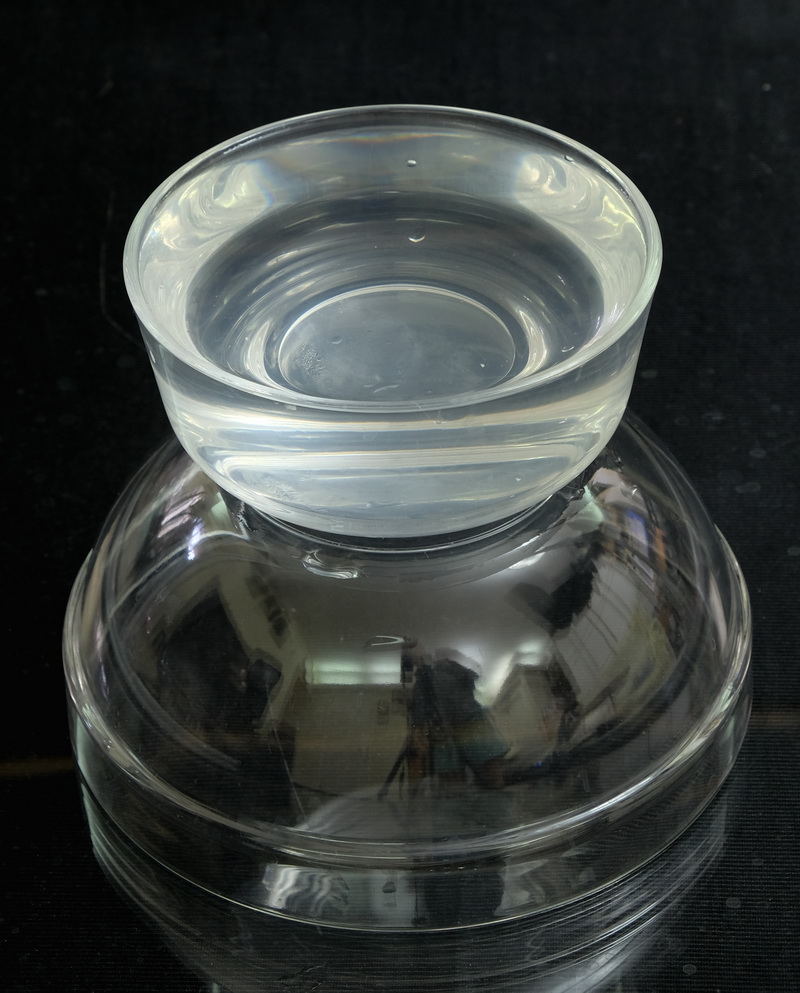 This time I am using a larger bowl with a diameter of around 15cm. I am still using plain water as the splash liquid.
Removing bubbles/empty spaces in the tube
When you add a liquid to the top bottle, some of the liquid will run in to the tube down towards the valve. If you are lucky the tube will fill. The chances are though; there will be bubbles or a section of tube with no liquid. To clear small bubbles you can massage the tube and try to get the bubble to clear. If the gap is fairly large, like the below, use the Drain function in the app.
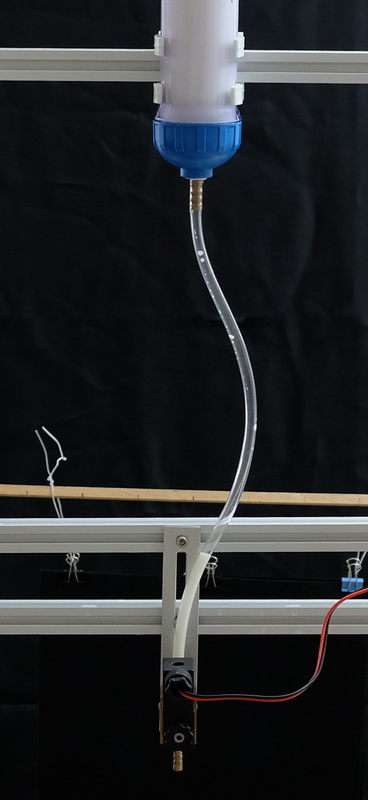
To clear large gaps in the tube use the drain function in the dropController app.
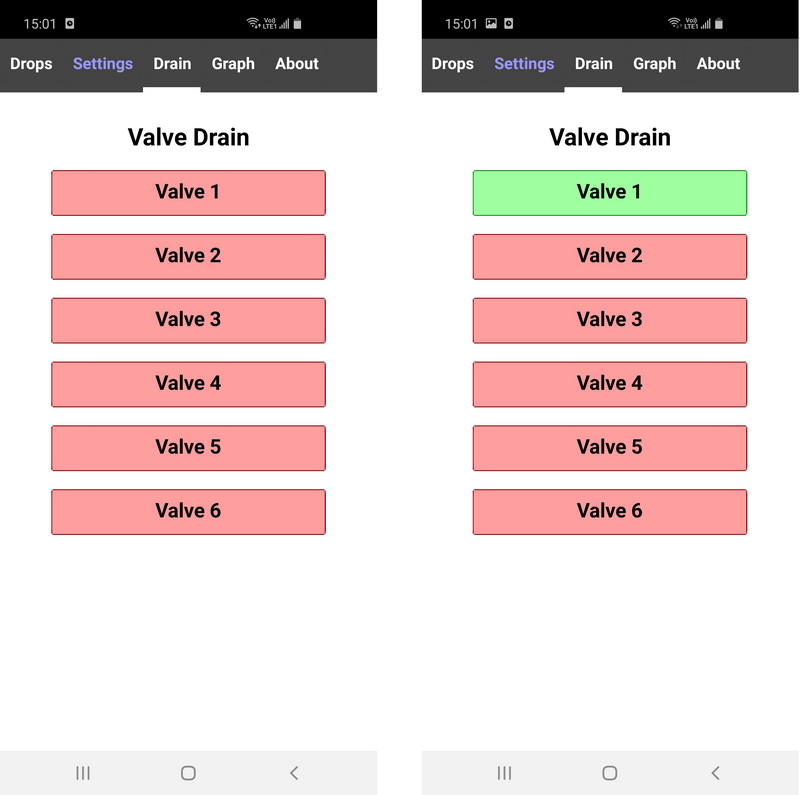
– Open the valve,
– catch the milk,
– close the valve,
– pour the milk back in to the bottle.
 If you are using a valve connected directly to the bottle then you won’t have this issue but you will still need to make a few drops to get the milk in to the valve and nozzle.
Bowl Position/Splash Tray Position
I followed the same method I used in part 1; make a drop, eyeball where it hits, move the bowl. repeat until happy. And exactly the same as before, once I was happy with the bowl position I used a focus aid to help set up the camera and focus the lens. Same nozzle, longer straw (it’s a deeper bowl).
Camera Settings
I am using the same Canon 40D with the same Sigma 105 macro lens as before.
The camera is in manual mode.
– Aperture is F16
– Shutter is BULB (and I am using bulb on the dropController)
– The lens is set to manual focus and since the camera is on a tripod stabilization is turned off.
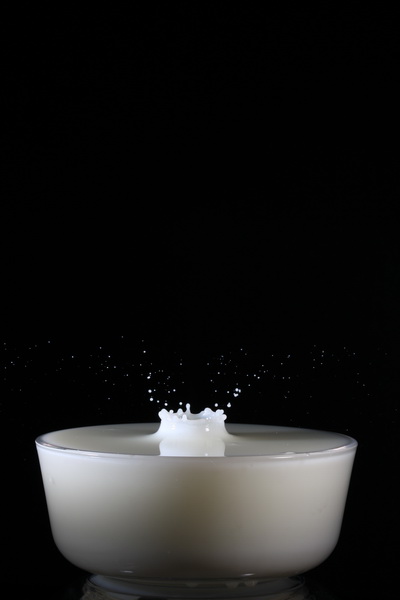
Capturing a Worthington Jet
To make sure everything was OK and to confirm I have clean drops I did a few sequences capturing a Worthington Jet. However, this time, once I was happy with the jet I didn’t add a second drop. I stayed with 1 drop and I experimented with the drop size.
Changing the drop Size
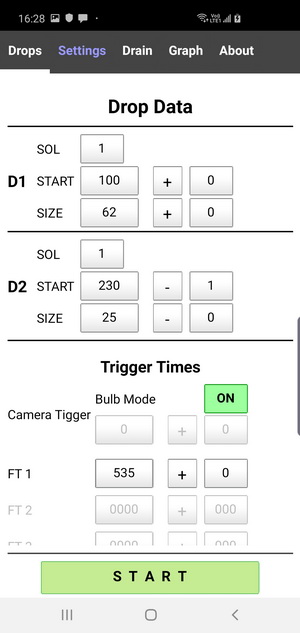
Experimenting with different drop sizes is quick and easy with the dropController. I set the initial drop size to 30ms, added a + delta of 10 ms, turned off the camera and flash triggers, turned on Loop Mode and let the sequence run.
While running different drop sizes I didn’t take photos until I thought I had a decent jet. For the most part you can eyeball it and it is fairly obvious if the jet is tall and thin or short and fat.
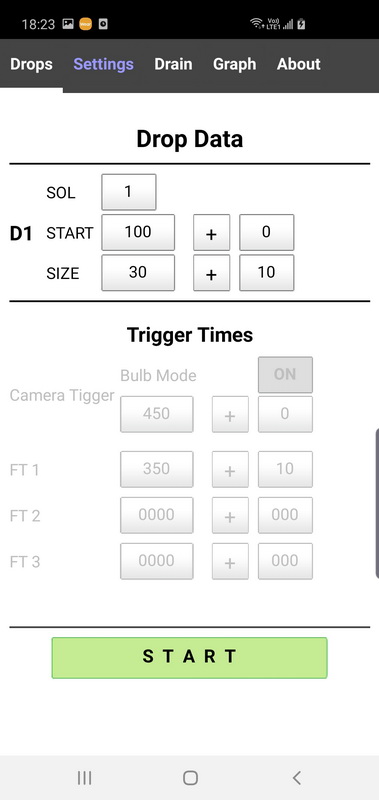
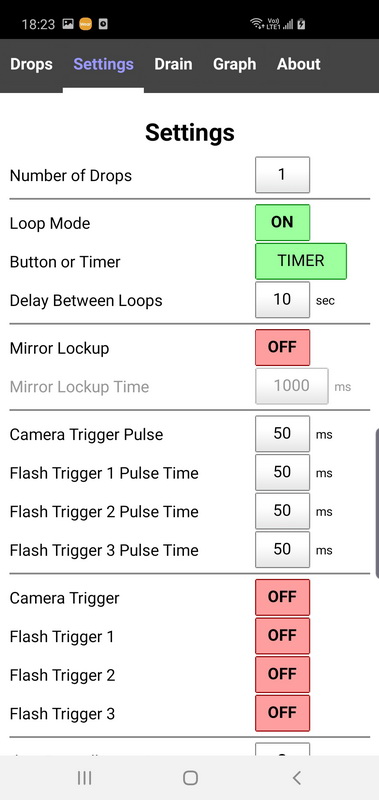
Note that I have the drop starting at 100ms rather than zero. This is my usual method and allows me to make the start time earlier without changing the times for any other drops. Being able to move the start time of the first drop without changing the other drops is very handy.
I shan’t bore you with lots of images of poor quality jets. I ran the sequence several times; 30ms, 40ms, 50ms, 60ms, 70ms, 80ms. The jets at 50ms and 60ms were OK but I thought I could do better.
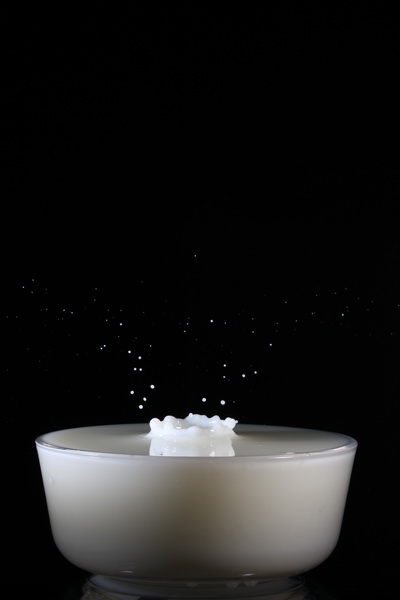
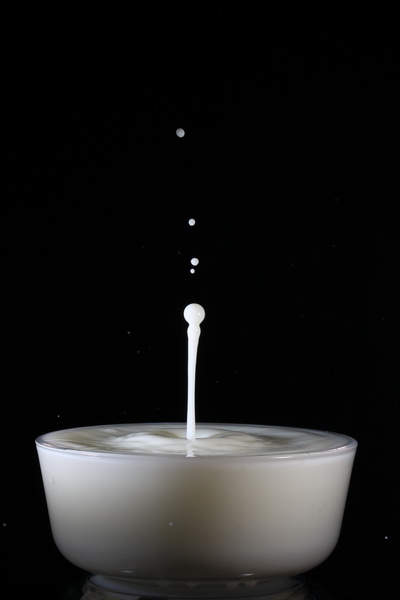
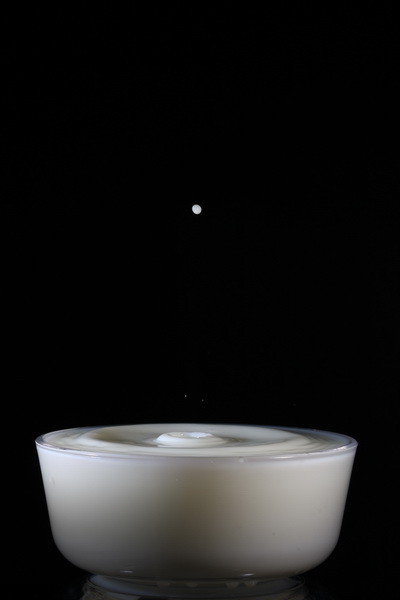
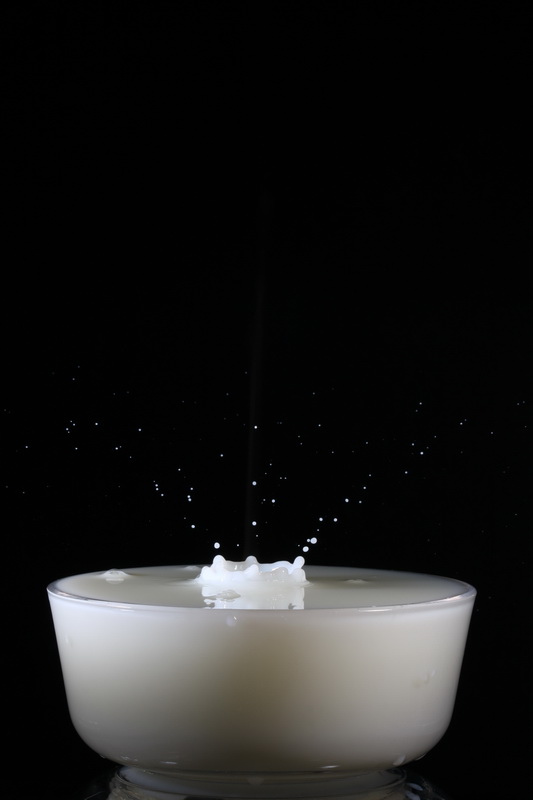
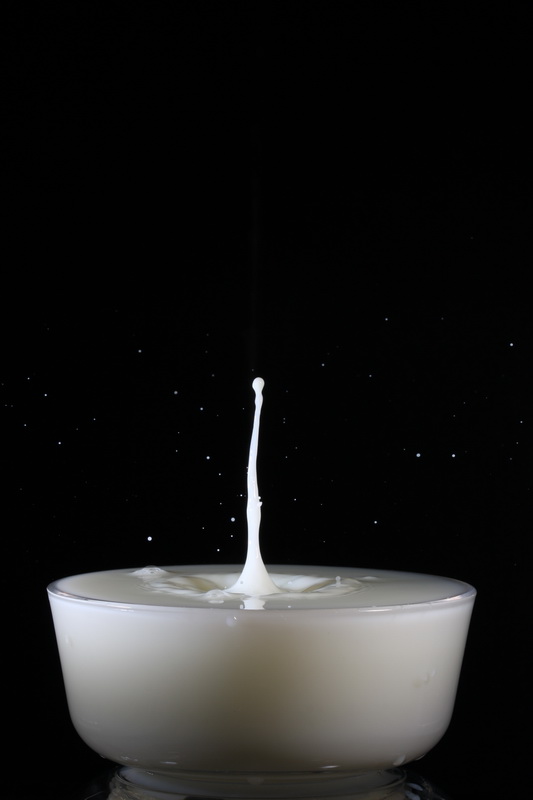
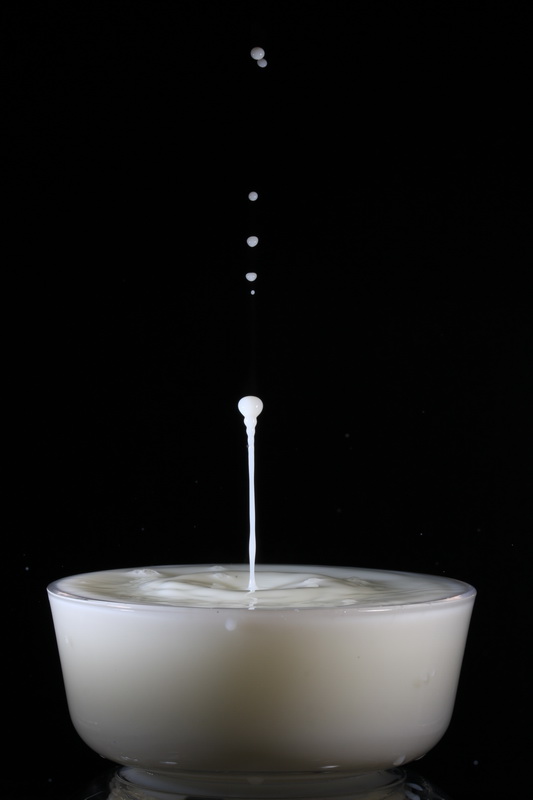
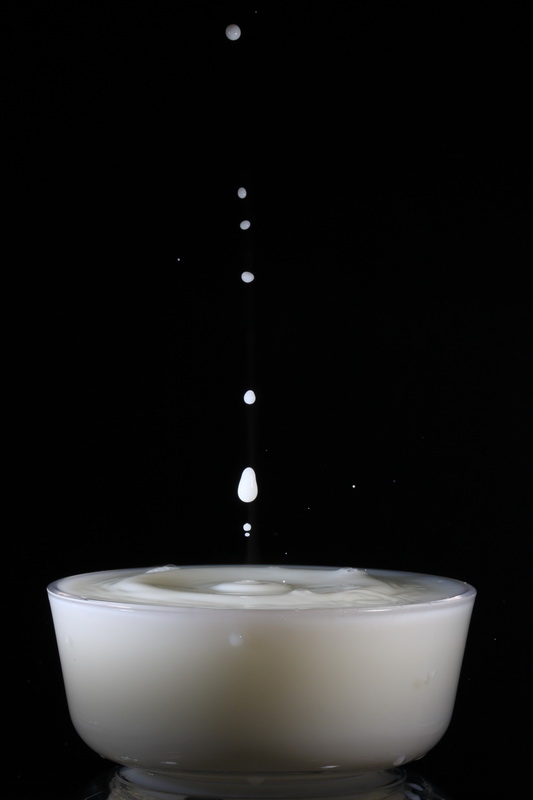
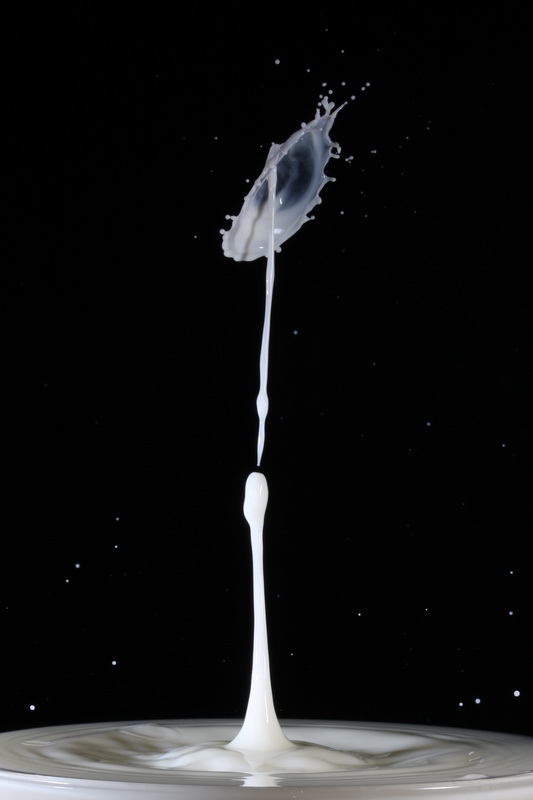
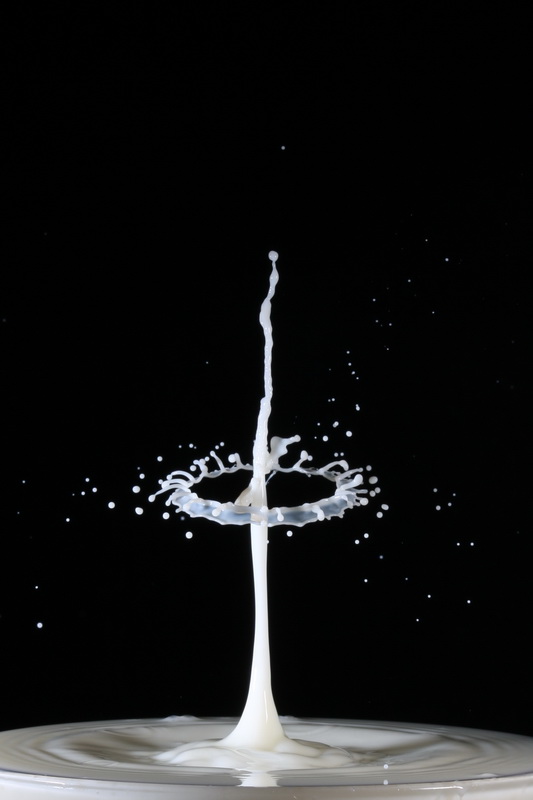
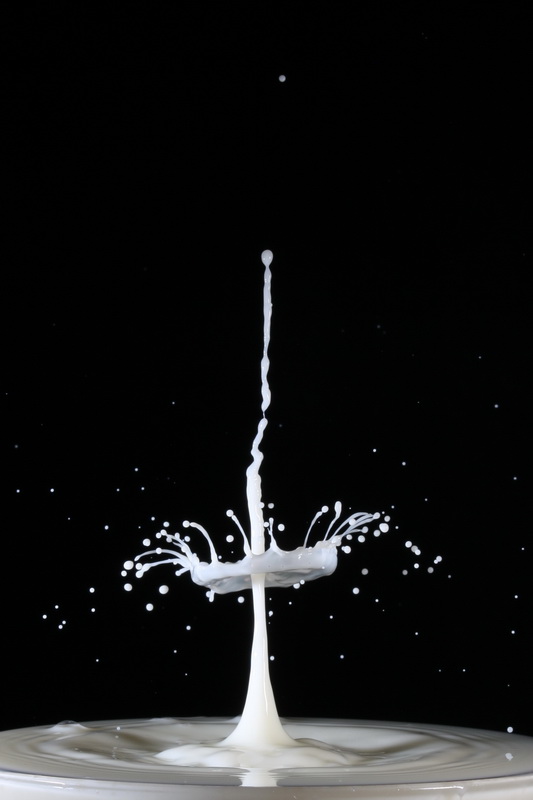
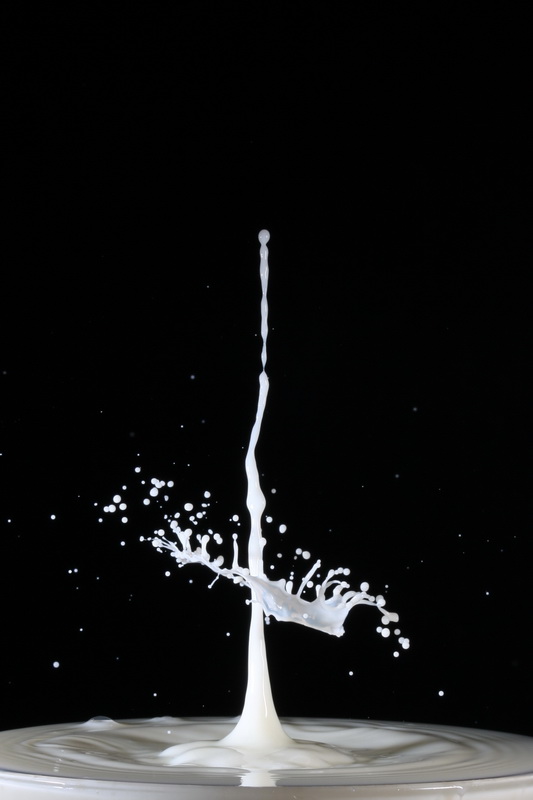
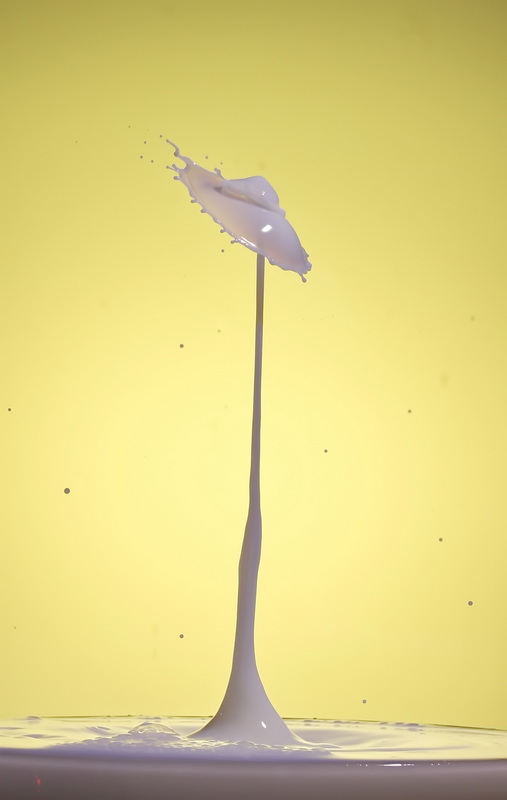
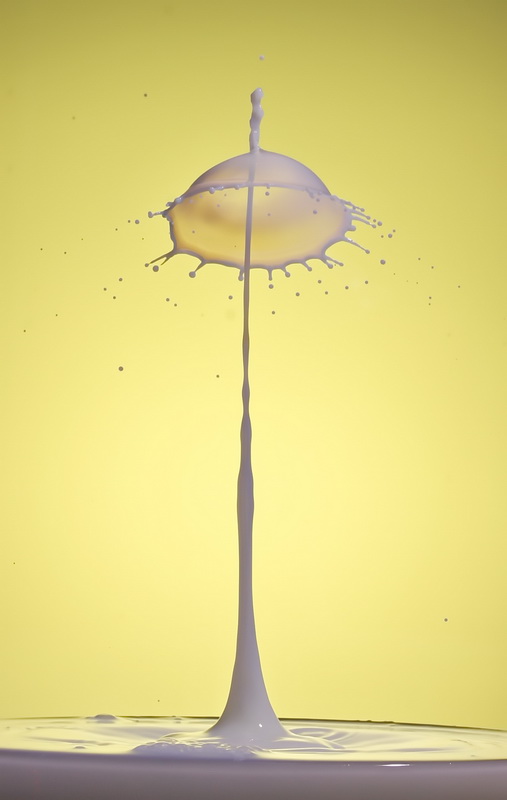
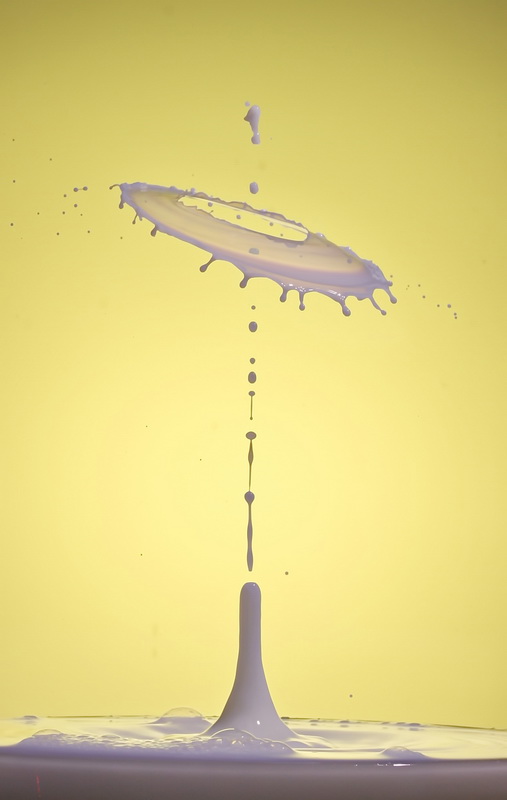
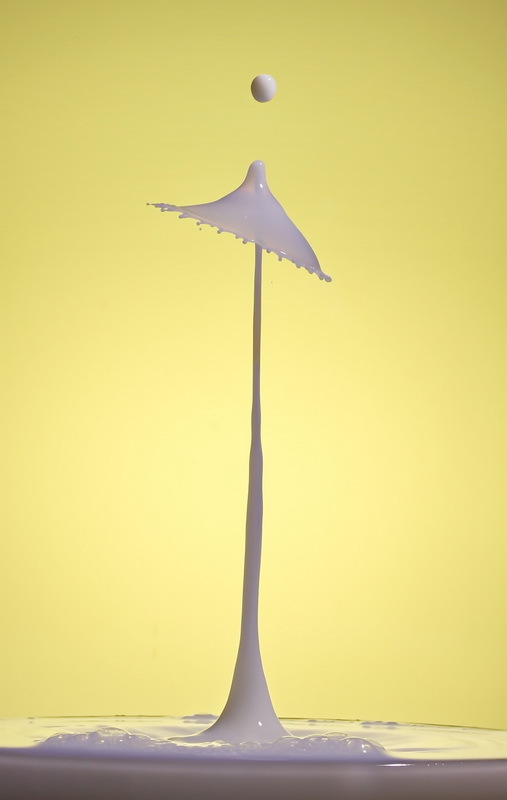
Worthington Jet Created From a 50ms Drop Size
The Worthington Jet at 50ms was quite nice. It is hard to tell from the photos but the column is 7 to 8 cm tall and the shape is nice. This jet would make a nice starting point for regular 2 drop collisions.


The Worthington Jet at 540ms is nice and this would make a nice 2 drop umbrella/mushroom shaped collision.
I kept increasing the size and at around 70ms things became messy and I didn’t get decent Worthington Jets after this point. The jet at 60ms was quite good so I homed in on this size. I reset the size to 60ms and used a size delta of +1ms and started again; 60ms, 61ms, 62ms, 63ms, 64ms and liked 62 the best. I ran the sequence with a drop size of 62ms a few times to confirm the first time wasn’t a fluke.
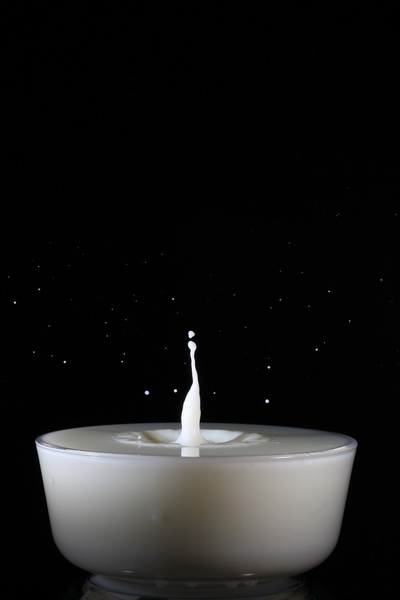
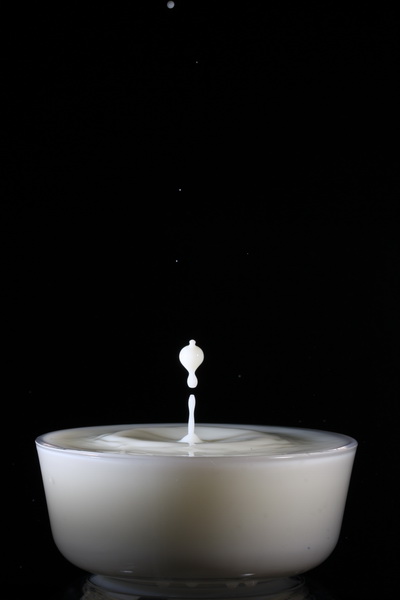
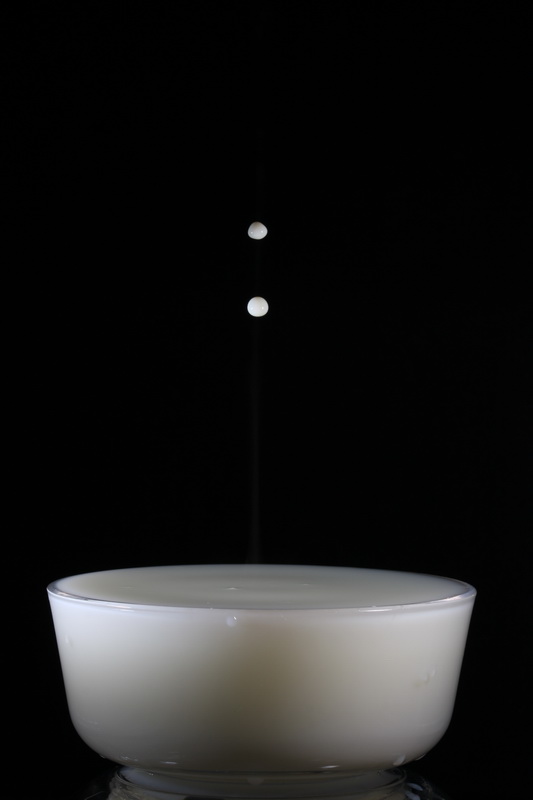
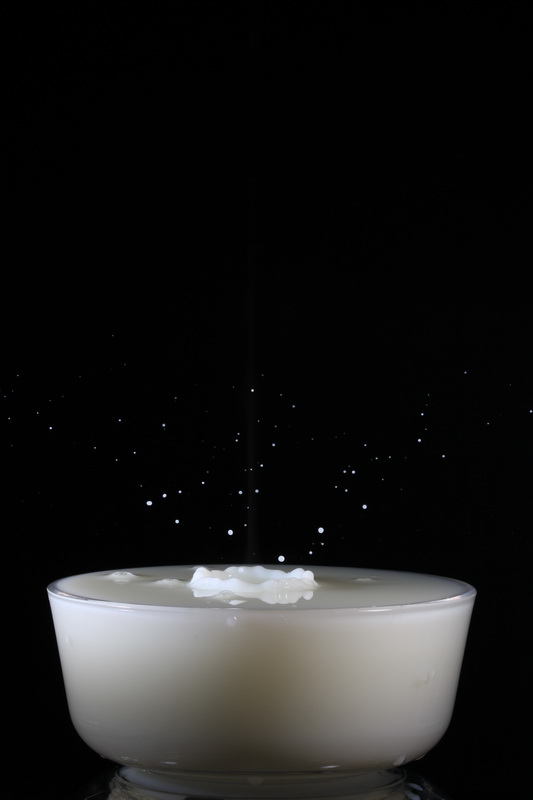
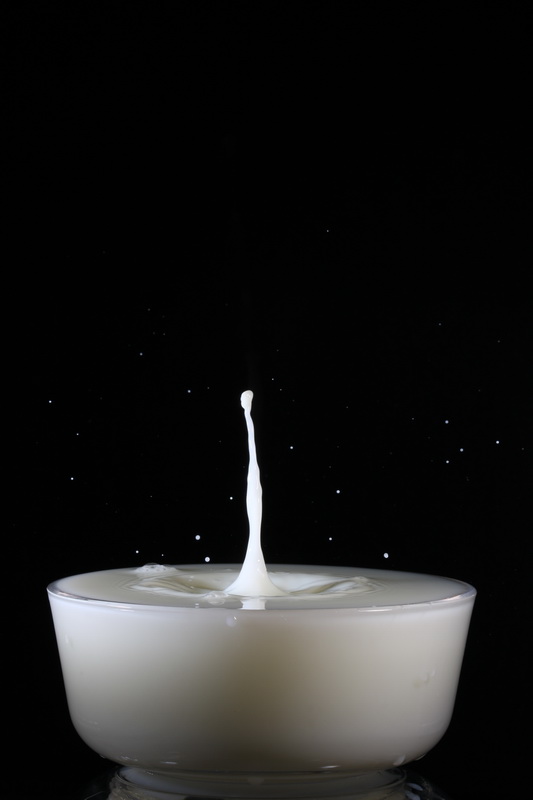
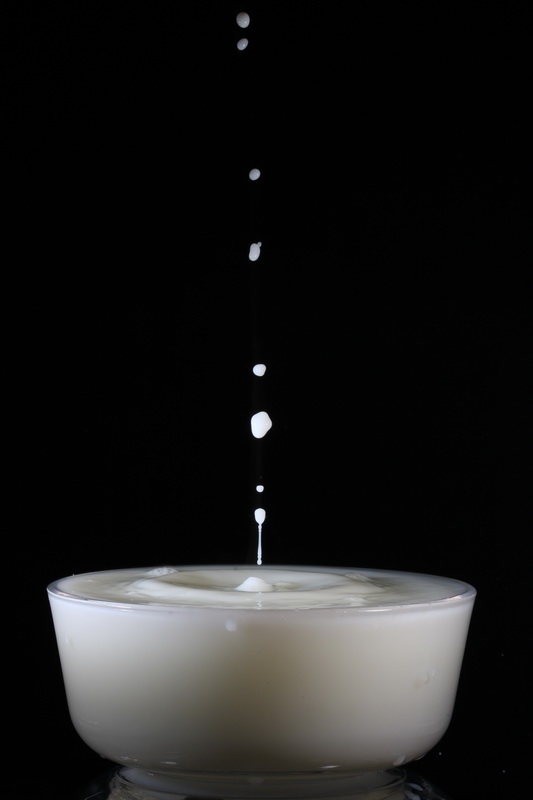
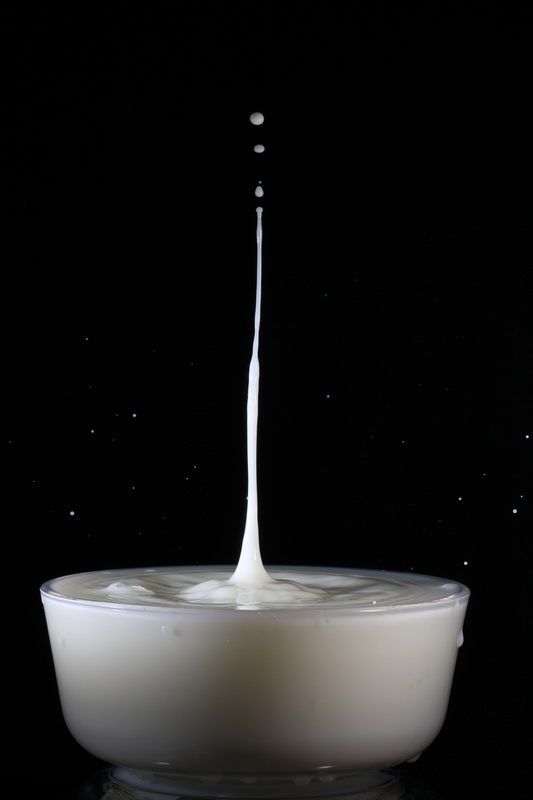
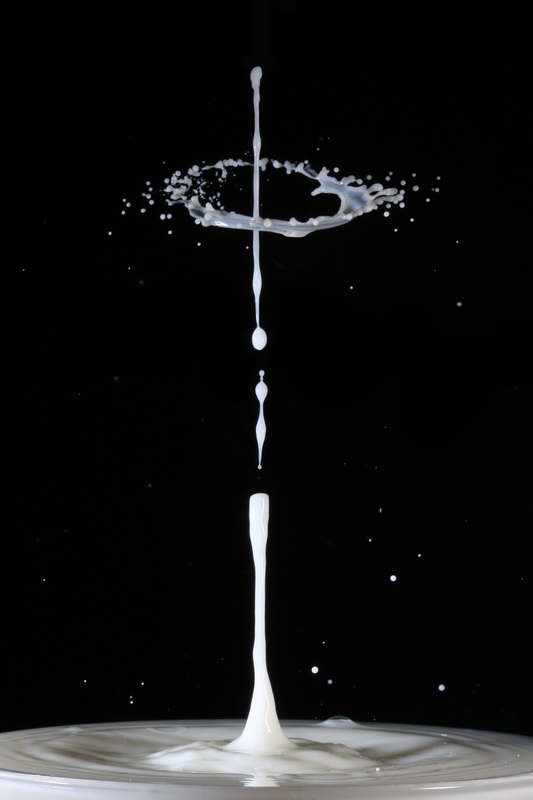
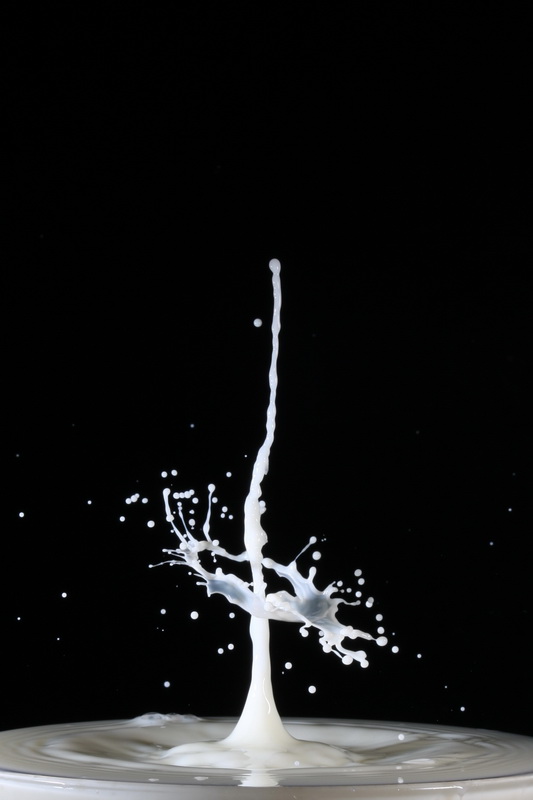
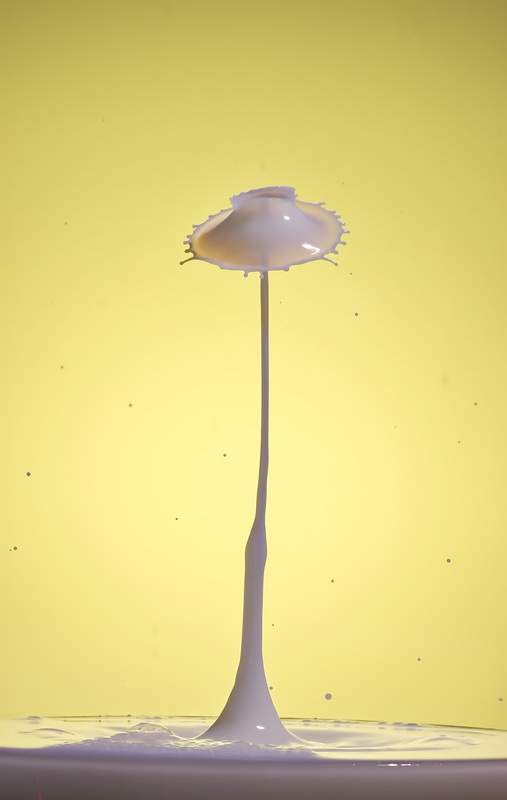
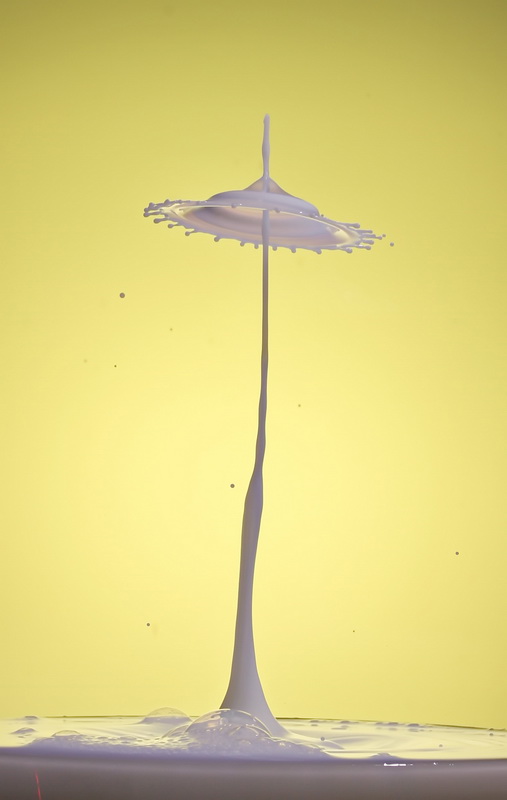
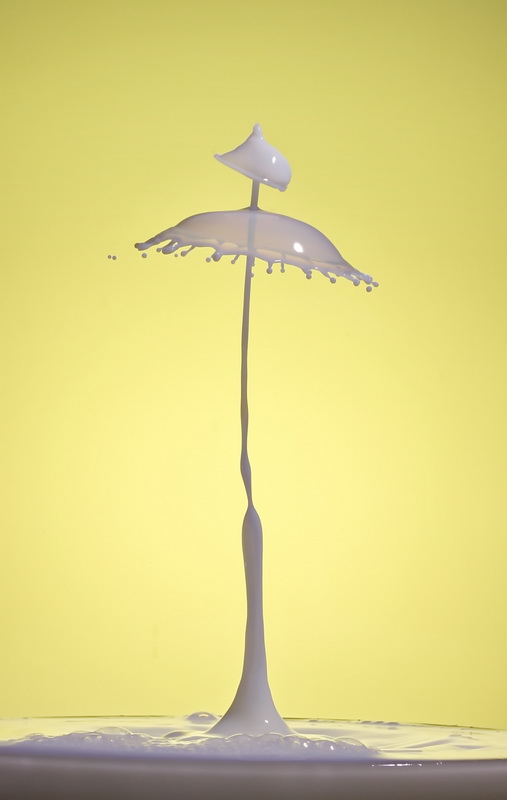
Worthington Jet Created From a 62ms Drop Size
The Worthington Jet at drop size 62ms surprised me. It shot up much higher than I expected. The top height of the jet at 540ms and 550ms is around 20cm not including the floating drops.

350ms
360ms

370ms

380ms

390ms
400ms

410ms

420ms
430ms
440ms
450ms
460ms
470ms

480ms
490ms
500ms

510ms

520ms

530ms

540ms

550ms

560ms
570ms

580ms
590ms

600ms
610ms

620ms
630ms
640ms
650ms
660ms
The time is the flash trigger time.
Taller Worthington Jets
 A fairly easy way to get taller jets is to overload the drop by making it larger and larger until it splits in to two and this is exactly what I happened when I ran the drop sequence with ever increasing drop sizes.
You can take it too far though. At a certain point 2 drops becomes 3 drops or even a small stream. I noticed that after around 68ms or 69ms things became a little messy and I didn’t get consistent jets. Of course, the results are very dependant on the equipment and set up you are using.
There are a few factors at play but the main ones are; the valve open time, the valve orifice size, and the nozzle size & shape. The milk flows through the valve, runs from the nozzle, and forms a drop or drops as it leaves the nozzle. The surface tension of the milk is fighting with gravity and at a certain point the surface tension causes the milk to form a drop.
Large single drops are possible but it usually requires that the drop/liquid is released a lot quicker or in some cases the liquid have a different viscosity.
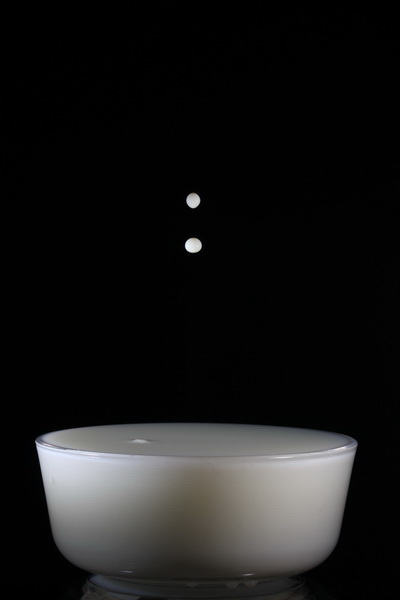
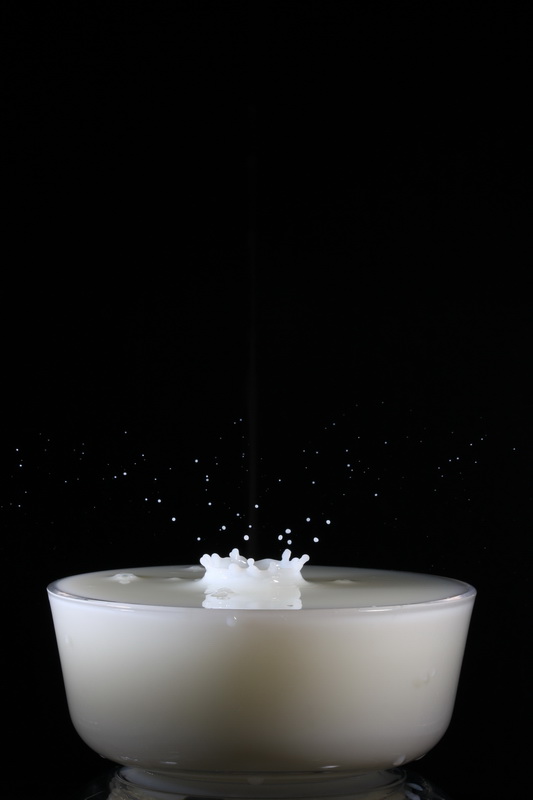
But why does 2 drops make the jet taller? Simple answer, the 2nd drop pushes the first drop deeper in to the water in the bowl. This creates more force which pushes the milk out harder and faster.
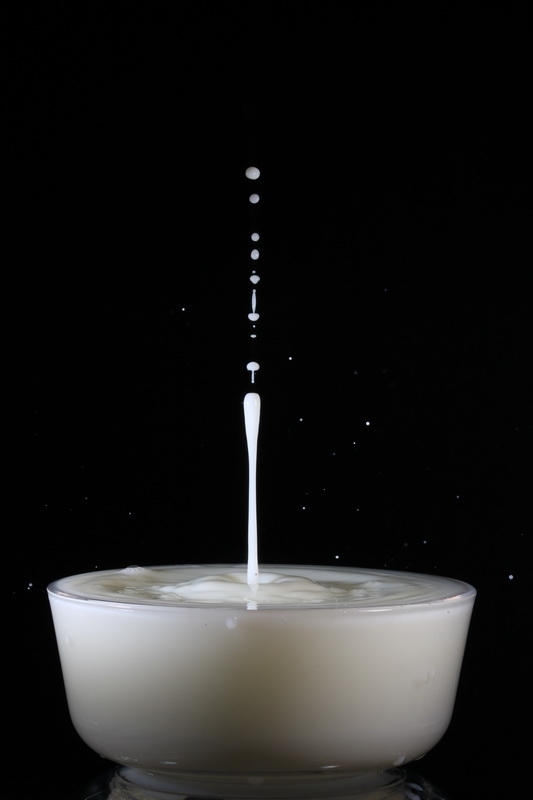
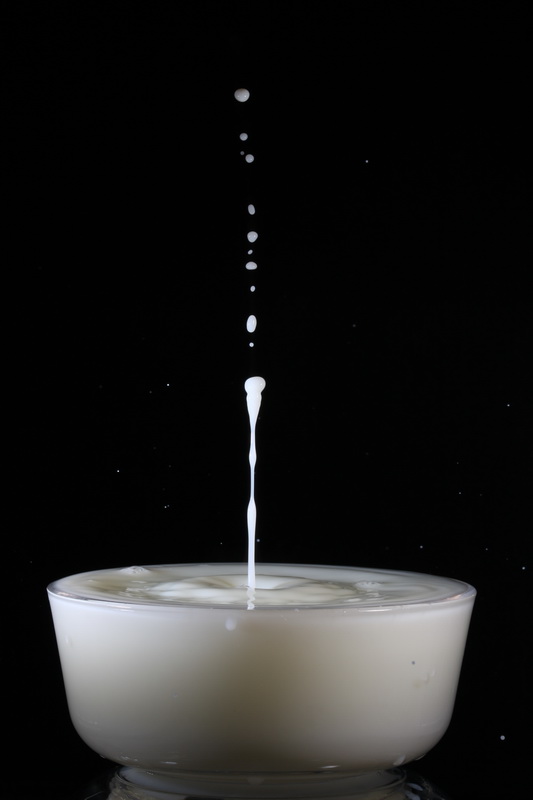
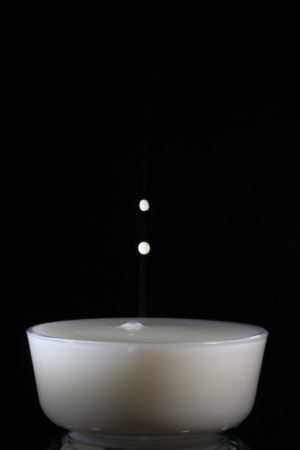
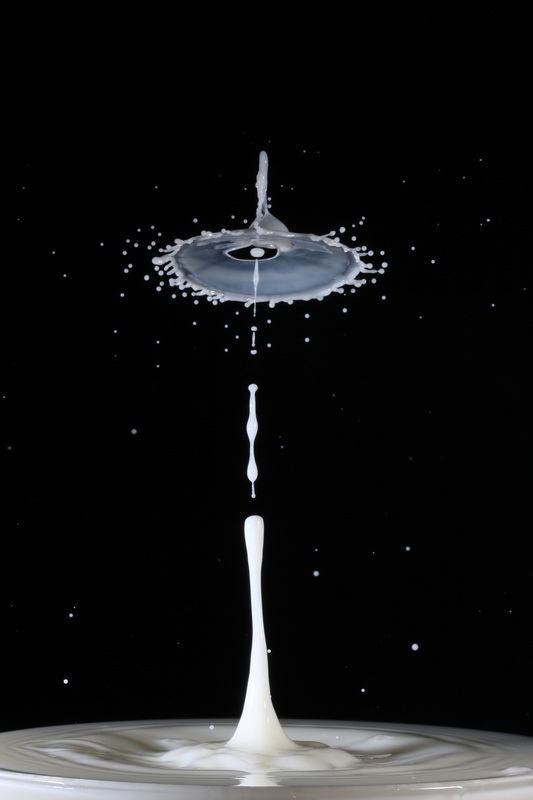
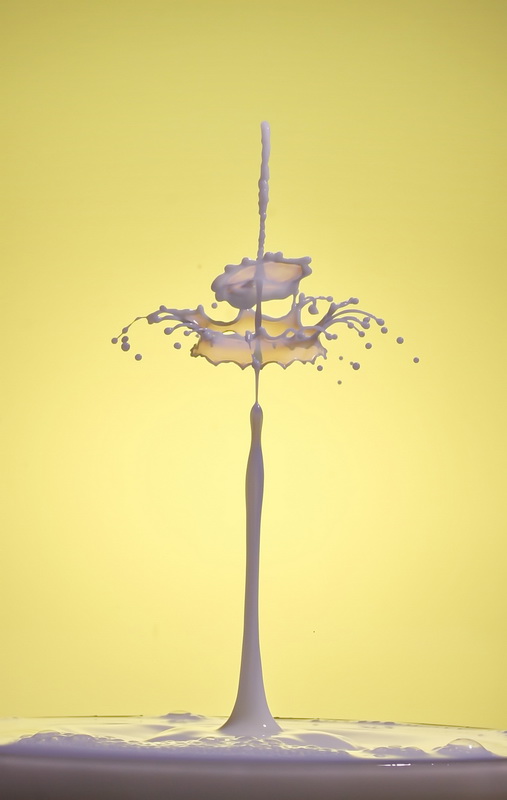
Adding a Second Drop
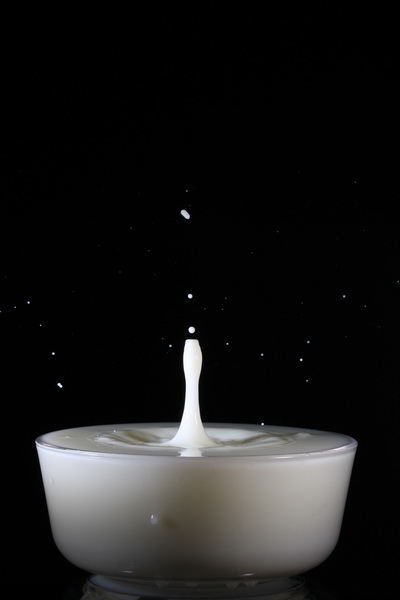
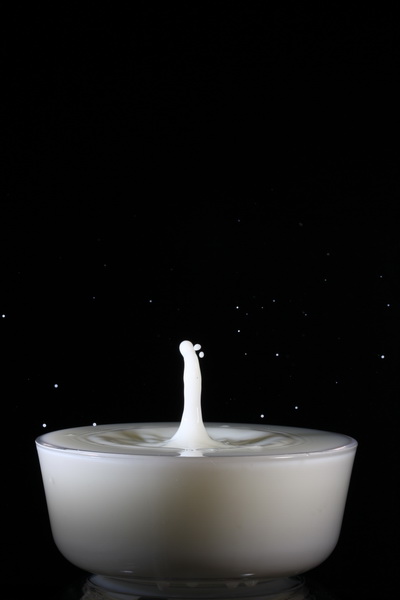
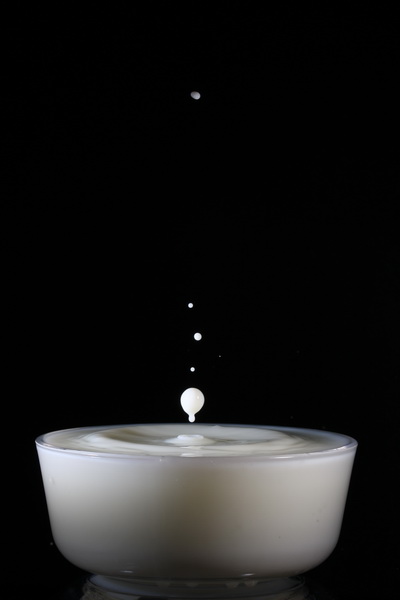
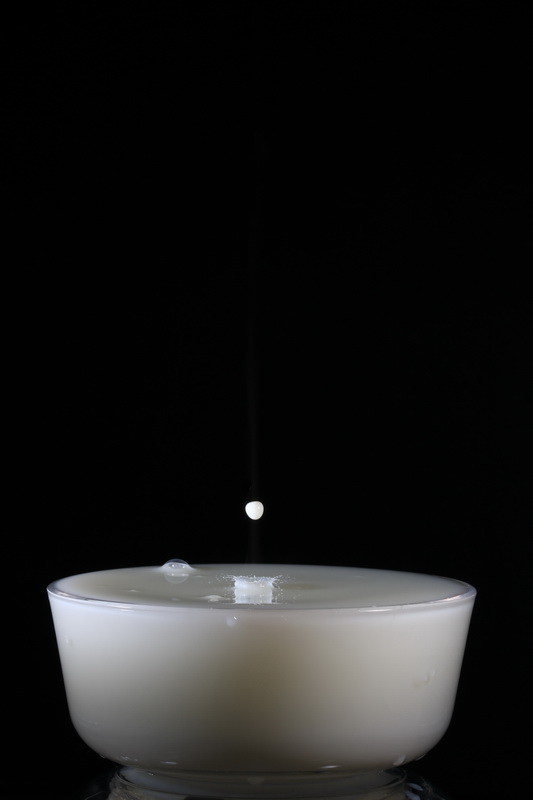
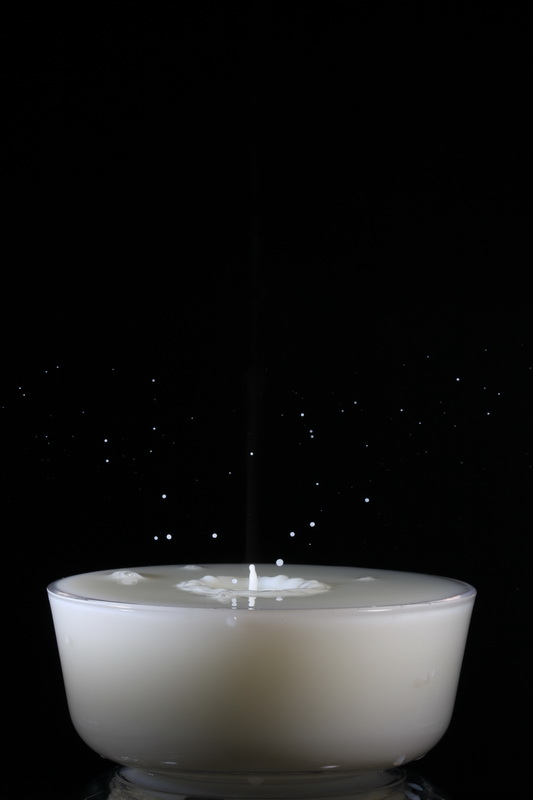
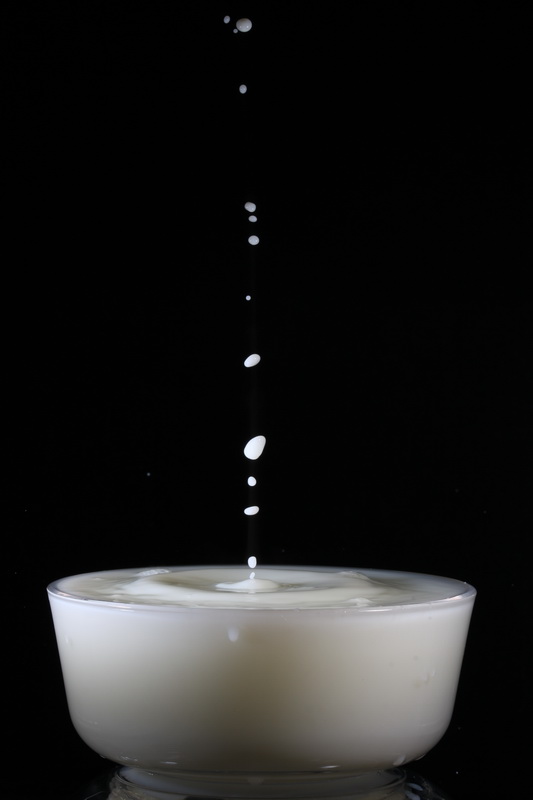
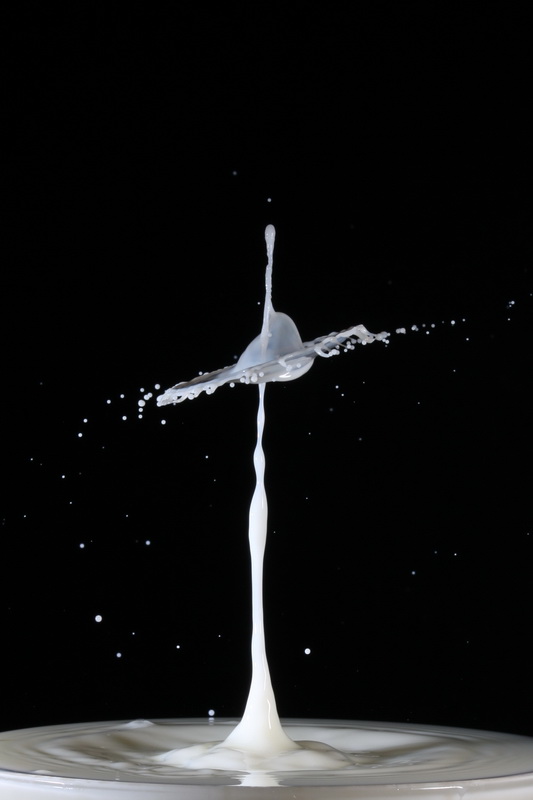
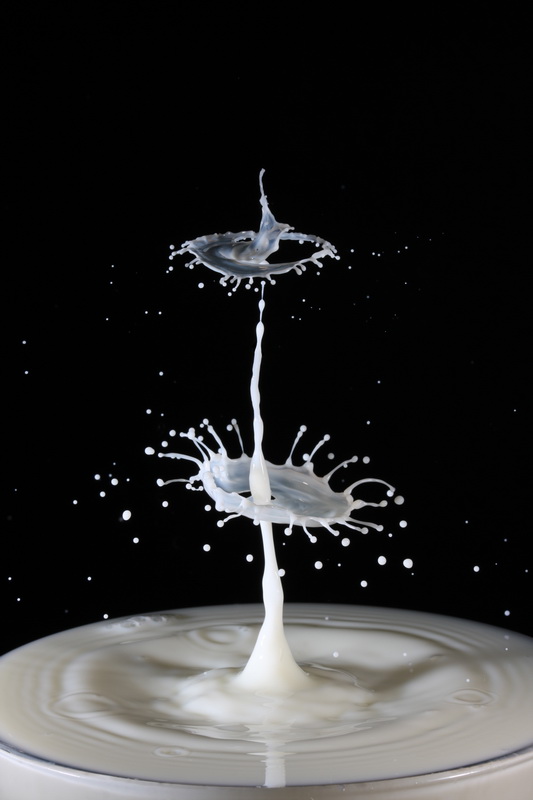
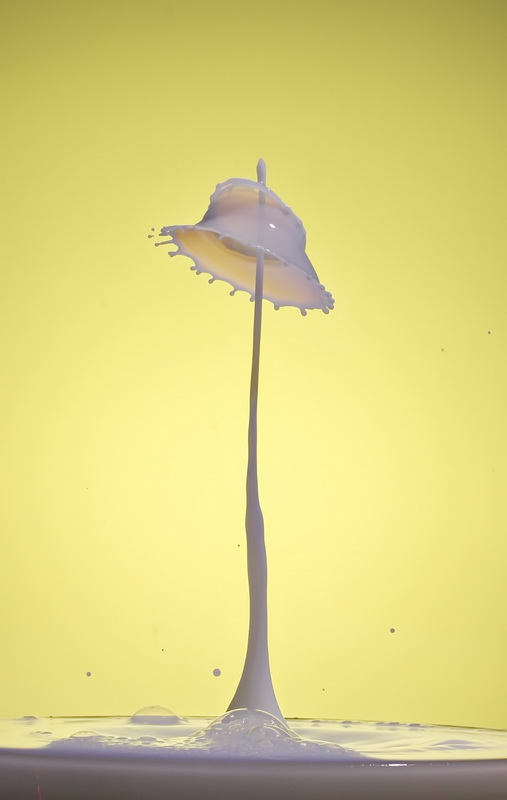
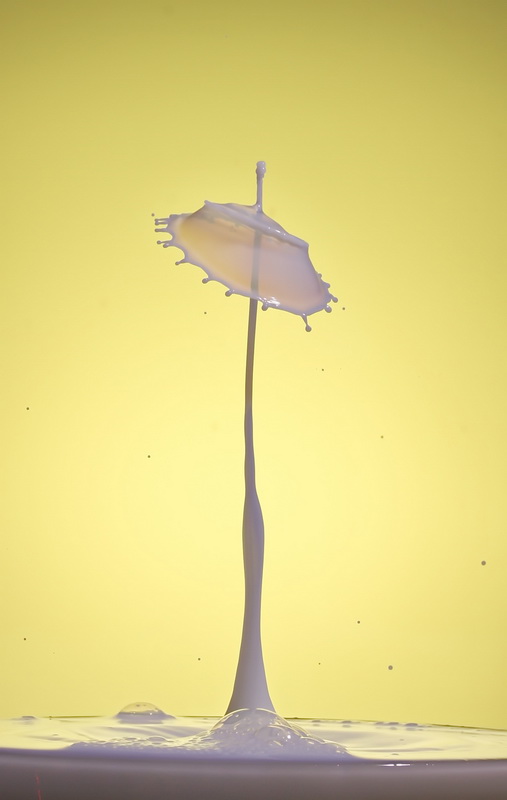
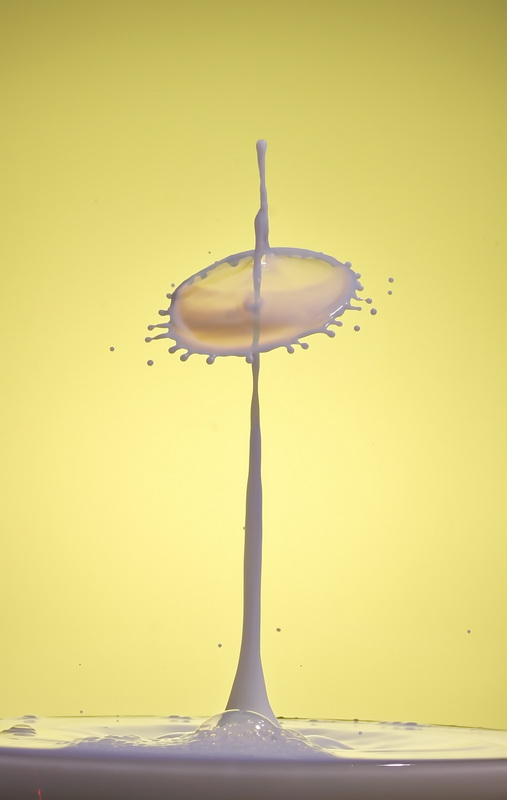
Looking through the images for the Worthington Jet created with a drop size of 62ms I settled on the jet when the flash triggers at 540ms. I was surprised that most of the shots were very similar with a nice straight clean columns. With a jet of this size things are far more random and tend to be a bit messy.
540ms

540ms

540ms

540ms

540ms
The time is the flash trigger time.
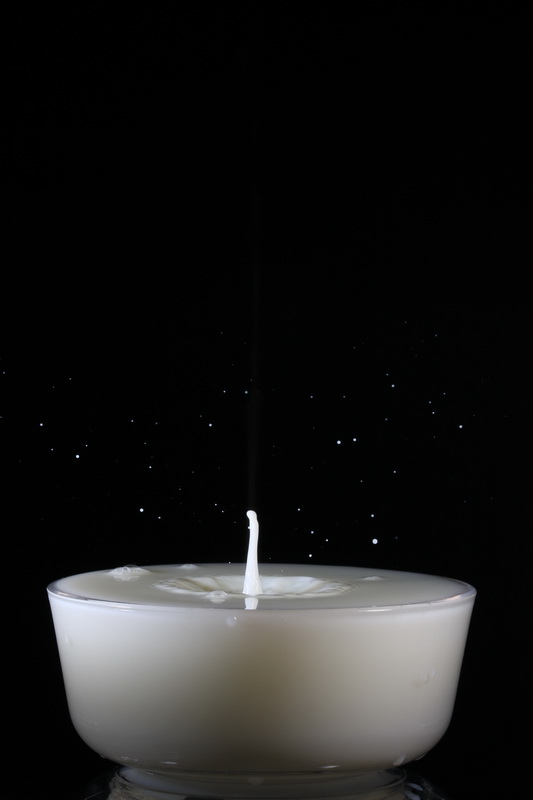
Although a Flash Trigger of 540ms worked I had better results with 535ms. At 535ms the column had a little bit more energy and this helped give better shaped collisions.
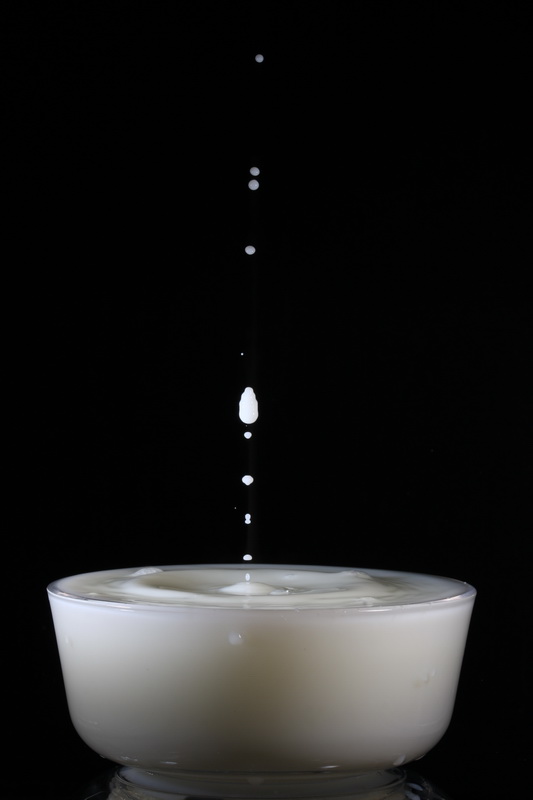
Now I have a good Worthington Jet it is time to add a second drop. For this I follow a similar process as in part 1. Add the drop with a fairly late start time and then use a delta value on the start time to walk the drop start time backwards.
230ms
229ms
228ms

227ms
226ms

225ms
224ms
223ms
222ms
221ms
220ms
219ms
218ms
217ms

216ms
215ms

214ms
213ms
212ms
211ms
210ms
209ms
208ms
207ms
206ms
The time is the the second drop start time.
Making the second drop larger with an earlier flash trigger would have given bigger collisions but I forgot to try. A simply way to give this a go is, after finding a collision time to use, add a + delta value on the size. At the same time you can move the flash trigger with its own delta, either + or -.
Comment About Milk
Although in the previous guide I say milk is a good liquid for getting started, it is not ideal, especially with taller Worthington Jets like the ones above, it is far better than plain water though. With taller jets milk can be chaotic and messy and things would have been nicer (cleaner collisions) if I had added a little bit of thickener. See the photos later. Depending on the liquid you are using super tall Worthington Jets are not always better. The taller they are the thinner they are.
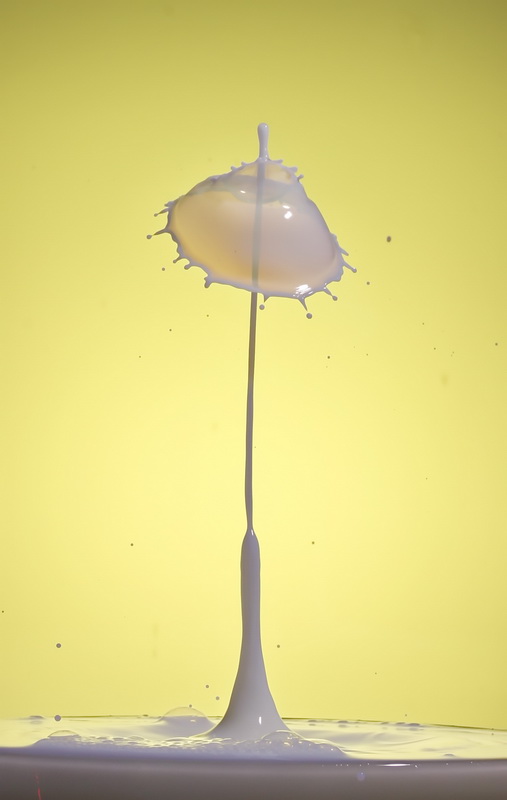
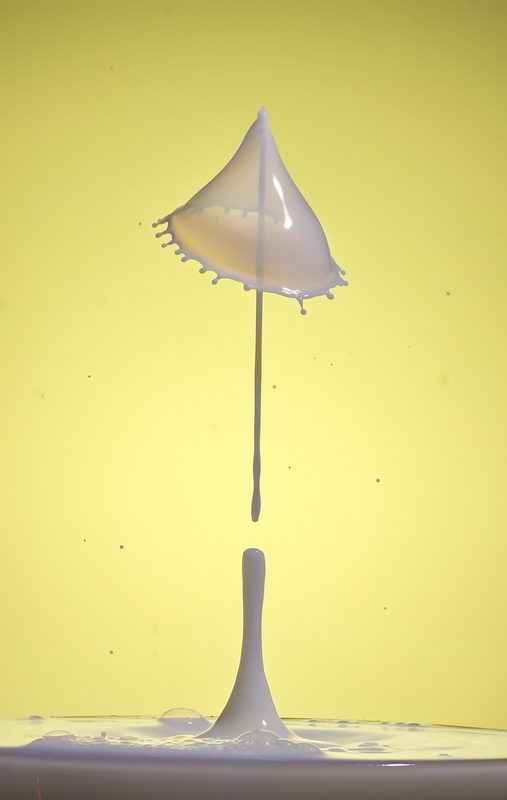
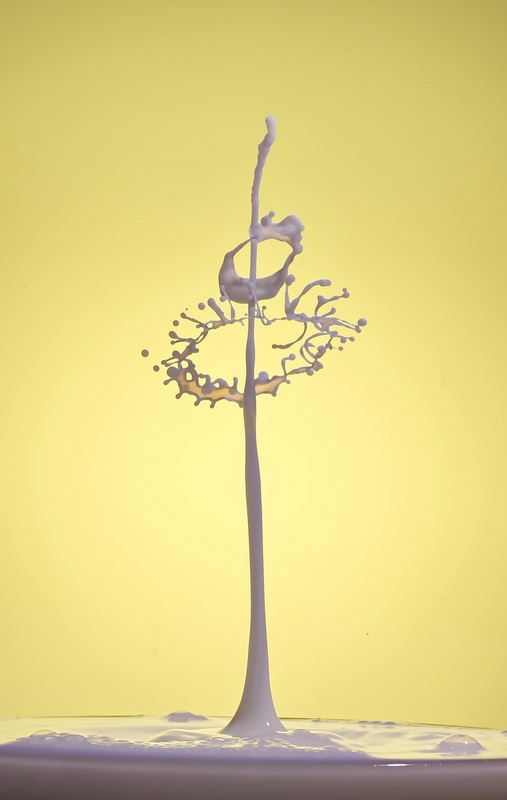
Advanced 2 Drops
By making the second drop larger until it becomes 2 drops (same technique used for getting taller Worthington Jets) it is possible to create 3 drop collisions using just 2 drops. This is especially good when using a single valve*.
*A single valve is unable to create 2 separate drops quick enough for 3 drop collisions (unless you are using an extremely fast and expensive valve).
When using normal valves and thickened liquids the drops can be fairly close together. This means the two collisions will also be close together. On shorter jets this is not so much of a problem but with taller jets it can be.
I have found that with less thicker liquids, like the milk I was using, adding a piece of thin tube to the nozzle can help separate the two drops. Other than this I have never found a magic formula. For me at least, it is a lot of trial and error and a lot of luck.
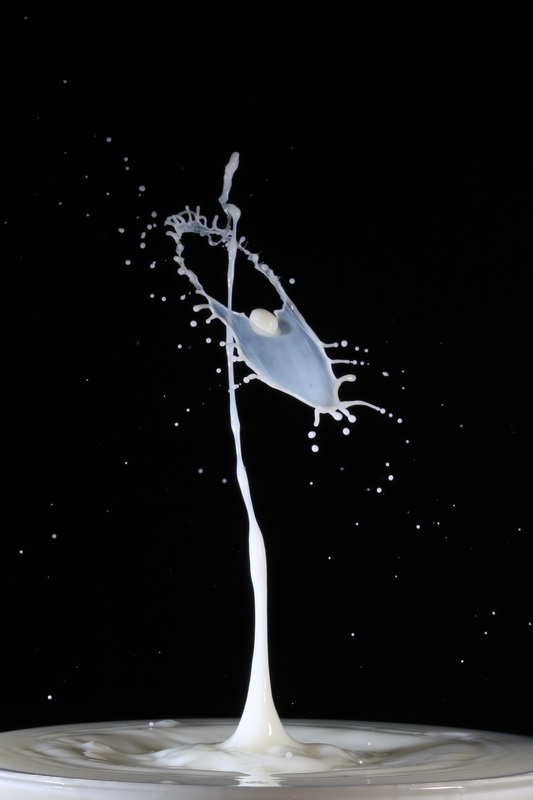
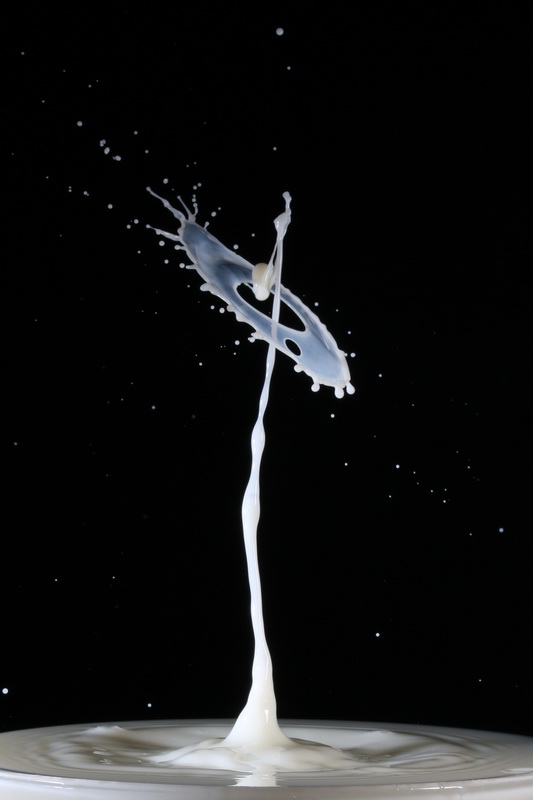
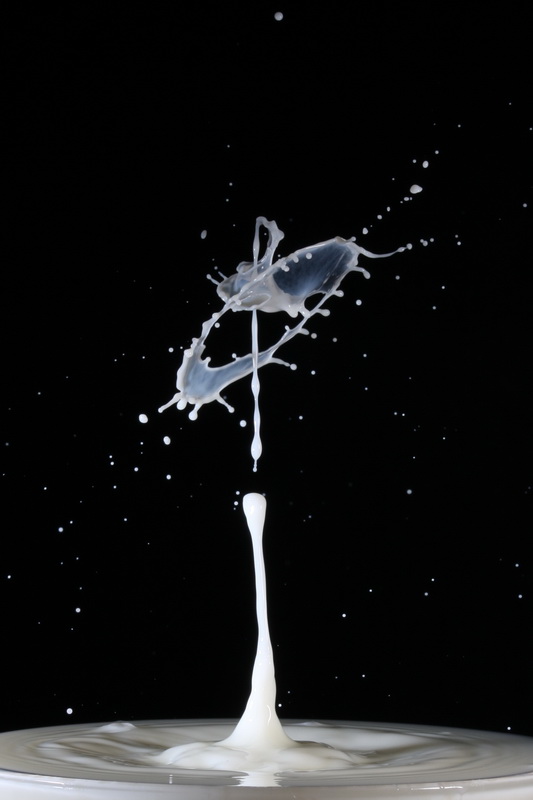
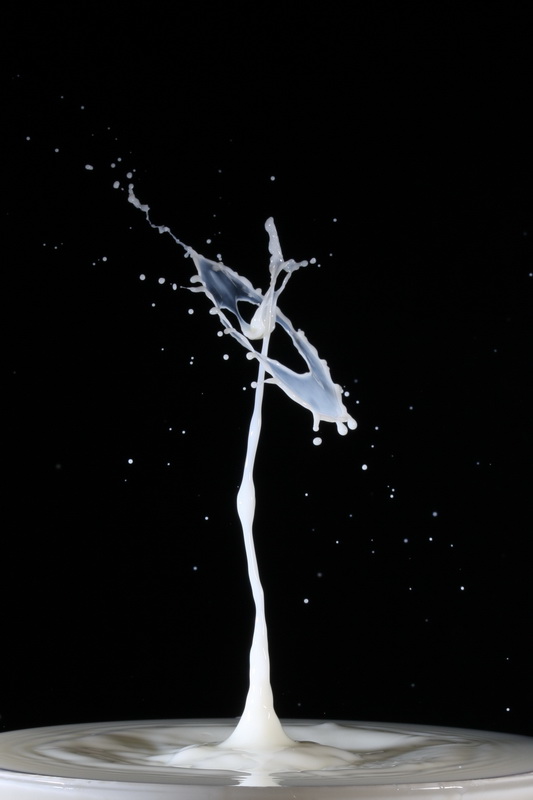
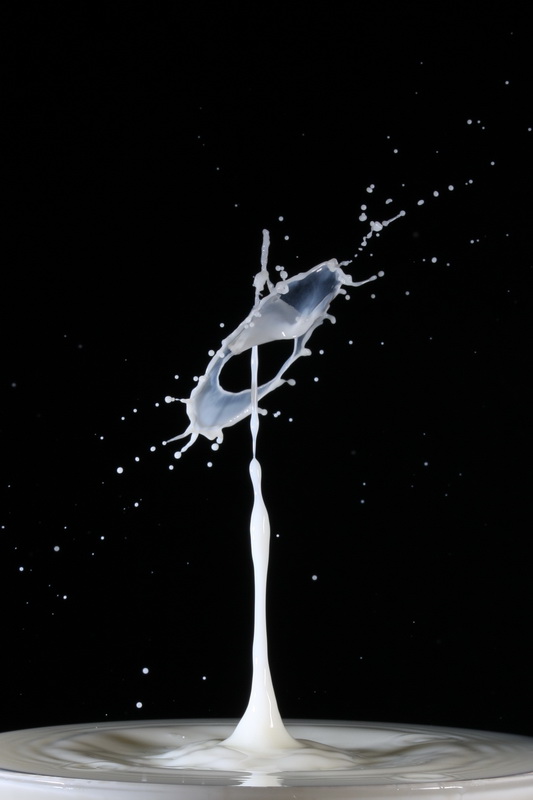
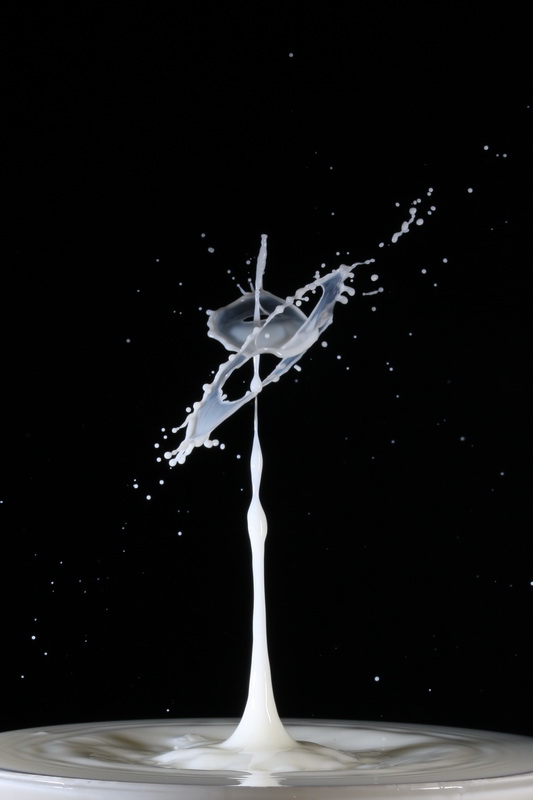
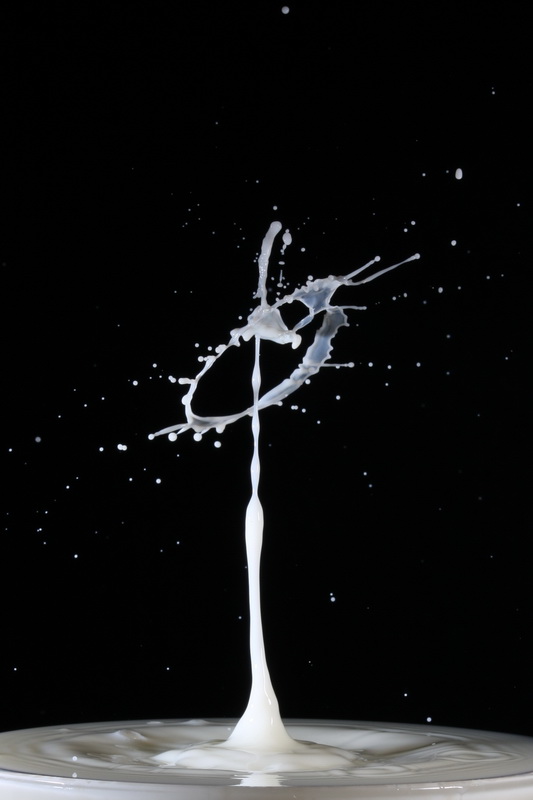
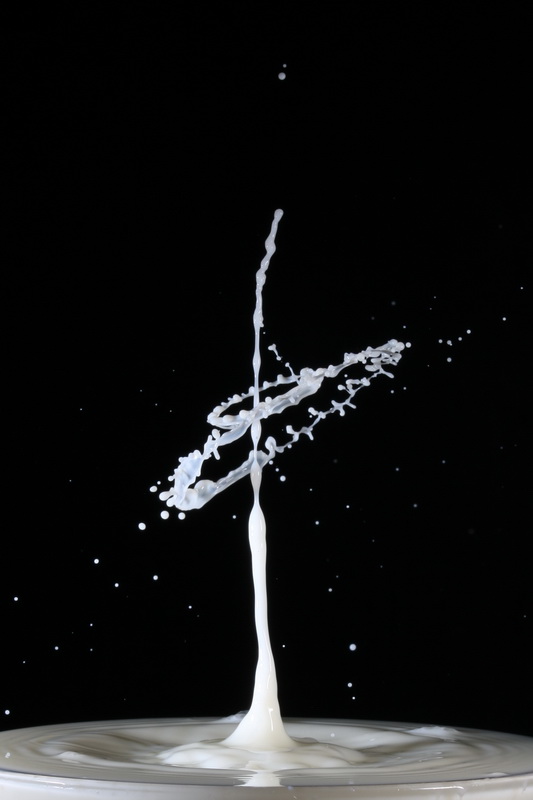
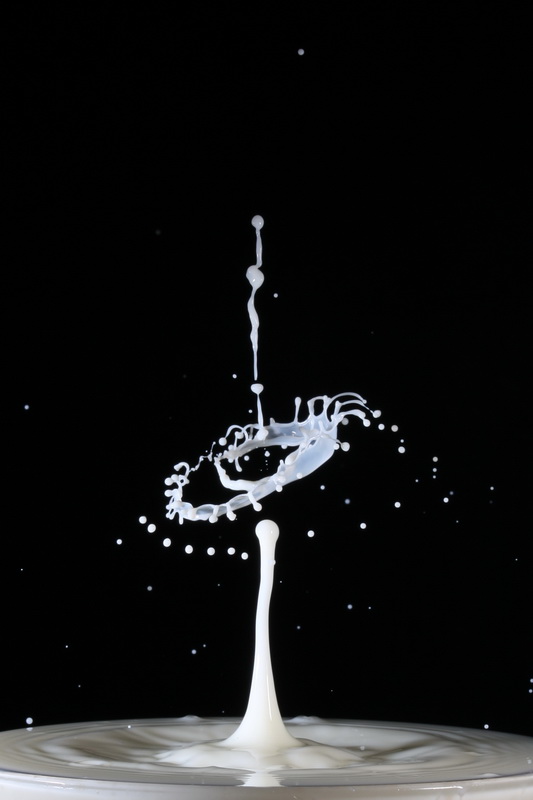
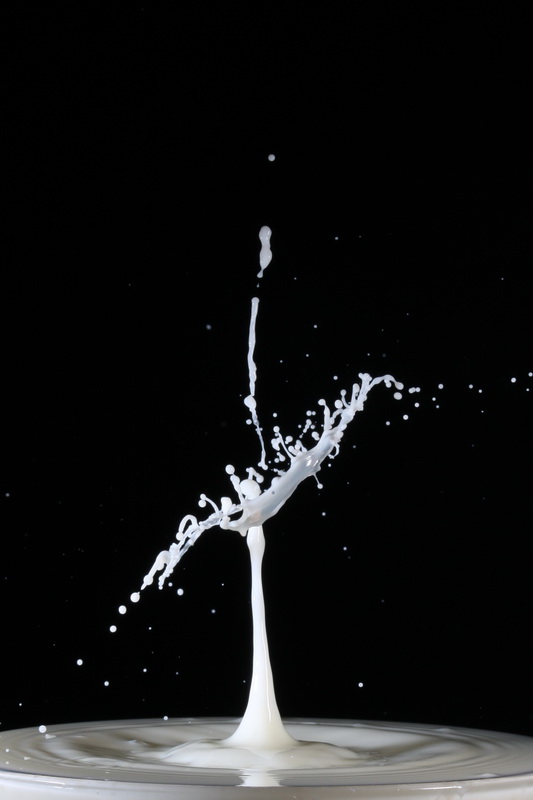
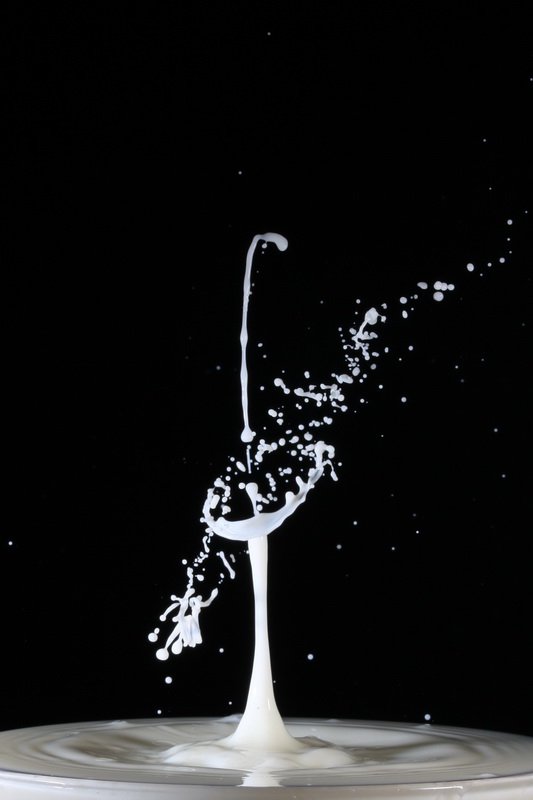
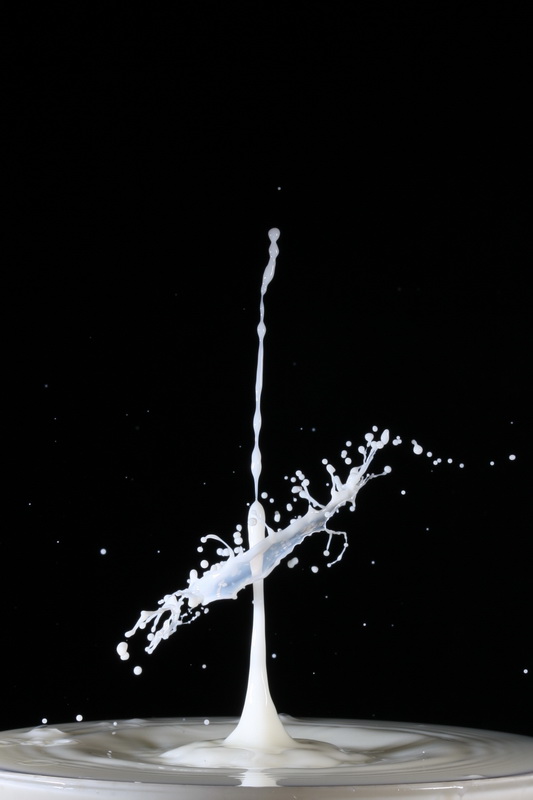
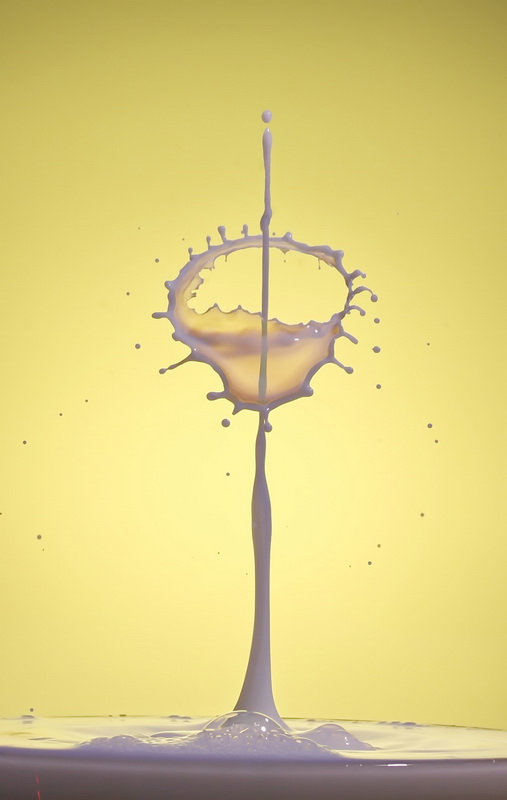
First drop 62ms. Second drop 60ms to 65ms. With drops this size when the 2 drops form the first drop tends to be larger than the second. This, in my opinion, makes for better photos.

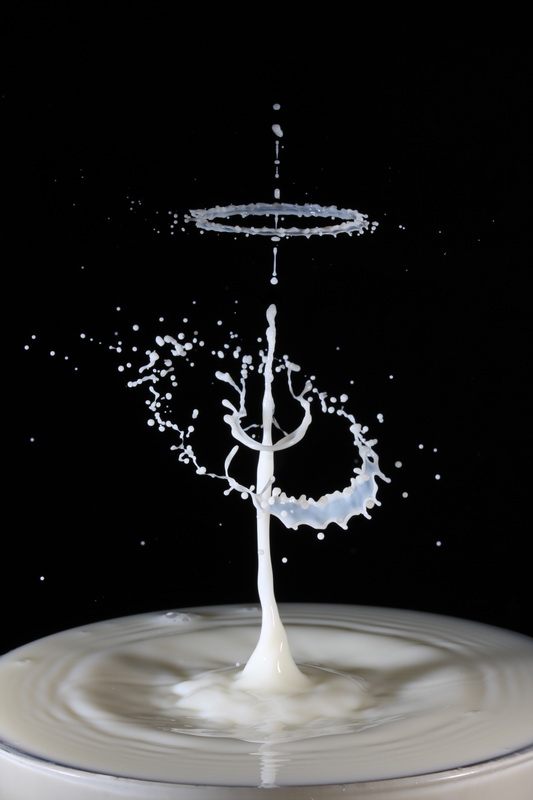
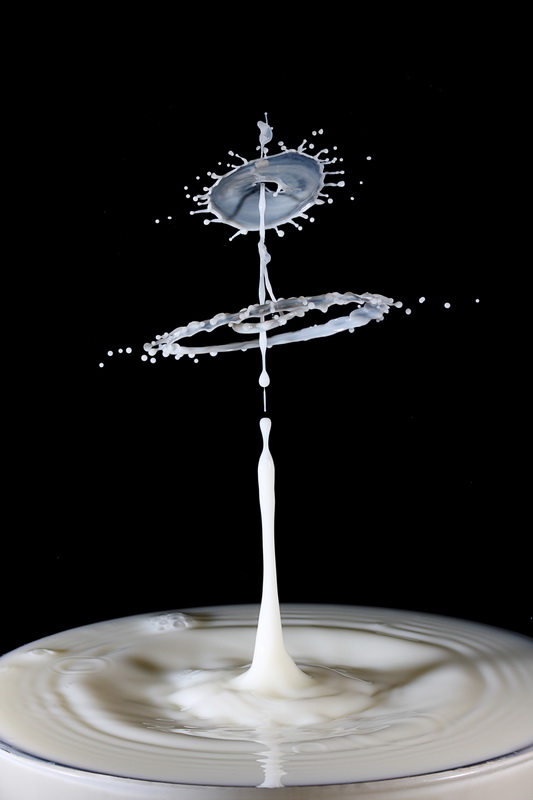
In the first 3 photos I achived a good separation of the drops. In the last picture the drops are closer together, I was still happy with the result though.
The last picture has been cleaned up a little bit.
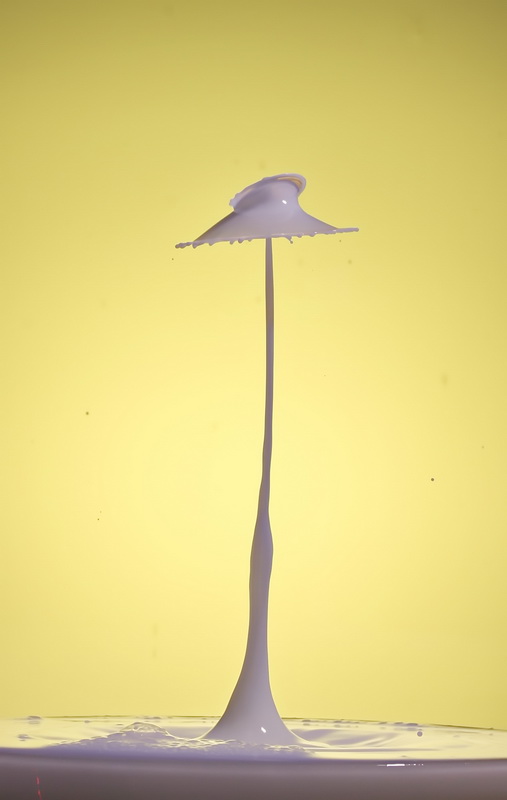
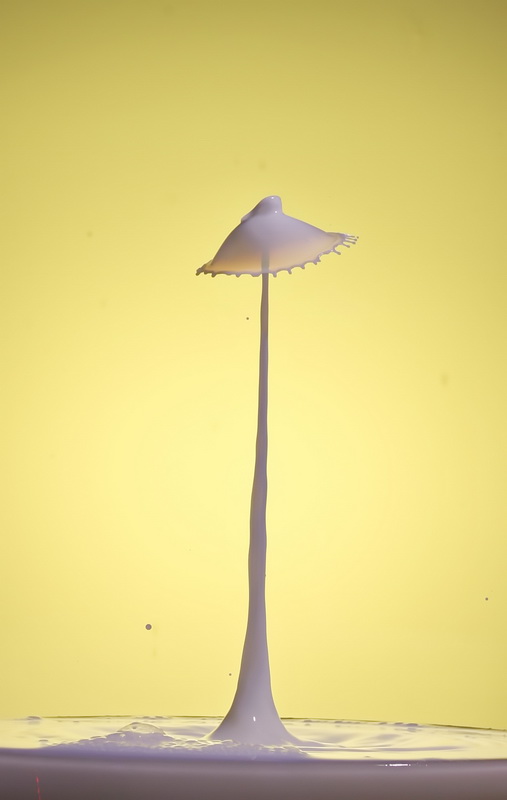
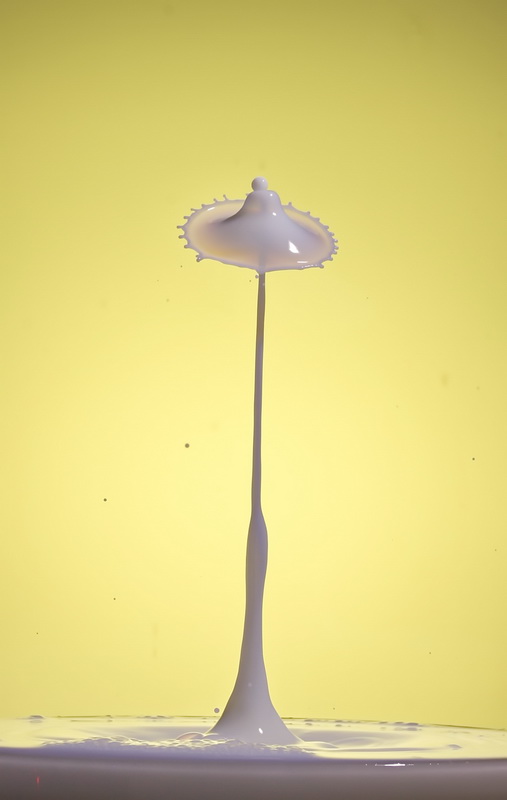
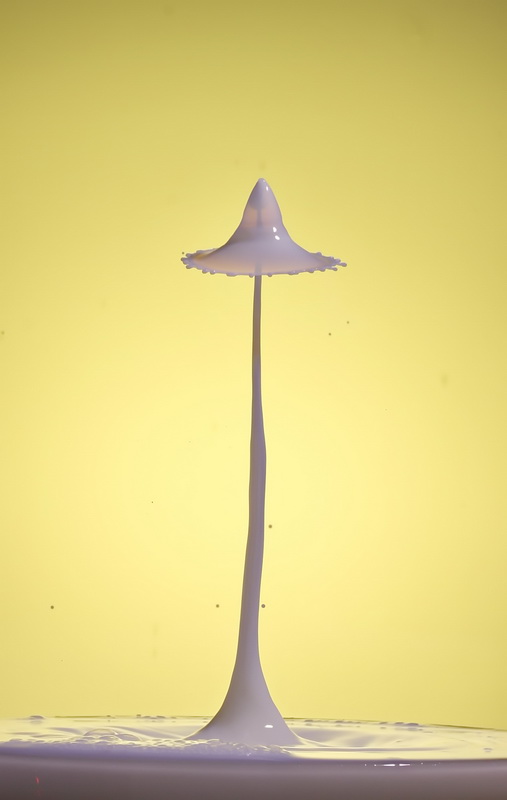
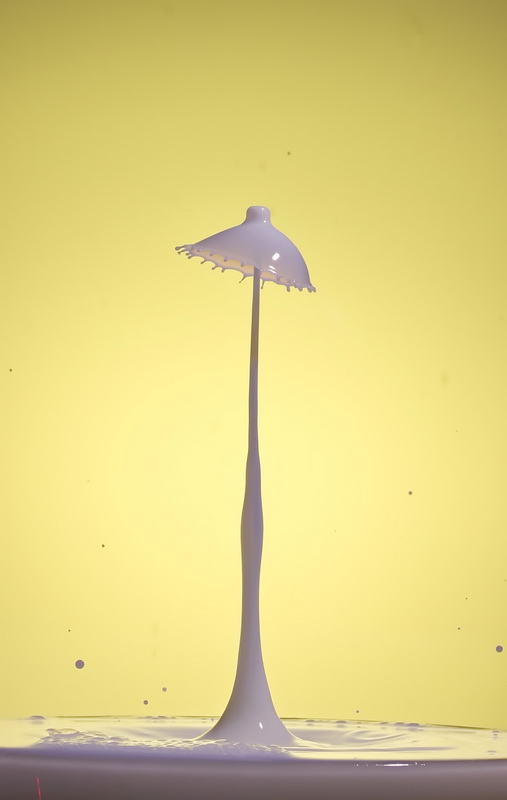
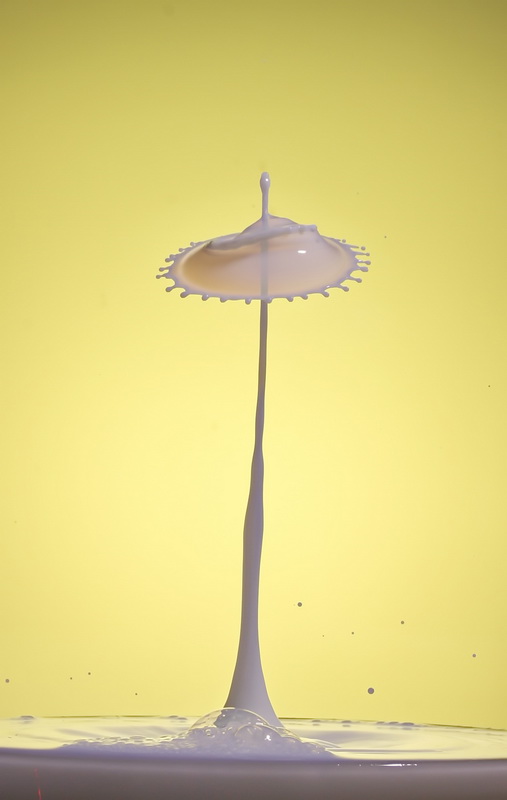
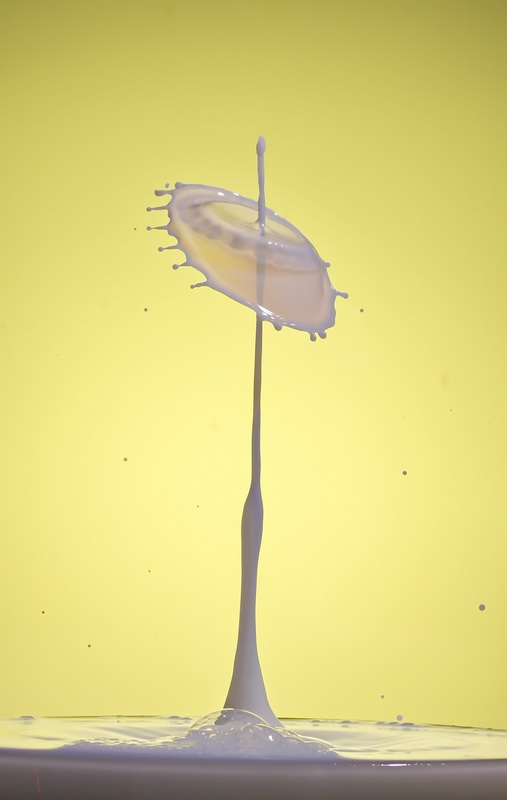
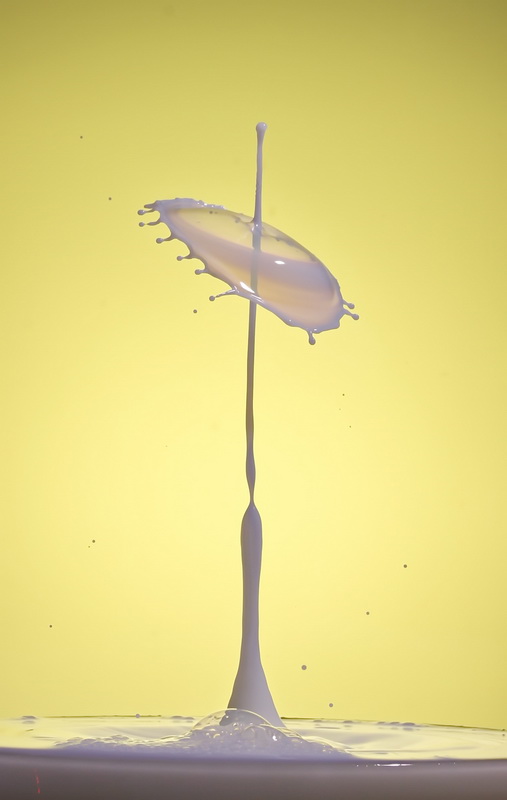
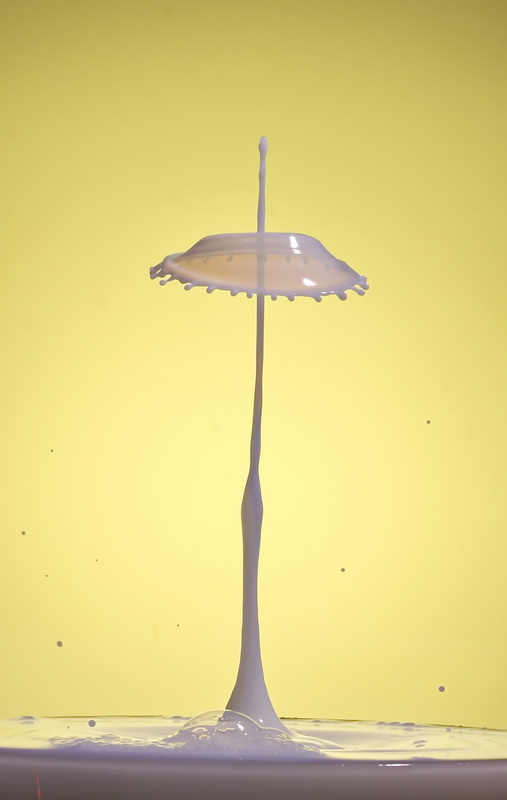
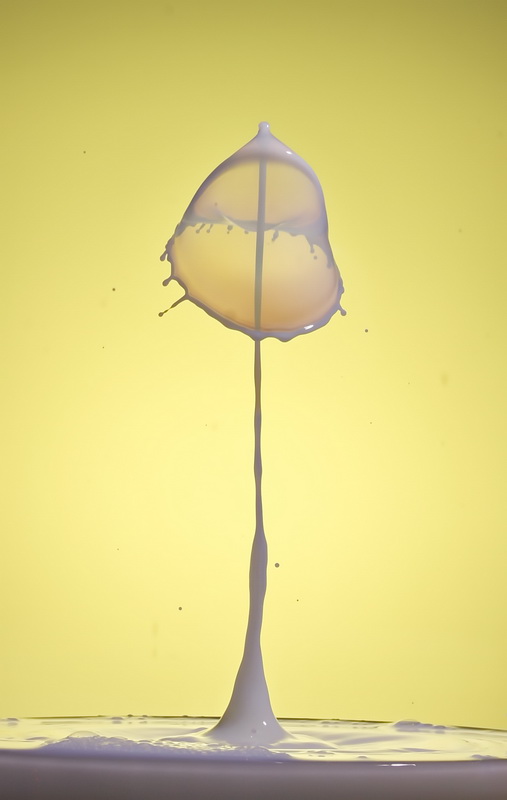
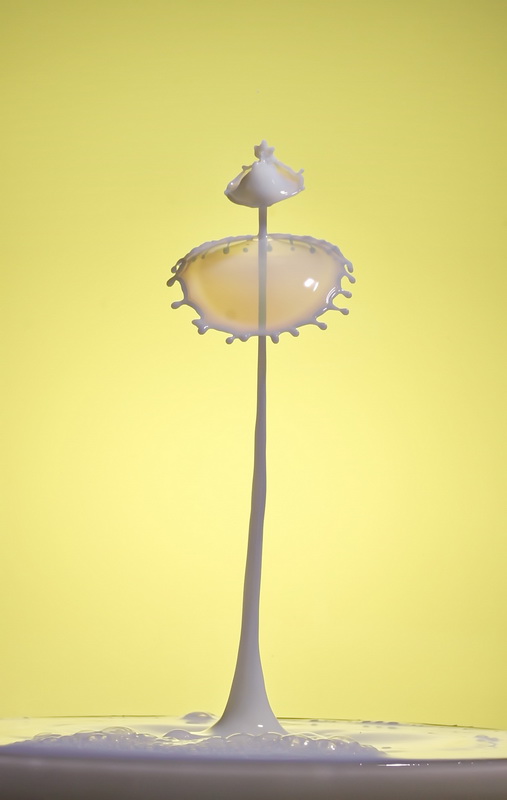
Different Background. Milk with Additive
So far I have only used a solid black background. This can be good depending on the colours and lighting used. The next set was taken with a thin white Perspex/acrylic sheet as the background with flash fired through it. The thin white acrylic works for me but semi-transparent/frosted may work better and should allow for lower flash settings. I use white because it is what I have.
 The flashes have yellow gels that make the background a nice yellow.
As it turns out bright yellow is not the best choice for a white liquid like milk.
The set up is the same as above and the drop settings are very similar. This time though I added a very small amount of Xanthan Gum to the milk* and if you compare these photos to the ones above you can see the collisions/shapes are much cleaner.
*I mixed the Xanthan Gum with water and then added the water to the milk.
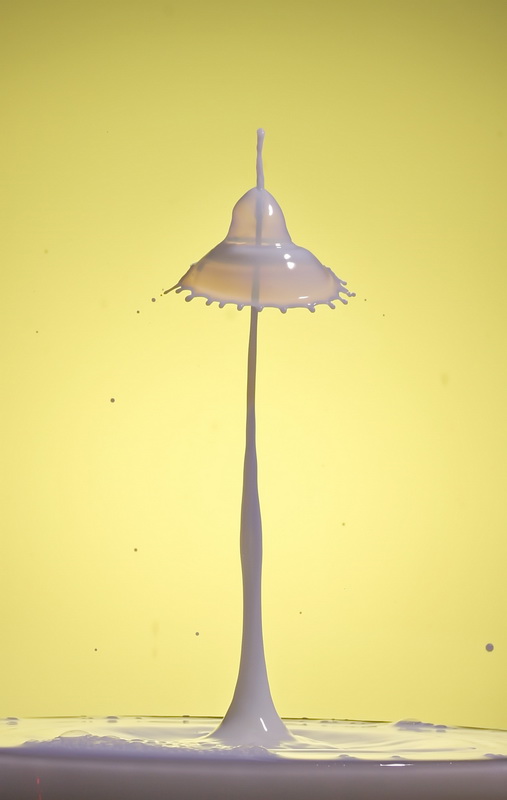

All photos are from a single sequence. I did run the same sequence many times and this is easy to do with the dropController. I just kept hitting the START button.
Because the Xanthan Gum thickens the milk it makes the Worthing Jets more ridged which means more consistent results. The jets in the above images are over 20cm tall and pretty straight. Clean jets like this are hard to achieve with just milk.
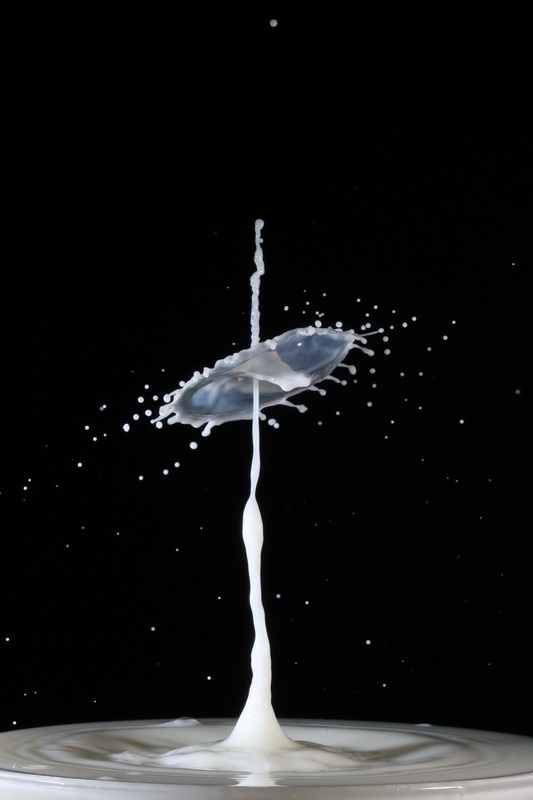
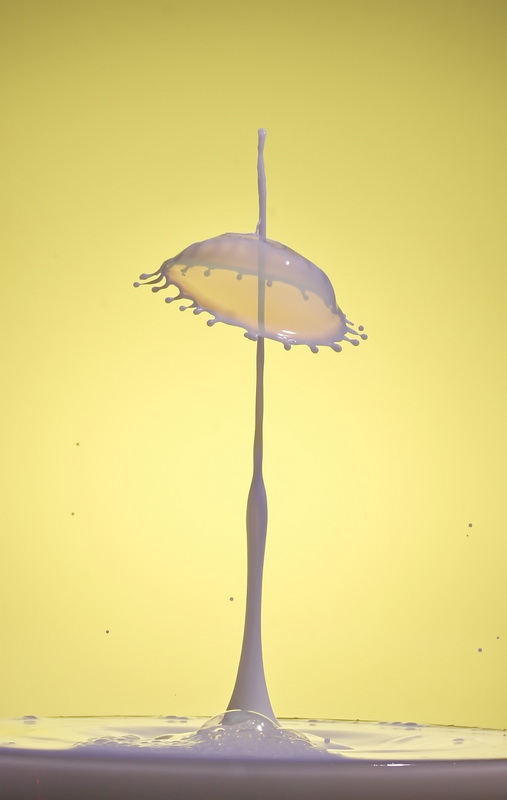
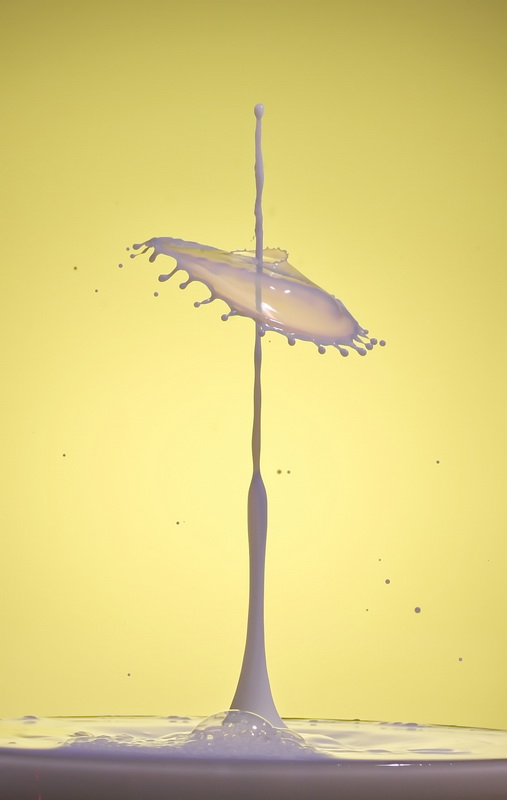
Advanced 2 Drops II
I tried the large second drop method with the thickened milk and a non modified nozzle. Although I managed to get 3 drop collisions I didn’t get the 2 drops to separate much. This was at the end of the day and I didn’t spend a lot of time on this though. I think I could have got better results had I spent time playing with the nozzle size.
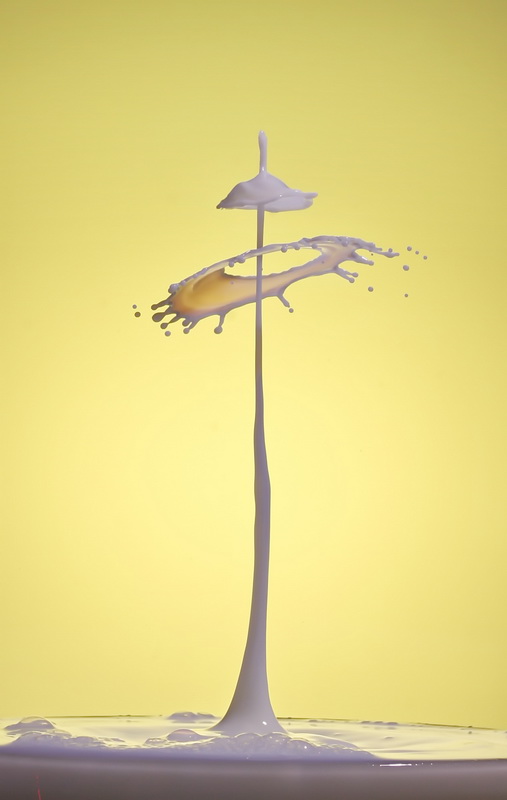
All shots are from the same sequence. The second drop start time has a – delta value making the drop start a little earlier each time.
And that’s it for the introductions to making drop collisions. Hopefully this gives you a good start from which to work from.