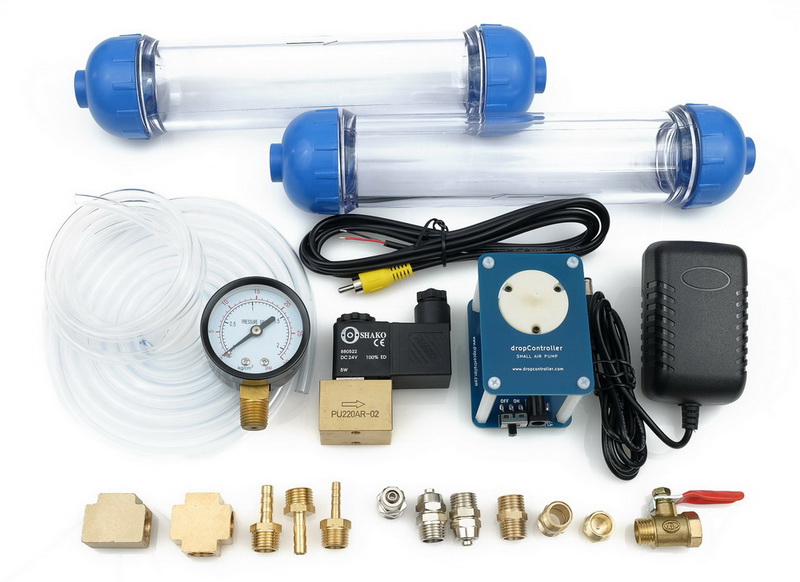
The dropController Shoot From Below (SFB) Set is everything (almost) you need for a comprehensive SFB system.
*You may want to add something to hold the bottom nozzle in place. Have a look at the SFB Bottom Nozzle Stand, available separately.
Appearance and style of components may change without notice.
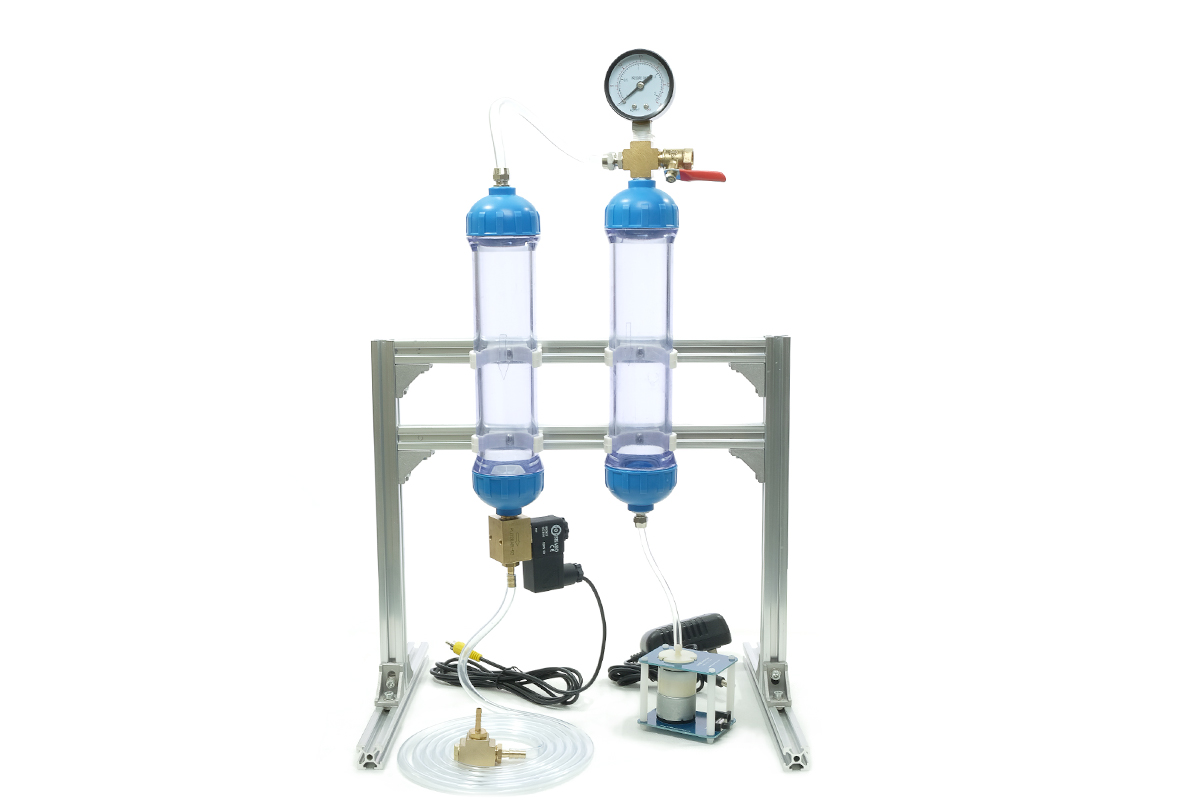
The frame is not included in the set.
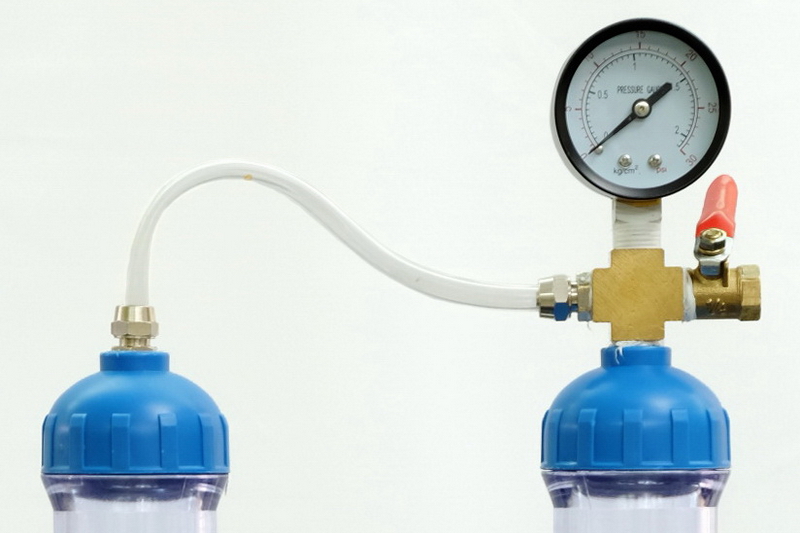
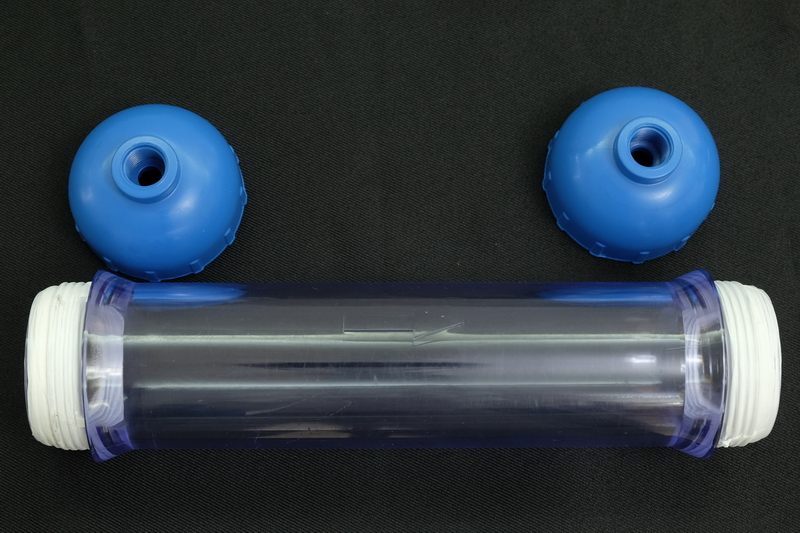
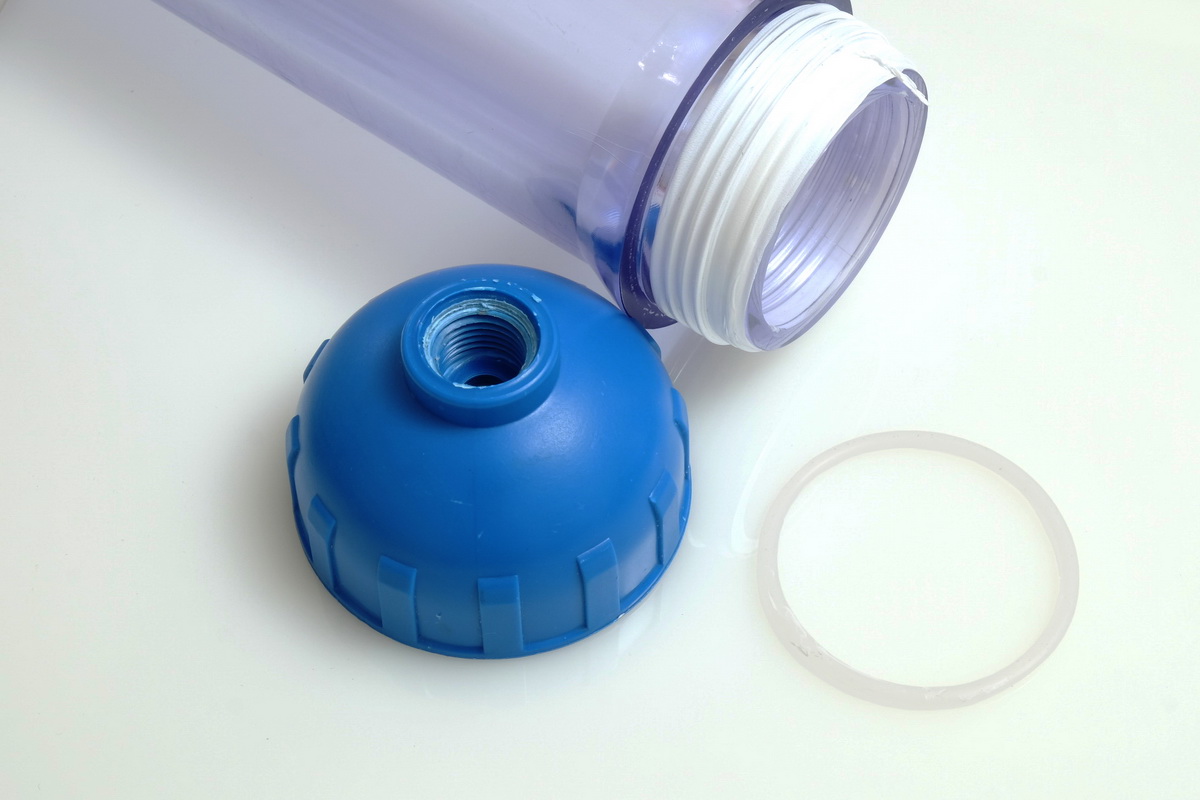
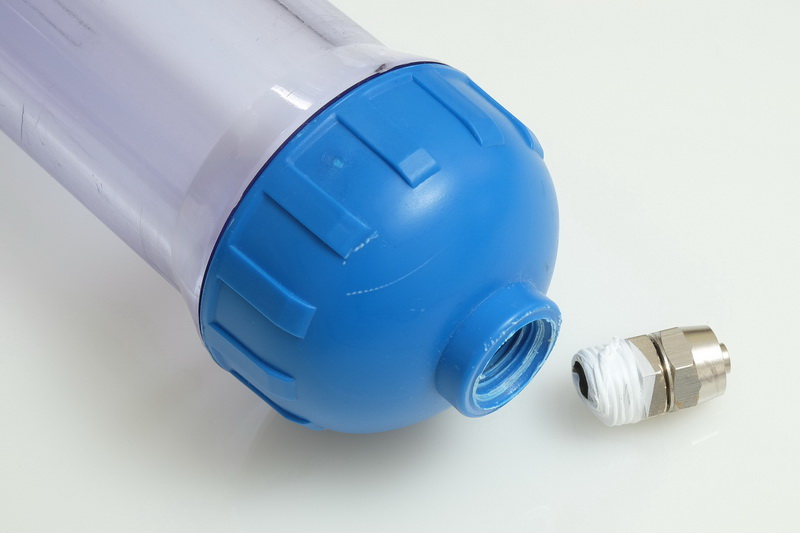
Bottles
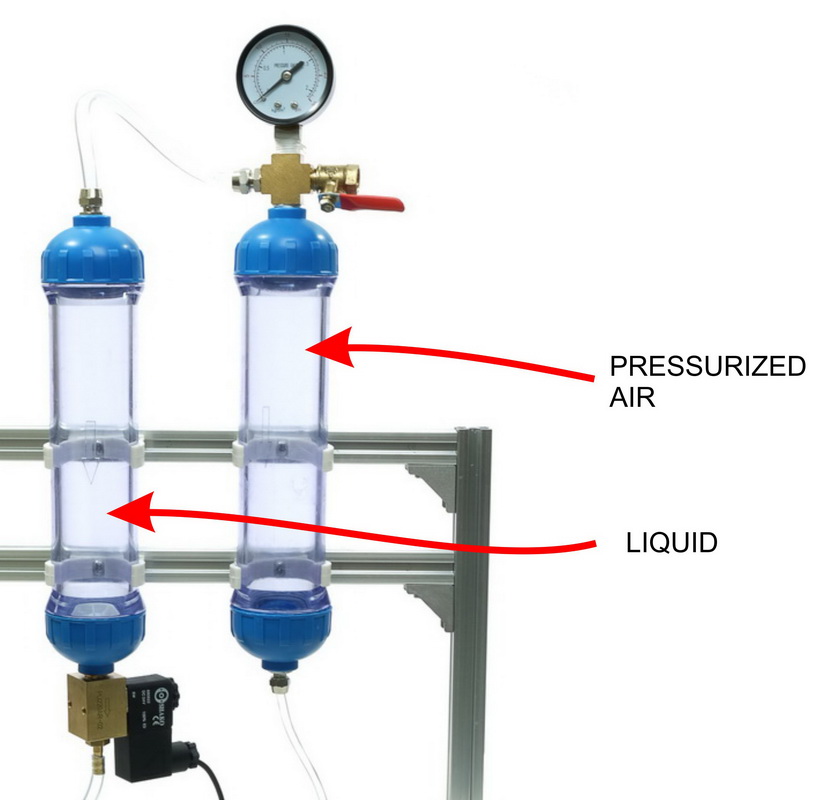
The set includes two bottles, one to hold the liquid and one that acts as a pressurized air container. Using a second bottle as a mini pressure reservoir helps keep the pressure constant, especially when drops are made in quick succession.
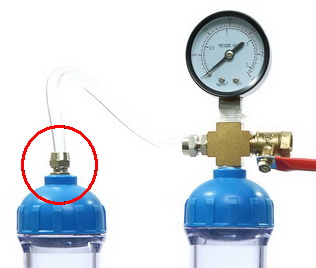
The quick release connector on the bottle used as the reservoir allows the bottle cap to be
easily removed for filling and cleaning.
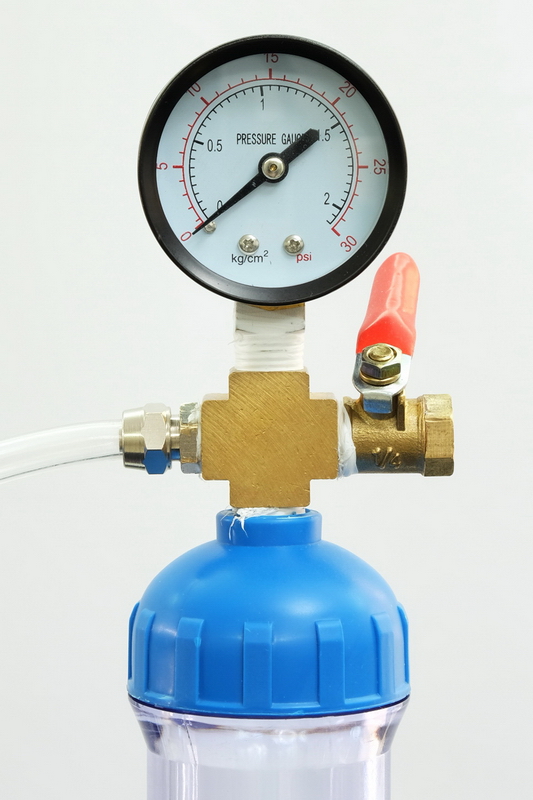
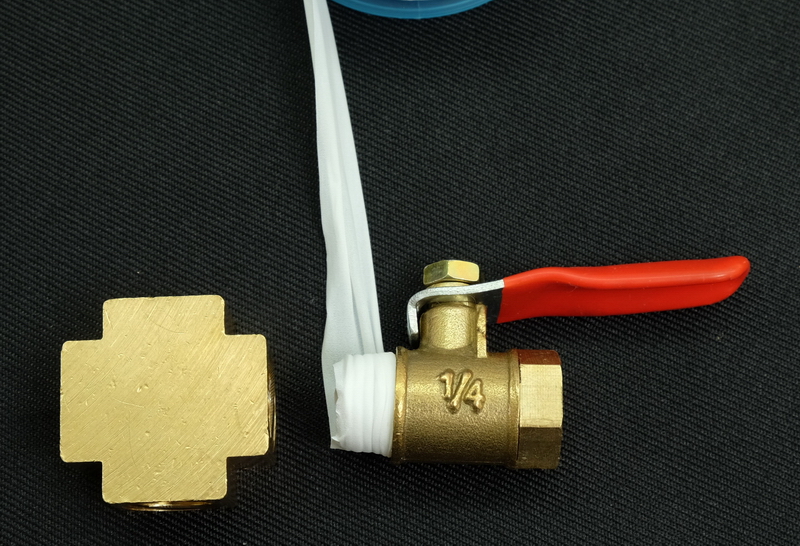
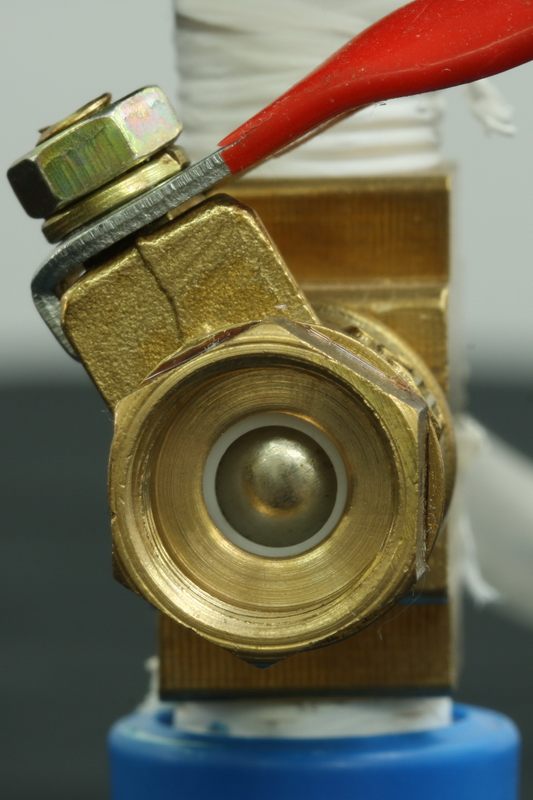
Pressure Gauge, 4-Way Block, Ball Valve
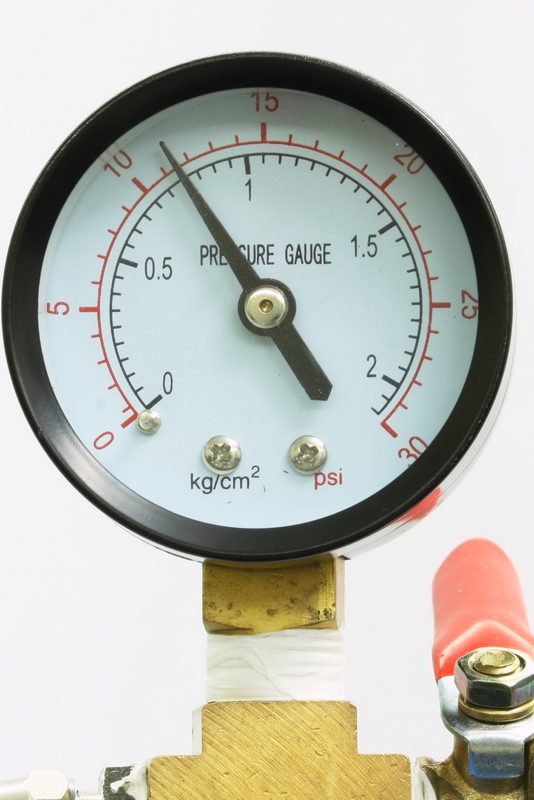
The pressure gauge displays pressures from 0 to 30 psi. The SFB system works from 0 – 10 or 11psi.
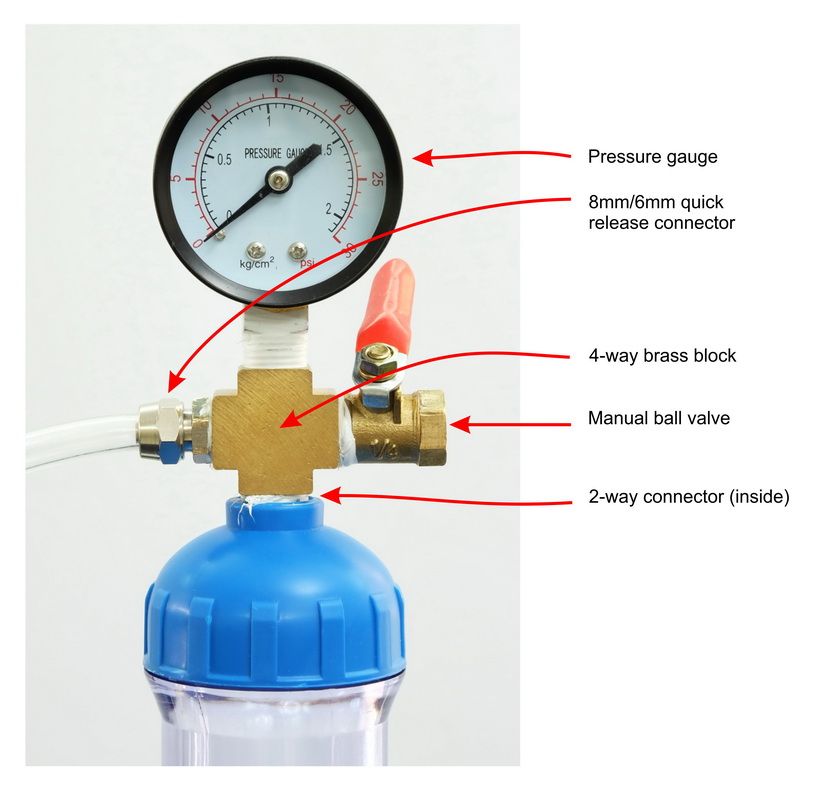
Setting up the pressure Gauge, 4-Way Block, Ball Valve
The 4-way block connects everything together.
The type/style of gauge may change without notice.
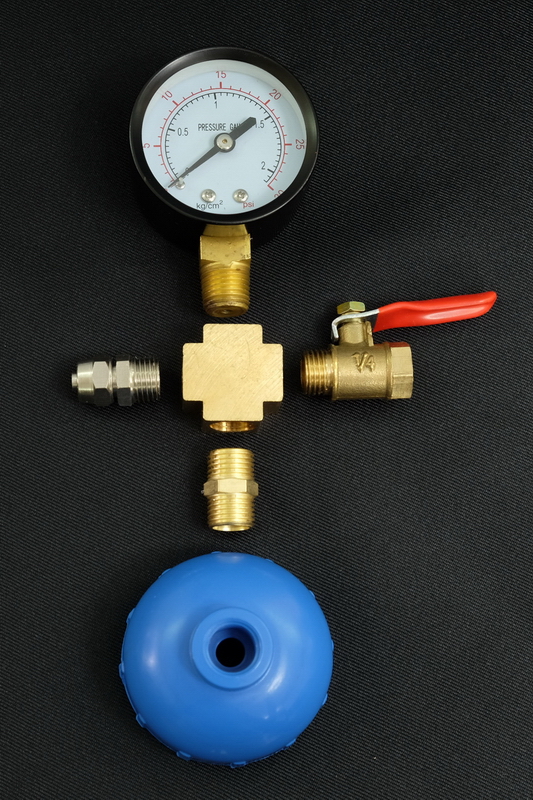
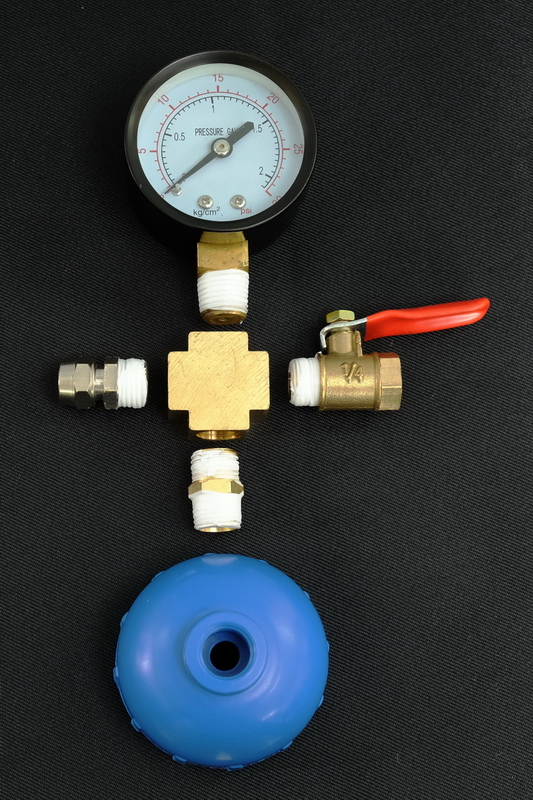
Add Teflon tape to all threads.
Use a little more tape on the part that connects to the bottle cap.
It is unlikely you will get everything perfectly lined up. The gauge may not be facing perfectly front and the ball valve handle may not be at the top.
No need to over tighten.
You can get an airtight seal without over doing it.
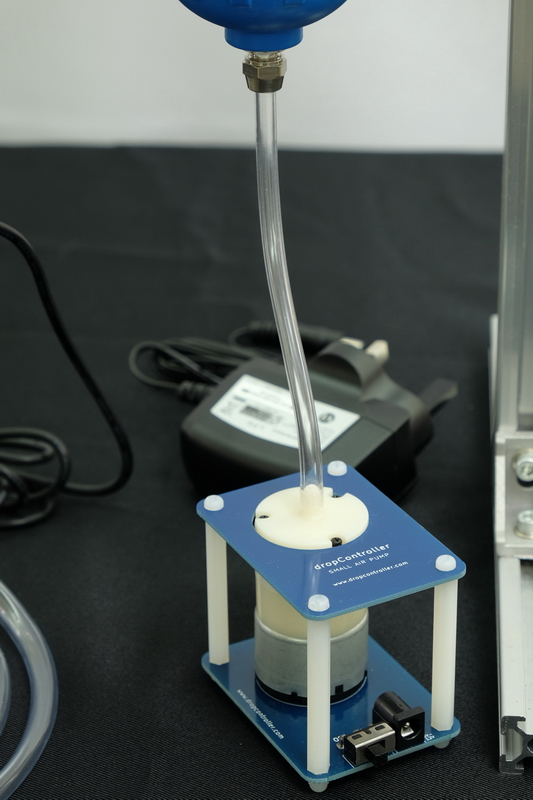
Air Pump
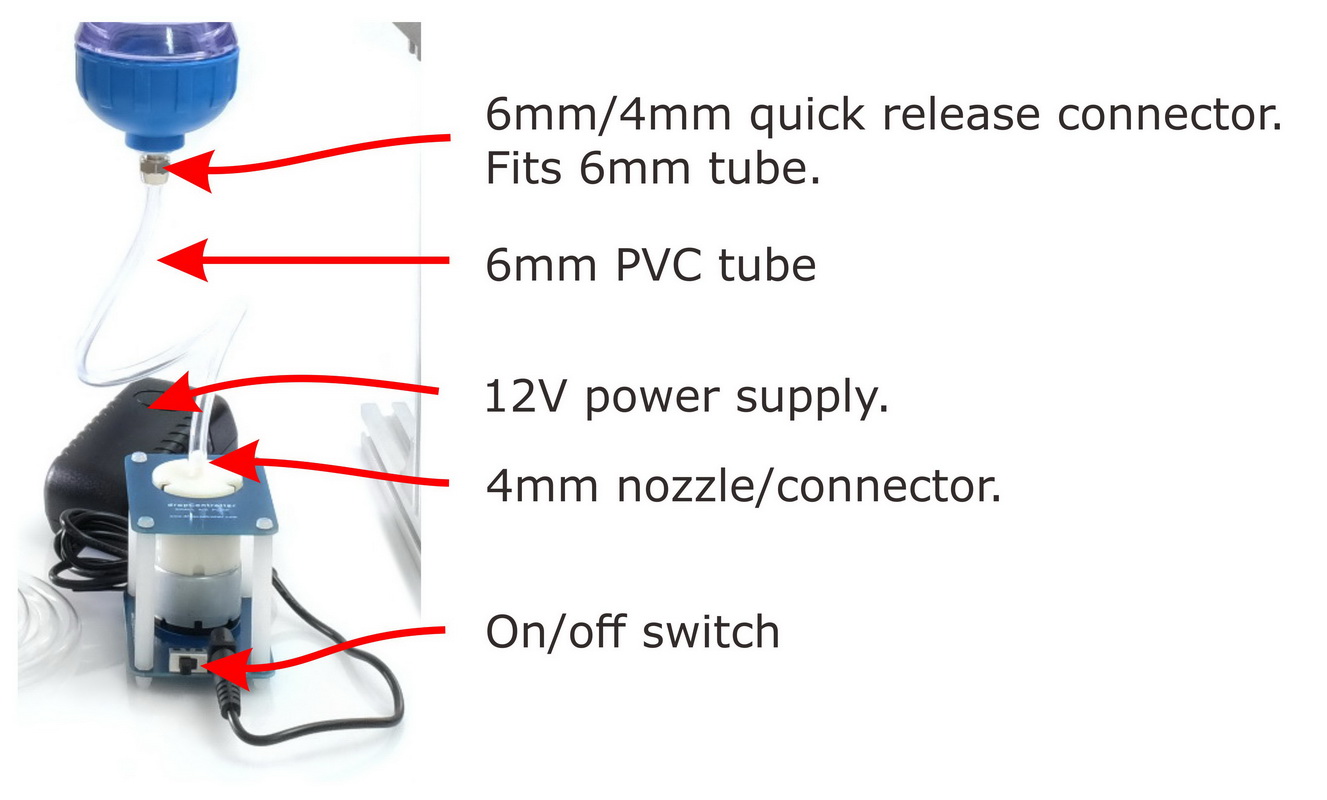
The pump has a 4mm connector that fits 6mm PVC tube. 1 metre of suitable tube is supplied in the kit.
The connector on the pump is fairly small, please handle with care to avoid damaging it.
The connector on the bottom of the bottle is a 6mm/4mm quick release connector. Using the quick release connectors is covered a little later.
Setting up the pump
Setting up the pump is fairly straight forward. Connect to the bottle, insert the power lead, turn on.
The air pump is able to operate from 6V to 24V. When used for SFB 12V is recommended and a 12V power supply is provided in the kit. The type of power supply plug provided will depend on the country of use.
When used at 12V, the pump produces around 10psi of pressure. This is enough pressure to hit most ceilings with a jet of water. I live in a small apartment and have to be careful about mess and normally use 1 to 3 psi. This is enough pressure to shoot the jet 50 or 60 cm. Enough height to still make a mess, just not on the ceiling.
The pump has a 4mm connector that fits 6mm PVC tube. 1 metre of tube is supplied in the kit.
The connector is small, please take care when attaching the PCV tube. Too much force may damage the connector.
The connector on the bottom of the bottle is a 6mm/4mm quick release connector. This has a ¼” NPT thread.
Using the quick release connectors is covered a little later.
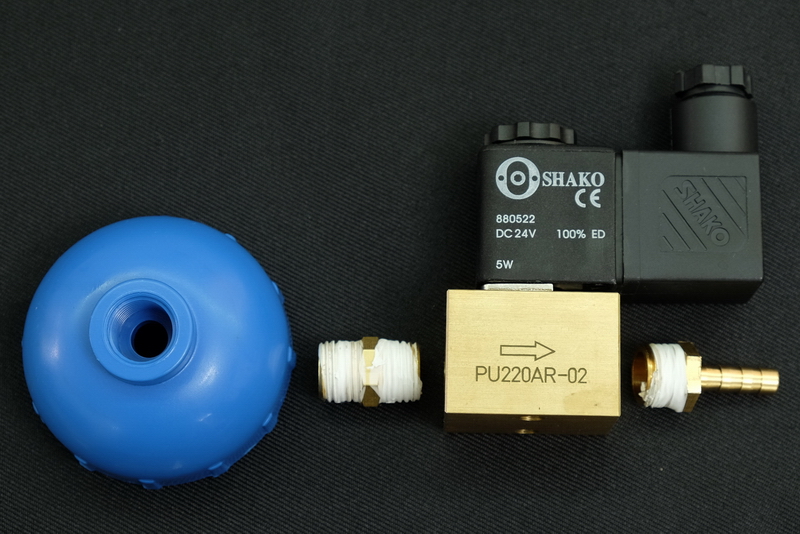
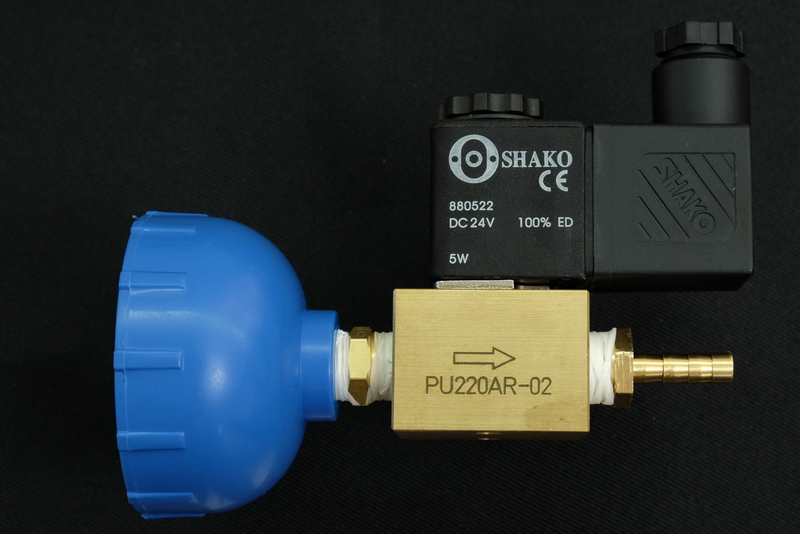
Setting Up The Solenoid Valve

The valve connects to the bottle using one of the double sided connectors.
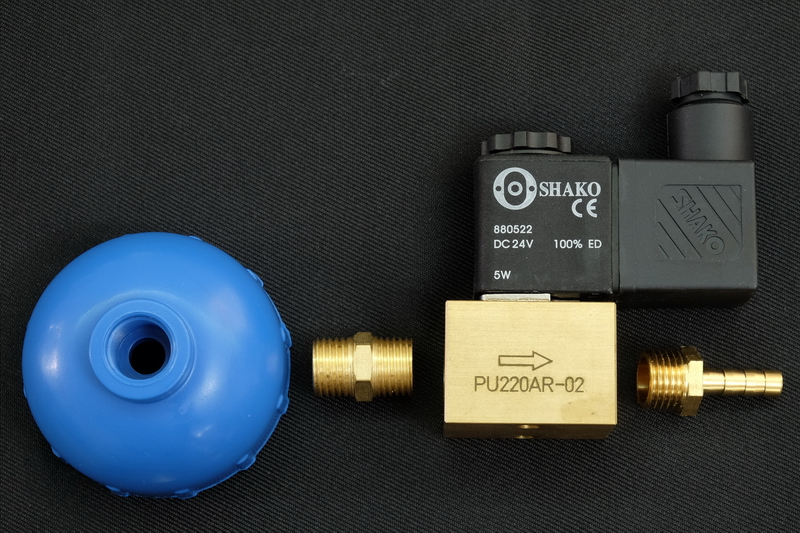
To get an air tight seal use Teflon tape.
Wrap the tape in the direction of the thread.
Use a little more tape on the side that connects to the bottle cap.
Some of the connections may be tight. This is good.
Included with the kit are an extra 2 x 6mm nozzles. These allow you to separate the valve from the bottle should you wish. Using the valve connected to the bottle makes things a little easier for SFB and I recommend using this method when starting.
The extra nozzles also mean you can use the valve and bottle for regular from above drops.
Add The Valve Lead
See the separate guide here.
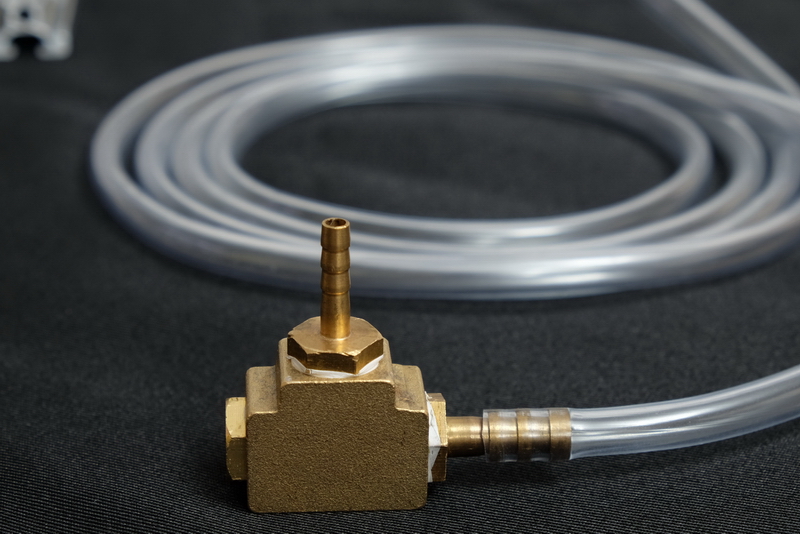
SFB Nozzle
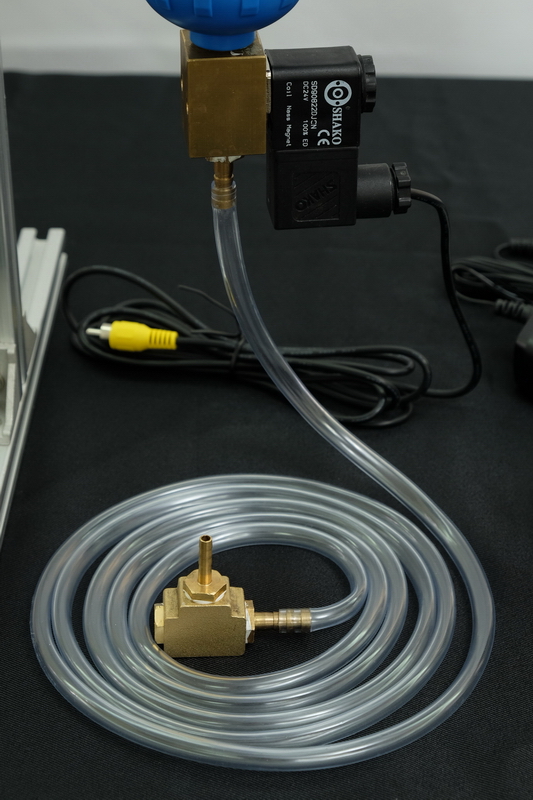
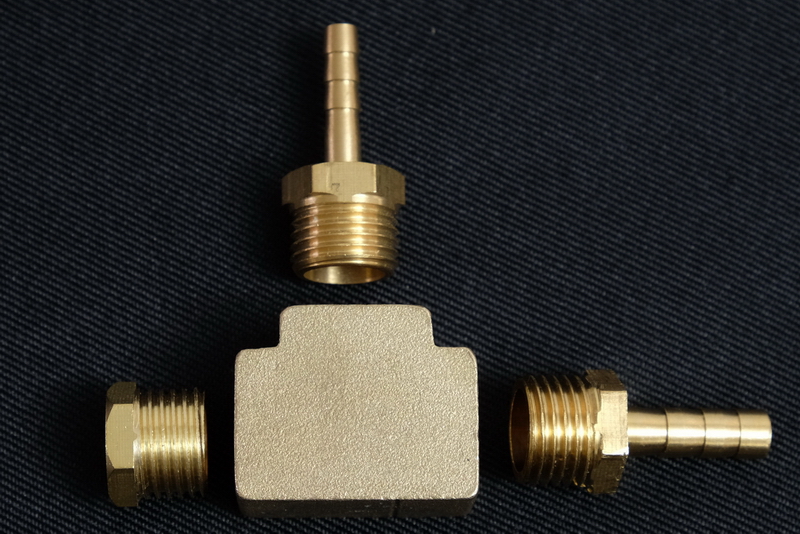
A 4mm barbed nozzle with a 2mm opening is included in the set. The nozzle is attached to the 3 way block which in turn is connected to the valve with the 8mm PVC pipe.
2 metres of 8mm pipe is included in the set. This is the larger thickness tube and fits the 6mm nozzles. 2 metres should be more than enough to allow you to experiment with different types of set up and nozzle position.
The 4mm nozzle connects to the 3 way block pointing up. The 6mm nozzle is to the side and connects to the valve. A brass end cap is used to seal the third hole. When assembling, remember to use Teflon tape.
The nozzle can be used like this but it is likely to move around when drops are being created and it is better to secure it in some way.
You will need a small length of the 8mm tube to connect the bottles together.
A simple method to secure the bottom nozzle is to attach it to something that has a bit of weight such as some short pieces of 2020 extrusion.
Stainless steel nozzle set sold separately.
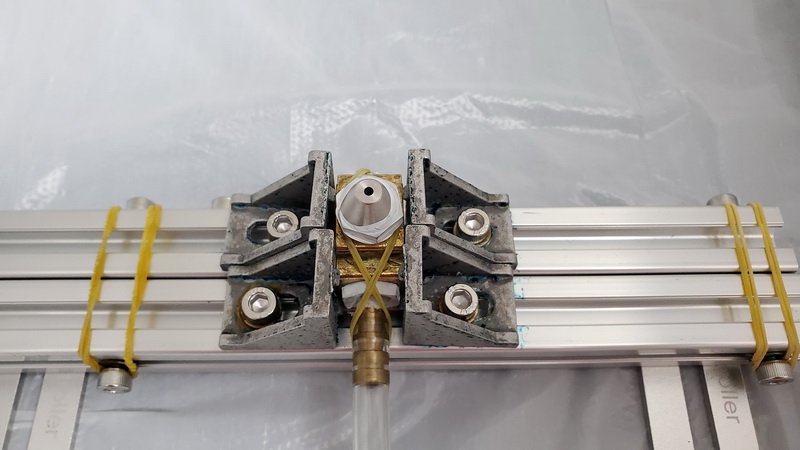
The dropController SFB bottom stand is a really nice solution. Available separately.
Teflon Tape
To get air tight seals, all threaded connections should have Teflon tape added. An air tight system means consistent pressures and will make controlling the pressure easier. If you have leaks you will find the pressure adjustments are not consistent. The only leak you want is from the ball valve.
Add the tape in the direction of the thread. All threads are in the same direction so once you have figured out the first one all the remaining ones are the same.

Wrap the tape so that the tail follows the twist direction when tightening.
If the tape is wound in the wrong direction it will bunch up when attaching the parts together.
Don’t forget to add Teflon tap to the bottle threads.
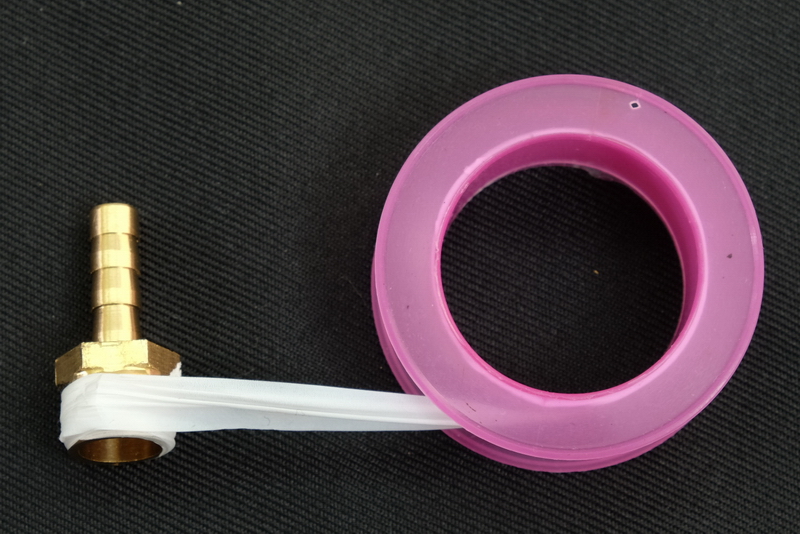
Don’t lose the silicon seal/grommet.
Quick Release Connector
The set contains 3 quick release connectors: 2 x x8/6mm and 1 x 6/4mm.
The 8/6mm connectors are used to connect the bottles together and the 6/4mm is used to connect the air pump.
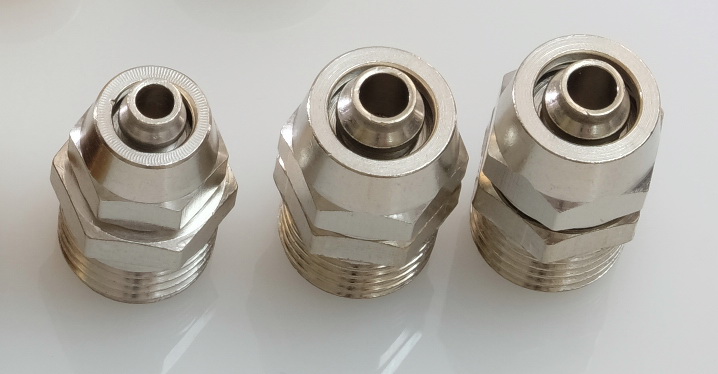
To attach the tube, take the top off the connector and feed the tube through the top.
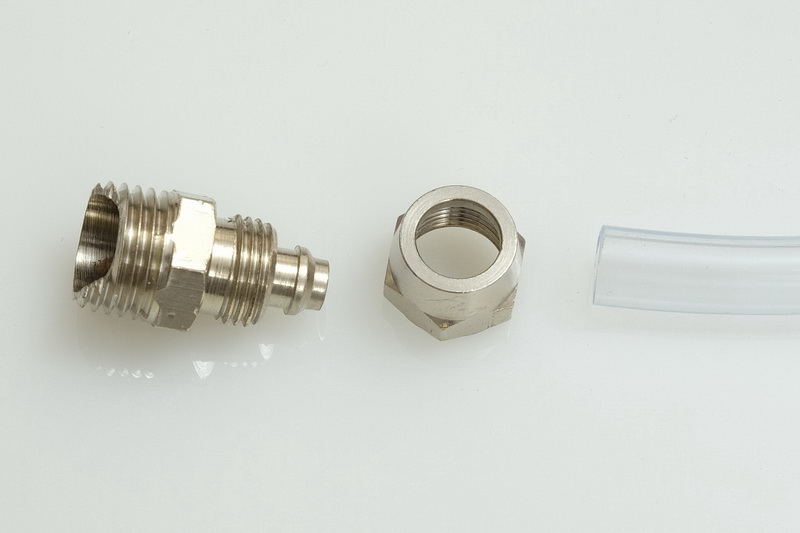
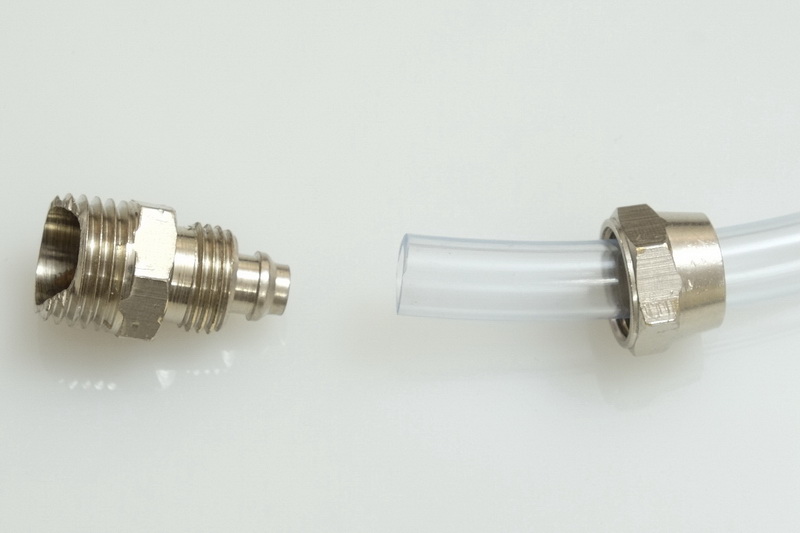
Push the tube on to the nipple and then tighten the top. The top does not need to be very tight. Hand tight should give an air tight connection.
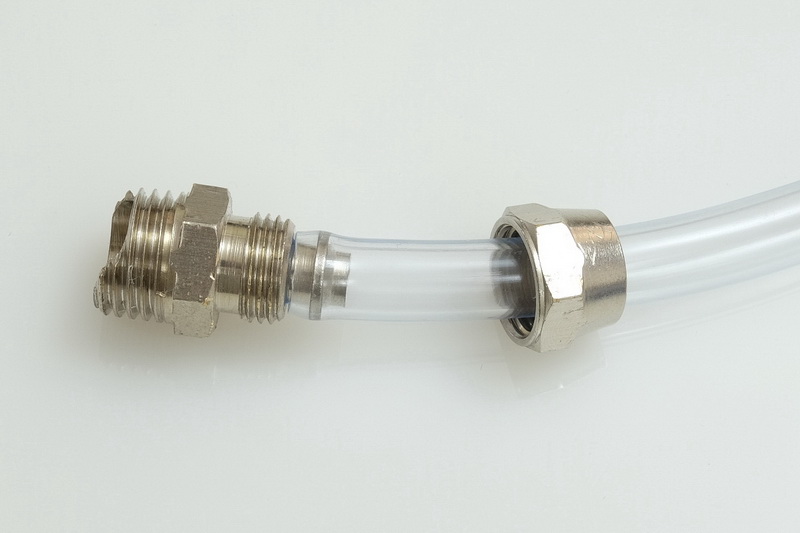
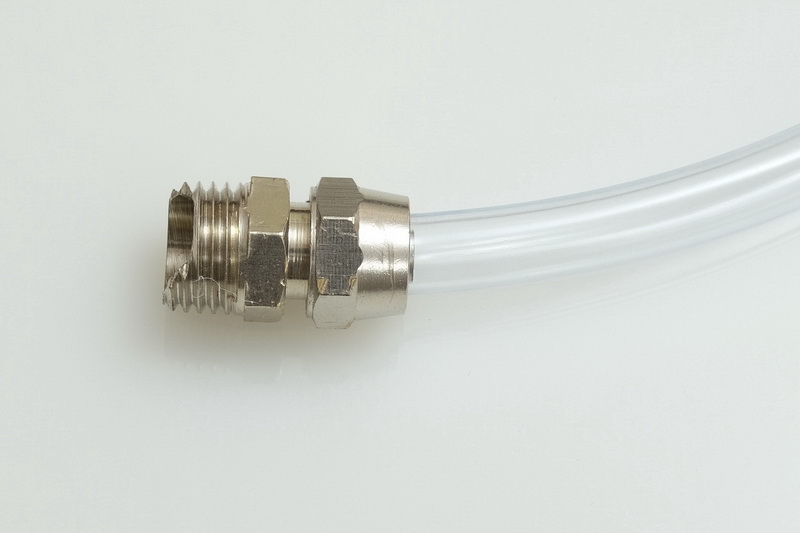
When attaching the connector to the bottle (and also the brass 4 way connector) remember to add Teflon tape.
Checking The SFB System
When you have the SFB system set up, give it a test and check for leaks.
Fully close the ball valve and turn on the pump. The pressure should rise to around 10 psi.
Wait a minute or so and then feel for leaks. If you find a leak, redo the leaking connection and try again.
When you are happy that there are no leaks experiment with the ball valve.
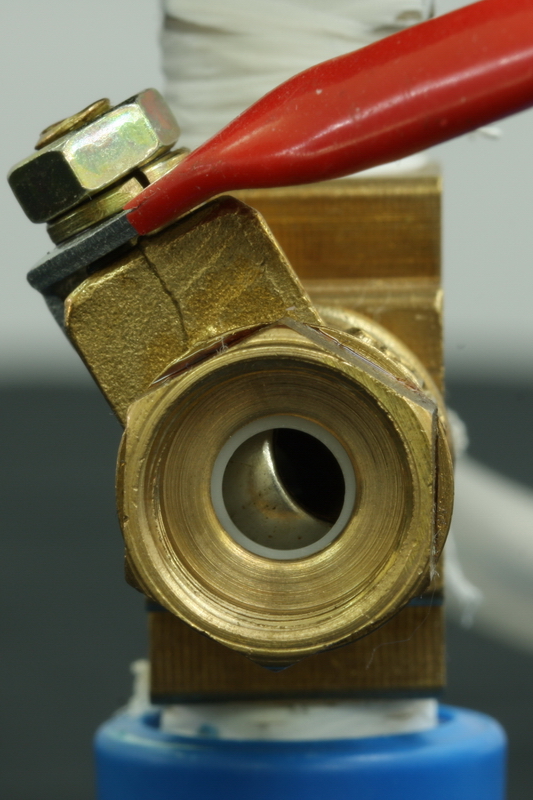

The amount of pressure used to generate the jet is controlled by the ball valve. The ball valve acts like a tap to control the air flow. Pressure is controlled by how much the valve is open and how much air is escaping. Maximum pressure is when the valve is fully closed. Minimum pressure (none) is when the valve is fully open.
When the ball valves are new they are a little stiff. This is normal. To loosen them work the handle back and forth a couple of times. Do not force the handle though.
Fine adjustments with the ball valve can be a little tricky and it may take a few attempts to get the exact pressure you want.
When using fairly low pressures the ball valve is only open a tiny bit.
It is hard to tell from the above photo that the valve is slightly open, however, if you were to put your hand next the valve you would feel air escaping.


Start with low pressure jets and work up. Experiment to determine what pressure produces what size jet.