If you have used dropControllerV3 then the V4 app will be very familiar. If not, read on.
Note: This is an overview or reference for all the controls. It is not a guide to using the app and if that is what you are after a better place to start are the Getting Started Guides.
App Overview
The dropControllerV4 webapp has five main pages
- Drop Control
- Settings
- Drain
- Graph
- About
Of these, the Drop Data, Settings, and Drain Page are the most important.


There are two more pages buried deep inside the app. They are
- Loop Page
- Update Page
Screen shots are taken from a mobile phone. The format of the app changes to suit the device being used.
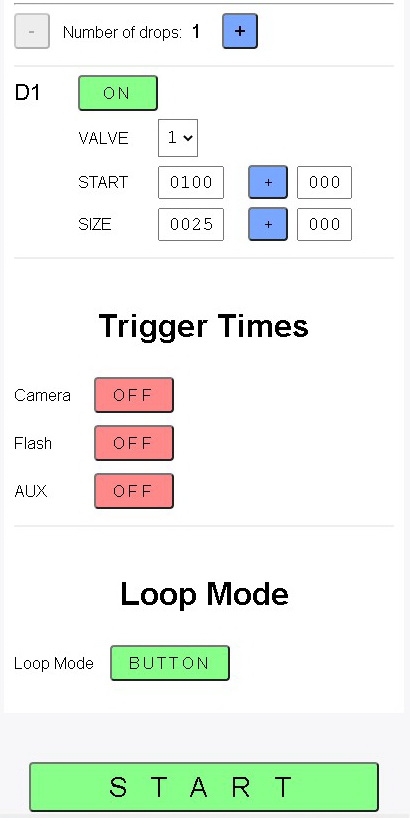
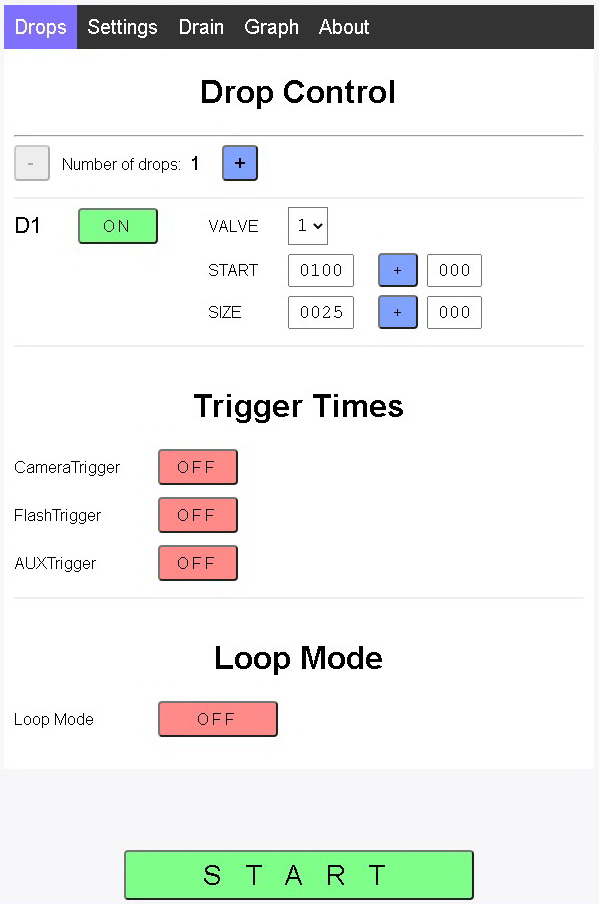
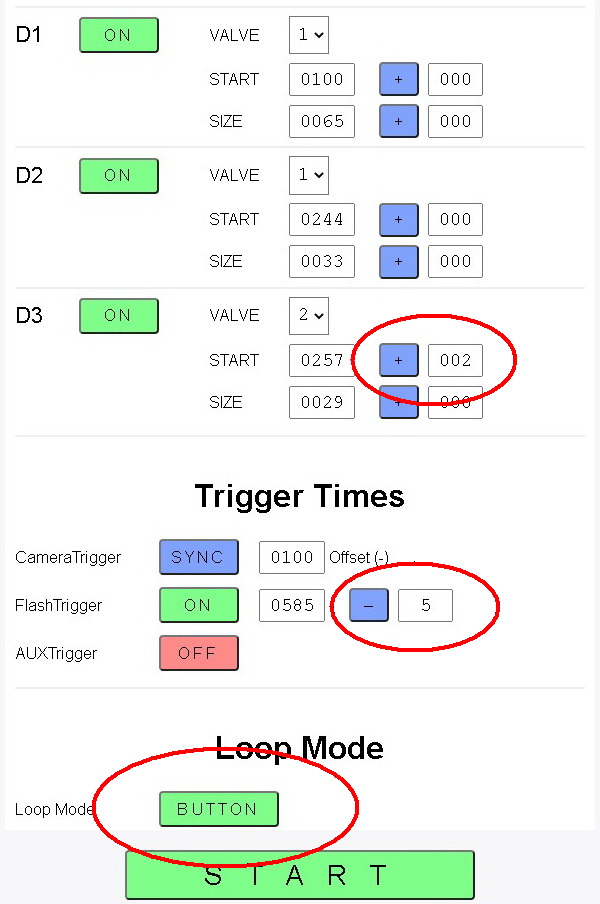
Drop Control Page
The Drop Control Page is the main page in the app. This where most of the action takes place.
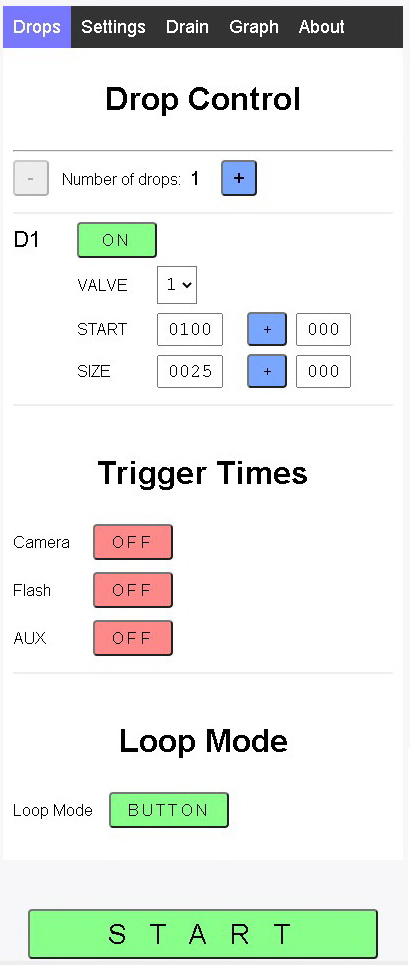
There are three sections
- Drop Data
- Trigger Times
- Loop Mode control
and a couple of minor sections
- add/remove drops
- START

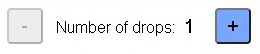
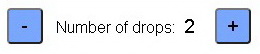
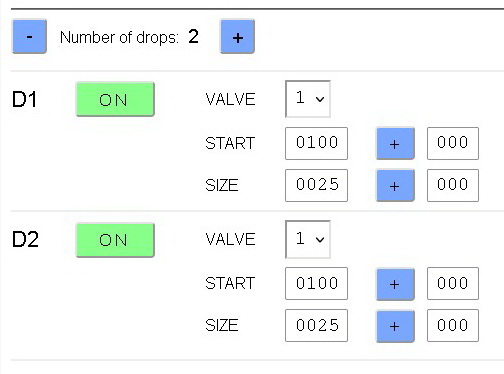
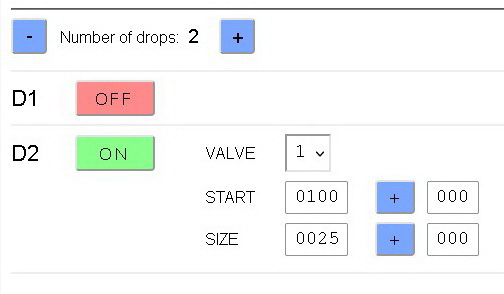
Add/Remove Drop
Clinking the  ADD button adds a new drop, and clicking the
  REMOVE button, removes the bottom drop.
When a new drop is added the controls for the new drop appear, as if by magic, in the drop data section.
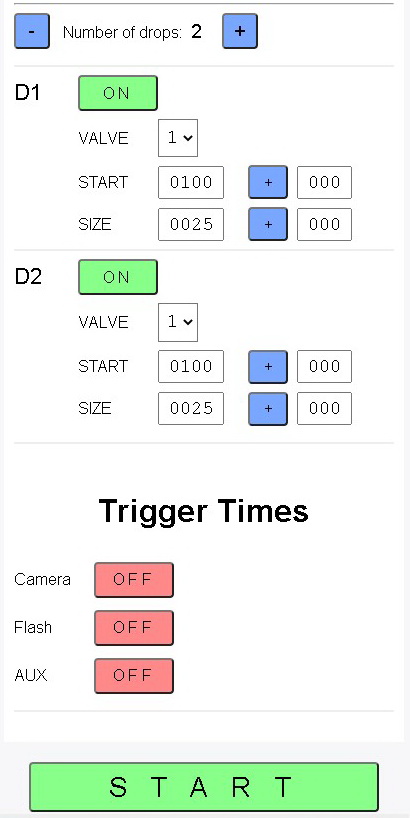
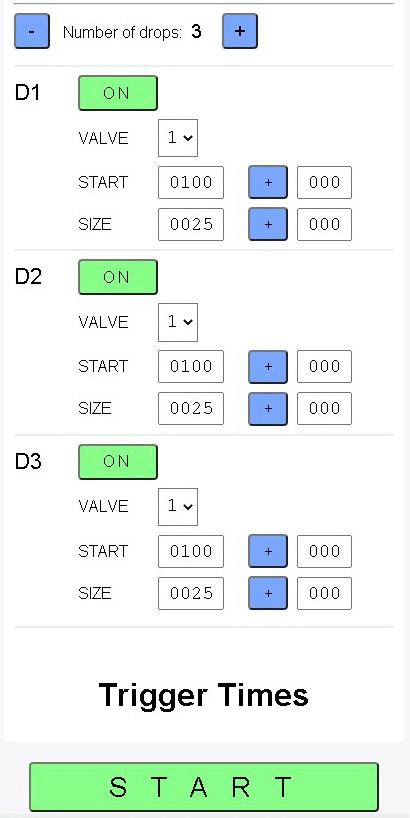
and when a drop is removed it disappears.
Note:
You cannot go below 1 drop.
The drop settings are remembered when the drop is not visible / not active.
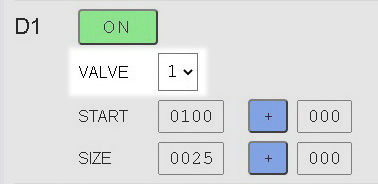
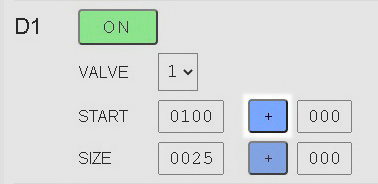
Drop Properties
Each drop has several properties. Some properties, like the start time and size are basic, others, like the delta values, are more advanced.
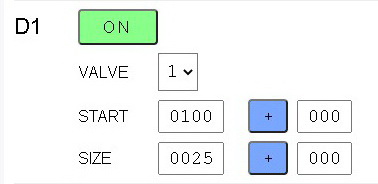
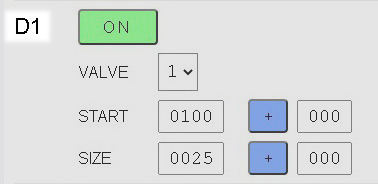
Drop Number
D1, D2, D3, etc
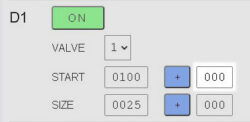
ON/OFF Toggle button
Turns the drop On and Off. Inactive drops are ignored.
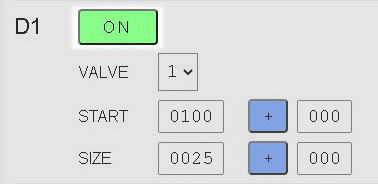
Valve Selector
Select the valve to use for the drop. Range is 1 to 8 and matches the valve port number on the back of the dropControllerV4.
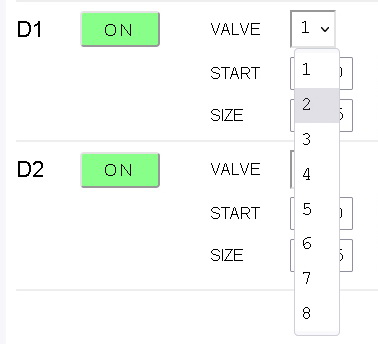
Select which valve port to use for Drop 1.
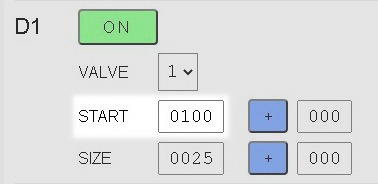
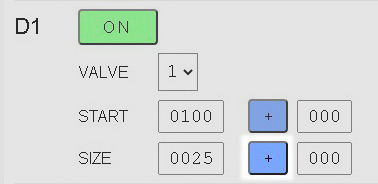
Start Time
The time is in milliseconds(ms).
There are 1000 ms in a second.
Start Time delta Control
There are 3 states: [+, -, ø].
+ = add.
– = subtract.
ø = OFF


The Delta Control Button cycles the setting: + => – => ø
Start Time Delta Value
The value is in milliseconds (ms).
When using Loop Mode, this is the amount of time to either add to or subtract from the Start Time.
When zero, the Delta Value has no effect.
Delta values are used to change the drop times when using Loop Mode. They can be used to change many of the drop values such as the drop Start Time and the Drop Size. Delta values can also be used to change the shutter trigger time and the flash trigger time. More on using delta values later.
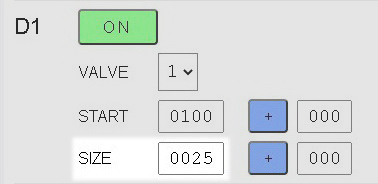
Size
The size is measured in milliseconds (ms) and throughout this guide (and indeed whole website) I use milliseconds when referring to the size.
Size Delta Control
There are 3 states: [+, -, ø] and the control works in the same way as the Start Time delta Control.
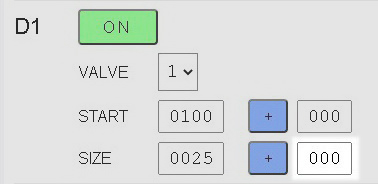
Size Delta Value
The value is in milliseconds (ms).
This is the amount of time to either add to or subtract from the Size. When zero, the Delta Value has no effect.
Loop Mode and delta values are covered in detail at dropControllerV4: Loop Page and Delta Values
Trigger Controls
There are three trigger controls
- Camera shutter
- Flash
- Auxiliary
Each trigger can be turned ON or OFF using the ON/OFF toggle control button.
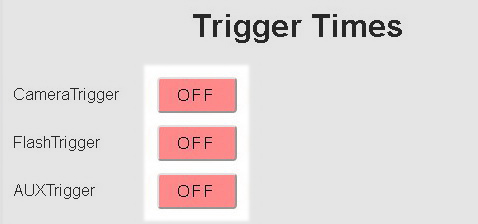
Clicking the ON/OFF button enables or disables the trigger.
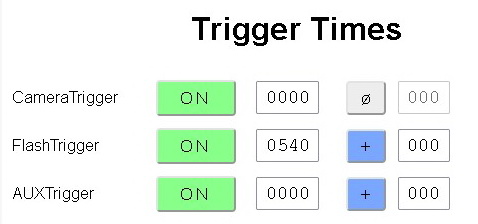
When enabled, each trigger has several properties
- Tigger Time
- Delta Control
- Delta Value
Camera Trigger
The Camera Trigger is a dual channel trigger that has a signal for the shutter and the focus.
The Camera Trigger has several settings
- OFF
- ON
- SYNC
- BULB
OFF

The shutter & focus triggers are disabled.
ON

The shutter trigger is active and will fire at the time set.
When ON is selected the Camera Trigger has 3 controls: the Trigger Time, Delta Control, and the Delta Time.

Trigger Time in ms.

Delta Control button.

Delta Time
The Camera delta settings work in the same way as the delta settings for the drop Start Time and the drop Size. There are 3 possible settings; +, -, ø
+ = add.
– = subtract.
ø = OFF.
The Delta Control Button cycles the setting + => – => ø
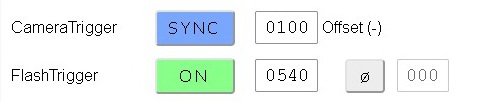
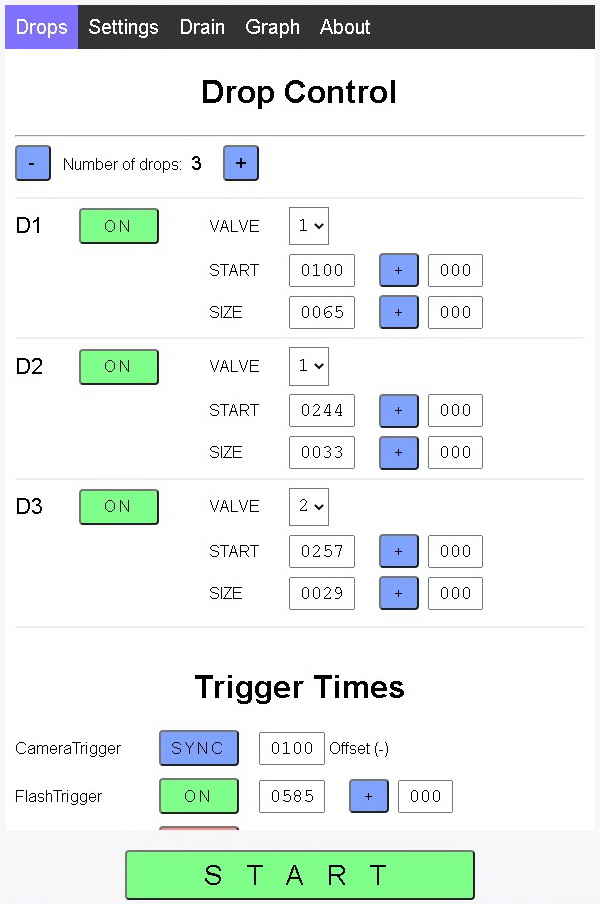
SYNC
In SYNC Mode, the Shutter Trigger time is sync’d to the Flash Trigger time. The offset time is used to trigger the shutter before the flash. The offset time is how long the camera takes to fully open the shutter.
SYNC is intended for use when the flash is connected directly to the dropController. When the flash is connected to the camera, SYNC has no effect.
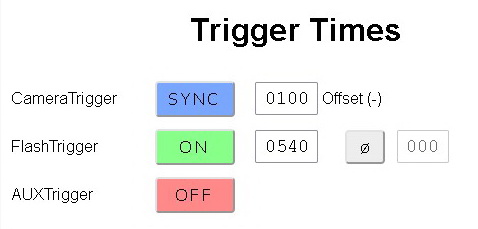
In this example, the offset time is set to 100ms and the Flash Trigger Time is set to 540ms. This means the shutter will open at 440ms (540 – 100 = 440). Remember to set an appropriate shutter speed on the camera.
SYNC Mode allows you to set the Camera Trigger and forget it. The only thing you need to take care of is the shutter speed on the camera.
The Shutter Trigger Time cannot go below 0. If the offset time takes the Shutter Trigger Time below 0 it is automatically set to 0. This can be a gotcha when the Flash Trigger time is fairly small. For example, if the Flash Trigger time is set to 100ms and the SYNC offset is set to 150ms, the Camera Trigger time will be -50ms, can’t have a negative trigger time so it defaults to 0ms. To avoid this issue add a base value to the start times. Instead of using a start time of 0, use 100ms or even 1000ms. You may notice that I always start at 100ms.
The environment you are working in (how light/dark), and how you are triggering the flash (on camera or by the dropControllerV4) all play apart in working out the best shutter speed to use. The only thing that really matters is that the shutter is open when the flash fires.
For a more detailed look at SYNC mode and an example on how to find the shutter lag using the dropController have a look at Camera Trigger SYNC Mode
BULB

In BULB Mode the shutter is opened at the very beginning of the sequence (usually 0ms) and closed at the end of the sequence plus the offset time. The end is the last event to take place either the flash trigger or a drop.
Here the BULB offset is set to 100ms. This means the shutter will close 100ms after the last event. Remember, the last even can be a drop, not just the flash.
BULB mode can mean the shutter is open for a fairly long period of time and is best suited when working in a dark environment.
The camera has to have a BULB function and have BULB selected for Bulb Mode to work.
Focus Trigger
The focus signal can be turned off in the Settings Page.


Some cameras (like my ageing Canon 40D and some Sonys) require the focus signal to be active in order to activate BULB mode on the camera. If your camera does not require the focus signal you can turn it off.
Flash Trigger
The Flash Trigger can be turned ON or OFF.
When the Flash Trigger is ON there are several properties; Trigger Time, Delta Control, delta Time. These are the same as as with the drop times and Camera Trigger.
The Trigger Time is the time the flash will fire. The Delta Control determines if the Delta Value is added or subtracted or ignored.
+ = add.
– = subtract.
ø = OFF.
The Delta Control Button cycles the setting + => – => ø
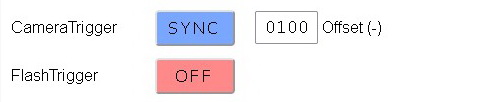
One thing to be aware of. When the Camera is set to SYNC and the Flash trigger is OFF, the camera trigger is inactive. You can’t SYNC to something that isn’t.
Auxiliary Trigger
The Auxiliary Trigger is either ON or OFF and works in exactly the same way as the Flash Trigger.


The Auxiliary Trigger can be used as a secondary shutter trigger or secondary flash trigger.
Trigger Pulse Duration
The length of the trigger pulse is controlled on the Settings Page.
Note: This is the length of time the trigger signal is active. Not when the trigger is fired.
Loop Mode Control
Clicking the Loop Mode control button cycles through the various options
- OFF
- BUTTON
- TIMER

Loop Mode is off and Single Sequence Mode is used.

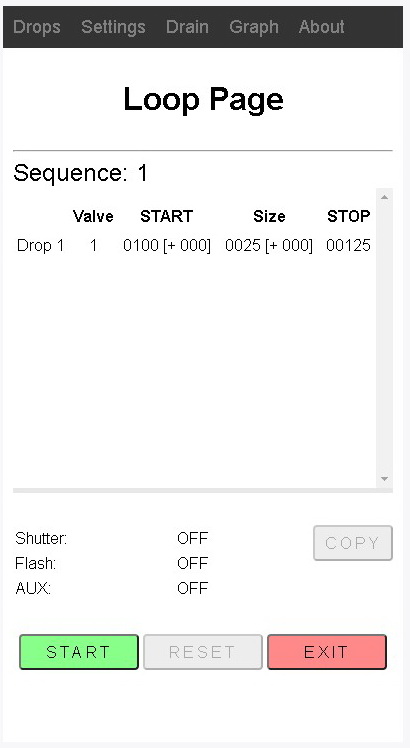
Loop Mode is active. To start each drop sequence the Loop Page START button has to be clicked.

Loop Mode is active and a timer is used as a delay between sequences.
The first drop sequence is started by clicking the Loop Page START button and then subsequent sequences are started when the TIMER reaches 0. The TIMER time is in seconds,
Loop Mode is covered in full at dropControllerV4: Loop Page and Delta Values
START Button

The START button tells the app to send the drop data to the dropControllerV4 device and make the drops. Depending on which mode you are using, Single Sequence Mode or Loop Mode, different things happen.
The START button tells the app to send the drop data to the dropControllerV4 device and make the drops. Depending on which mode you are using, Single Sequence Mode or Loop Mode, different things happen.
Single Sequence Mode
When the START button is clicked, the drop data is sent immediately to the dropController and the drops are created straight away.
Loop Mode
In Loop Mode, the Loop Page opens and waits for the user to start the sequence.
Single Sequence Mode
When Loop Mode is OFF, the app is in Single Sequence Mode. In Single Sequence Mode a single drop sequence is created
On clicking the START button, the drop data is sent to the dropController. While the drop sequence is active the START button changes to ACTIVE. When the sequence is complete the START button will change back to START.

In Single Sequence Mode delta values are ignored.
Loop Mode
Loop Mode is covered in full at dropControllerV4: Loop Page and Delta Values
Settings
The Settings Page has a few settings that you should only need to change once or twice and then forget about.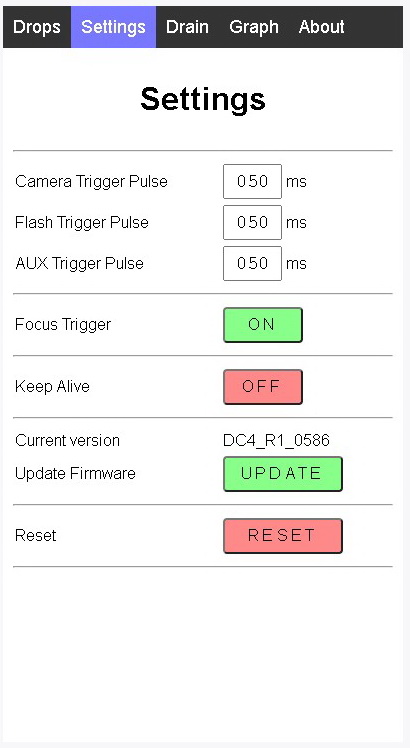
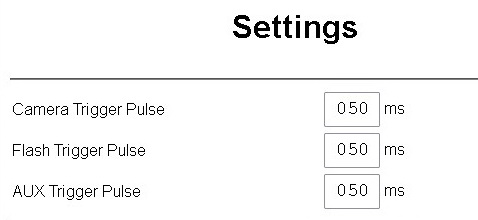
Trigger Pulse Time

The trigger pulse duration for the three different triggers can be set independently. When a trigger fires, the dropController sends a signal to the attached device (camera or flash). The pulse duration is the amount of time this signal is active.
50ms is a good place to start and for most equipment you will not need to change it. If you do have some issues, such as the shutter not firing reliably, increase the trigger pulse time, for example, to 100ms.
Focus Trigger
![]()
The camera trigger is actually two triggers in one. One trigger for the shutter and a second trigger for the focus. For the vast majority of cameras the Focus Trigger is not required to activate the shutter, however, some cameras, like my old Canon 40D will not activate BULB when triggered remotely without the Focus Trigger. In most cases you can set it to OFF.
Keep Alive
![]()
Keep Alive is an experimental setting designed to help keep the screen awake on mobile devices. The setting is highly dependant on the device in use though. Most mobile devices will follow the screen timeout period set in the device and turn the screen off after a short period of inactivity.
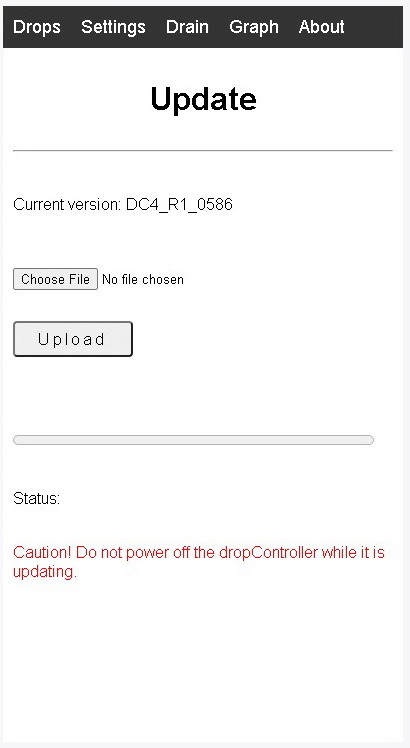
Firmware Update
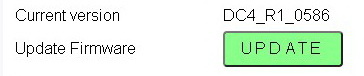
The version number for the current firmware is displayed above the Update button.
Clicking the Update button opens the Update Page. See dropControllerV4: Updating The Firmware
New versions of the firmware will be available on the Download page on the dropController website
Load / Save Drop Data
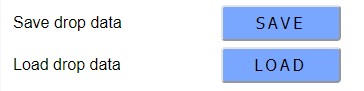
SAVE saves the current drop data. LOAD opens a previously saved drop data file.
The drop data is saved using a plain text file.
The dropController saves the last used drop data internally when powered off and reloads the previous data when first started.
Load/save was introduced with
- dropControllerV4 – firmware version DC4_0620R
- dropCrontrollerV4-mkII (8 & 16) – firmware DC4mkII_025R
Reset
![]()
Clear all saved data and resets the drop data and settings to the defaults.
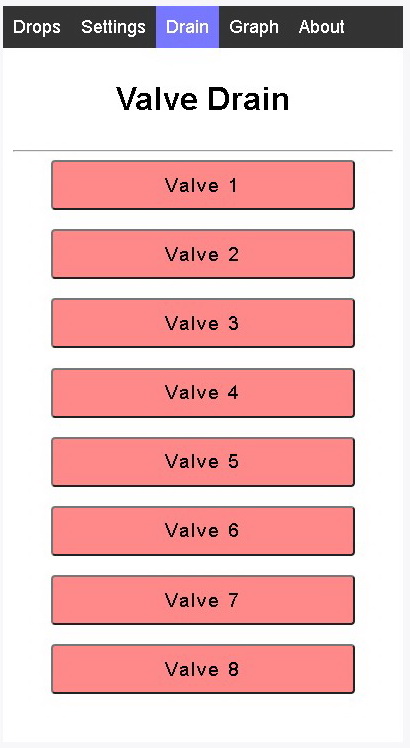
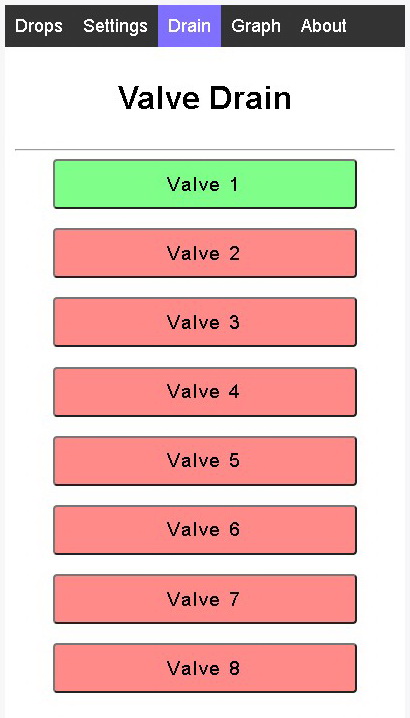
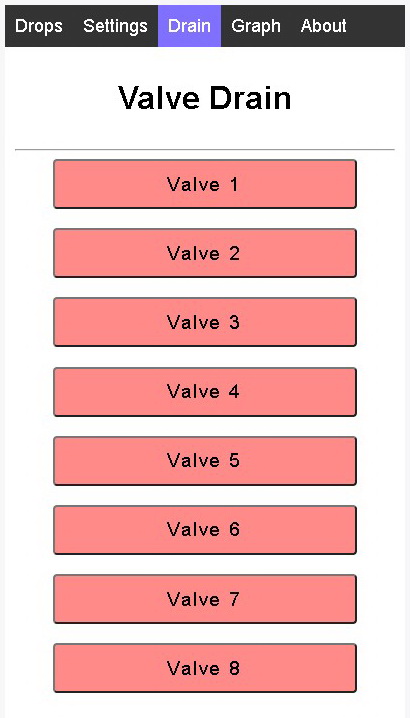
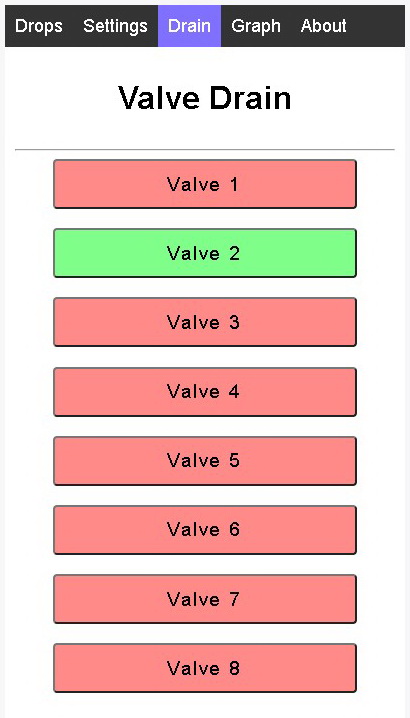
Drain Page
The Drain Page has simple On/Off controls for each valve port. This allows for draining and cleaning.

Clicking on any of the buttons opens the associated valve port. Clicking again closes the valve.
Note
Open valves are automatically closed when leaving the Drain Page.
The app does not know if a valve is attached to the valve port or not.
Valves can also be opened using the Manual Drain function on the dropController device.
The newer firmwares have an auto time out that closes open valves after a specific period.
Many solenoid valves are not designed for continuous use and can become hot when left active for long periods of time. The auto close function is a just-in-case you forget to close a valve.
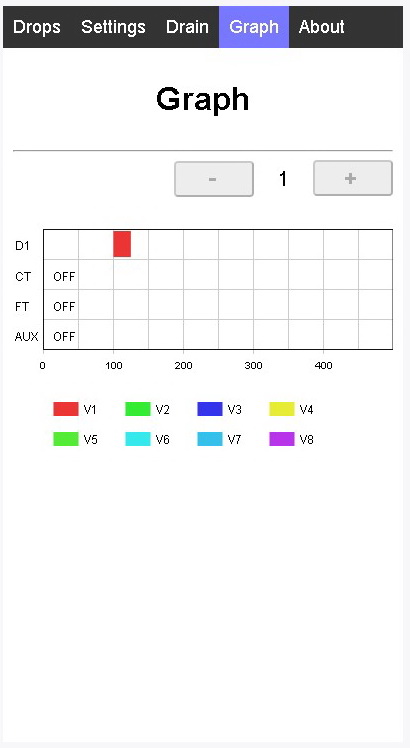
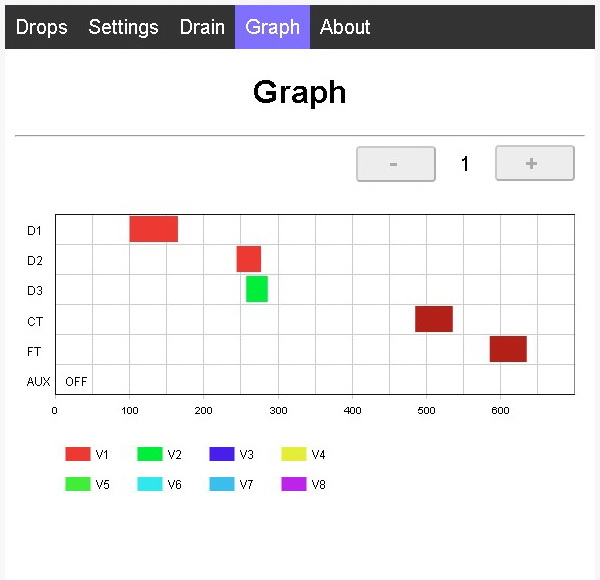
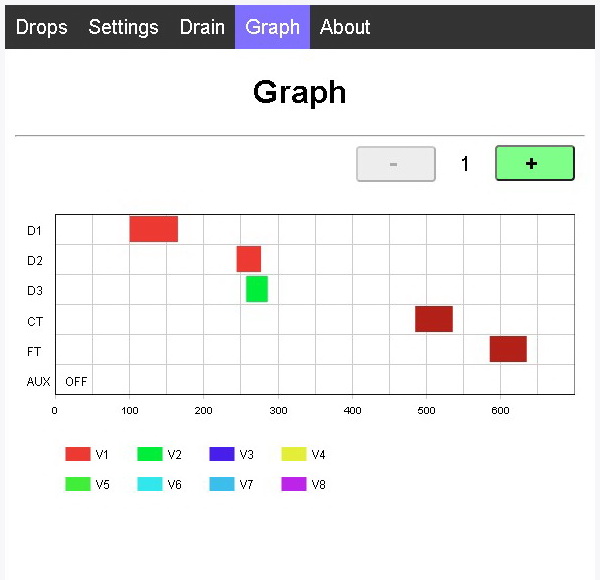
Graph Page
The graph offers a simple way to visualise the drop times. You may or may not find it useful.
On first using the app, if you jump to the Graph Page there will not be much to see. Only one drop and no triggers.

Add a couple more drops and the triggers and things get a little more interesting (only a little though).
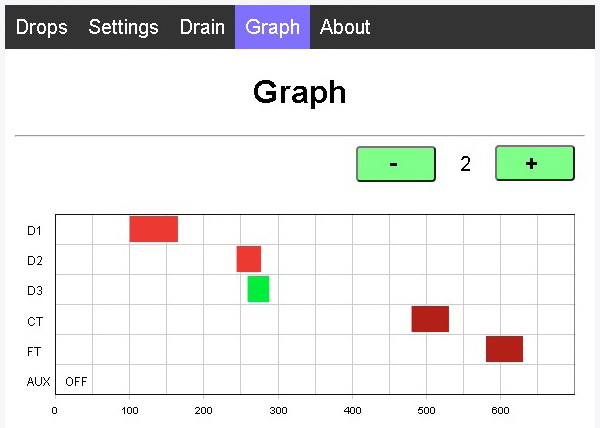
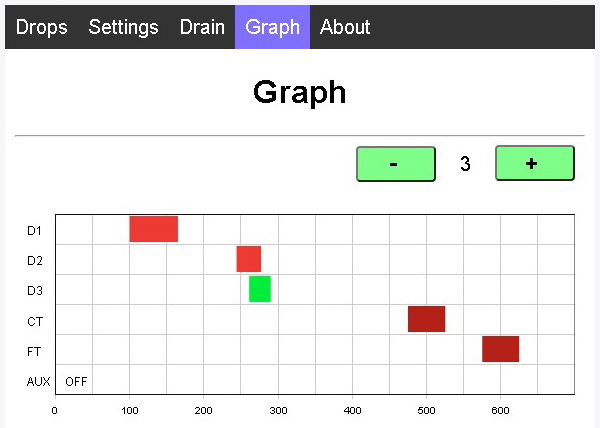
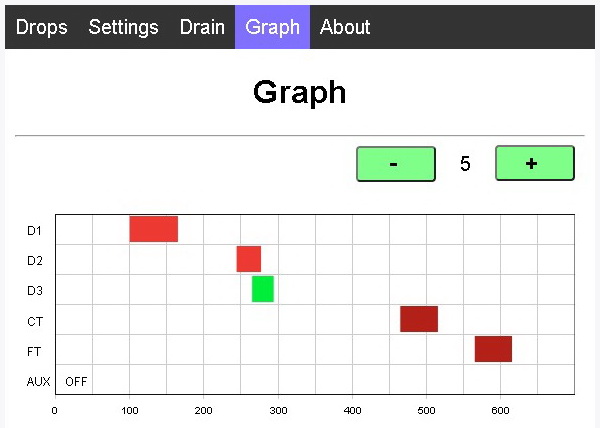
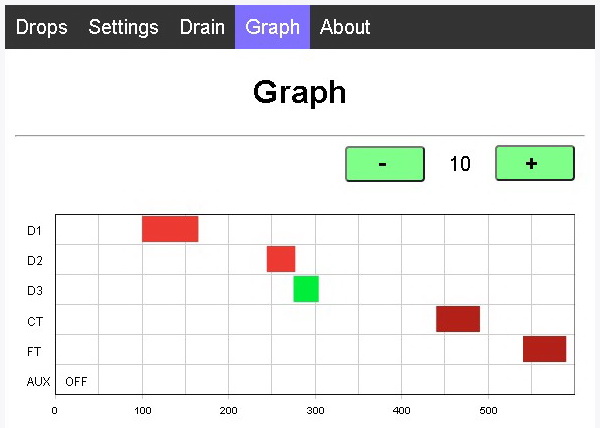
When Loop Mode is active, the effects of delta times can be seen by using the – and + buttons. The – and + buttons are only available when Loop Mode is ON
The buttons increase and decrease the sequence number allowing you to see what effects (if any) the delta values have.
Use the + and – buttons to see what happens as the drop sequences progress.
If you look closely, you can see the Start Time of drop 3 increases. A little more obvious is the Flash trigger time moving.

About Page
Serves no real function except a link to the website.