It is very possible to start drop photography with a single valve and with the use of reflectors and mirrors I managed with one flash for several years (a long time ago). There comes a point though, when one flash is not enough and you want to add more.
You do not need expensive flash guns and certainly do need need TTL (manual is better for drop photography). A basic set of manual flash guns is more than suitable.
The best option, in my opinion, is a wireless system. This does not need to be the greatest and a simple manual system is all that is required.
Wired Flash Connectors
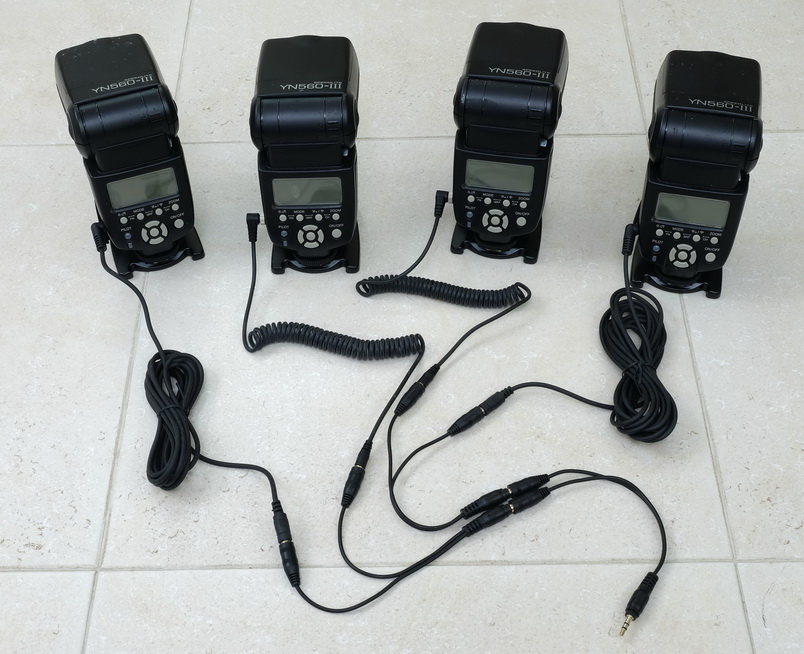
A key advantage of using wired connections is reliable and exact timing. With wires all the flash guns will fire at the same time, however, it also means wires which can get in the way.
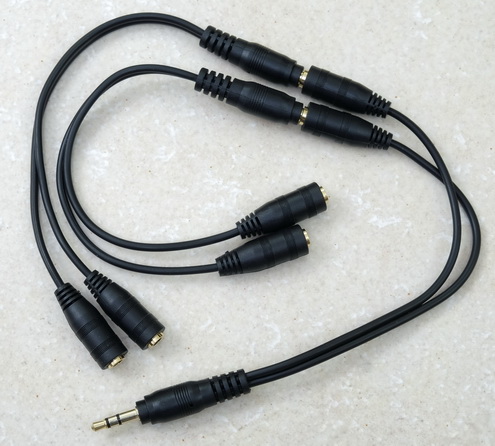
Y Connectors
Y Connectors/headphone splitters offer a cheap and easy way to link several flash guns together on a single trigger signal. Want to add more flashes? Just piggy back more Y connectors. A small caution. Y Connectors directly join all the flashes together and should only be used when the flash guns are all the same make and model (or have the same trigger voltage).

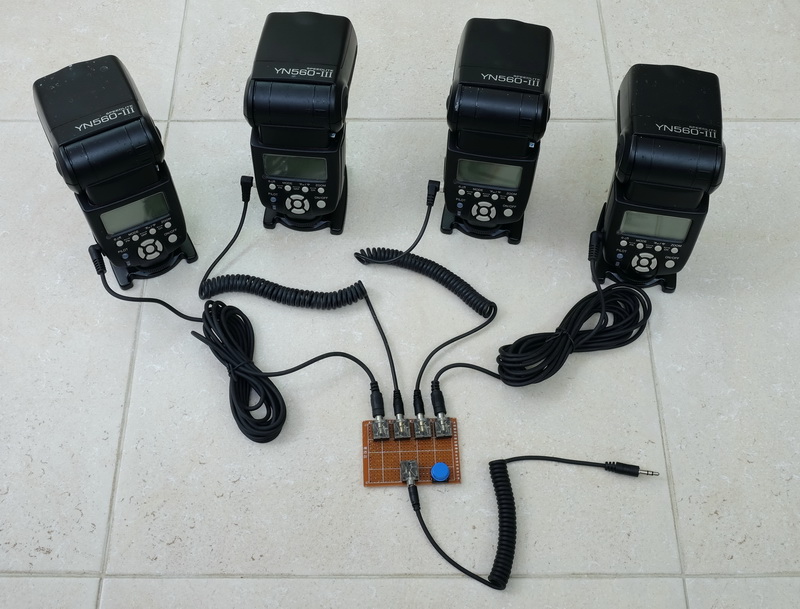
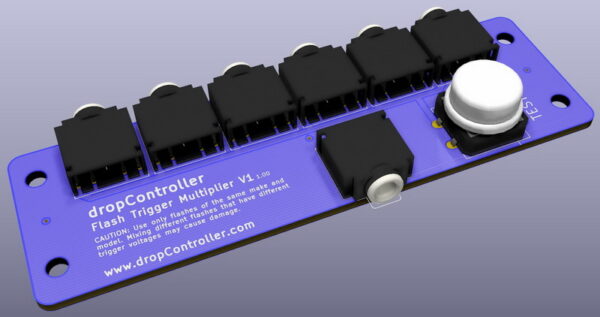
Flash Trigger Multiplier V1
I built a small flash trigger multiplier (1 in 4 out) on a small perf board. This has the same electrical connections as the Y Connectors and has the addition of a test fire button which comes in handy. Since the circuit is basically the same as for the Y Connectors the same cautions should be noted. This joins all the flashes together and should only be used when the flash guns are all the same make and model (or have the same trigger voltage).
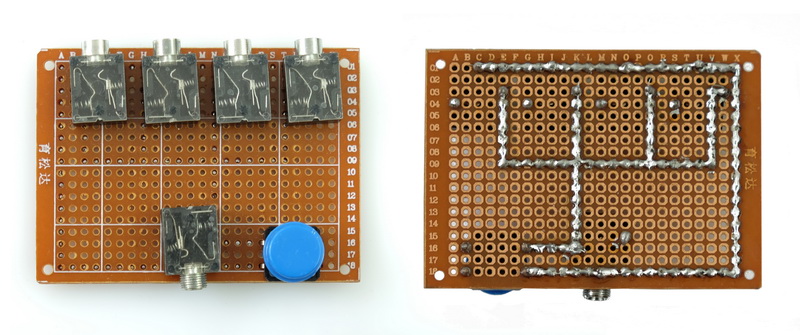
Flash Trigger Multiplier V1 PCB
KICAD PCB files for a 6 port trigger multiplier are available here.
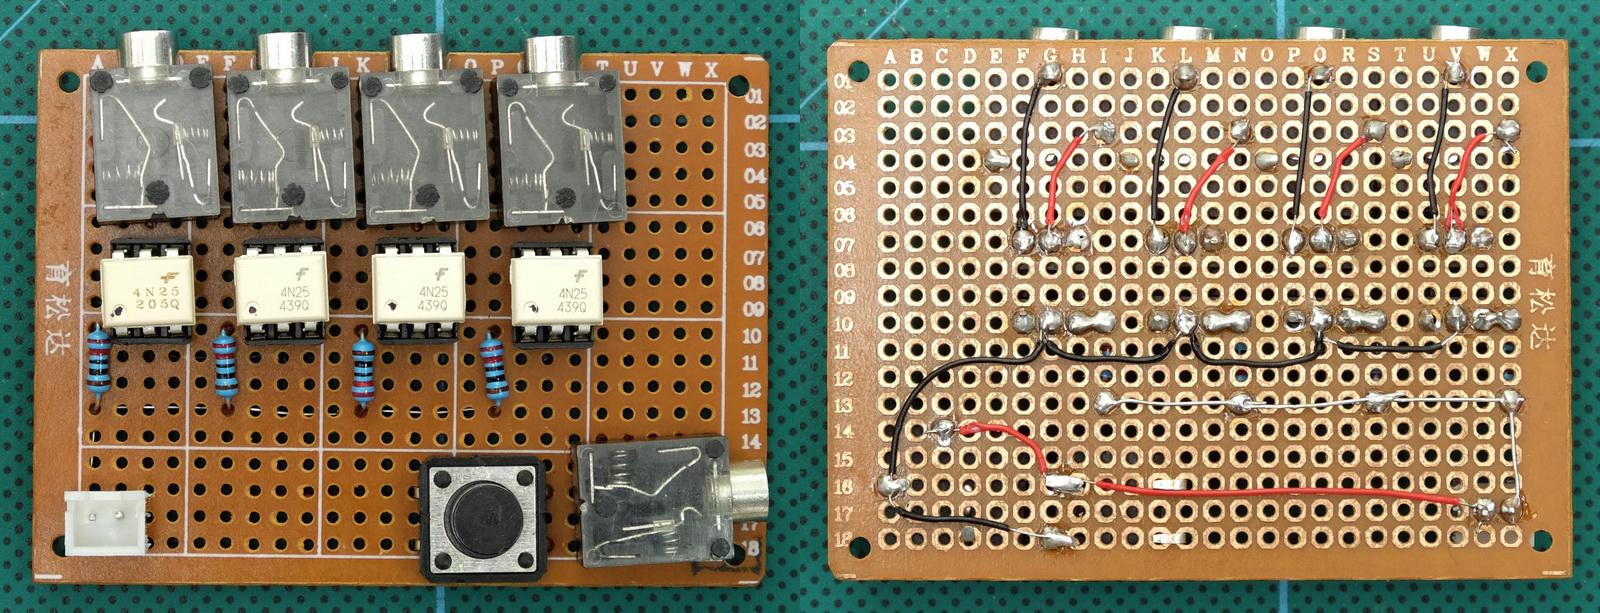
Flash Trigger Multiplier V2
I used version 1 for a while but found myself wanting to use different styles of flash at the same time (not for drop photography). The trigger voltages were a little different and wasn’t comfortable linking all the flashes together so I developed a version 2 of the Flash Trigger Multiplier. This one has opto-couplers to isolate the flash guns from each other. Unfortunately this means the circuit has to be self powered. In my case by batteries.
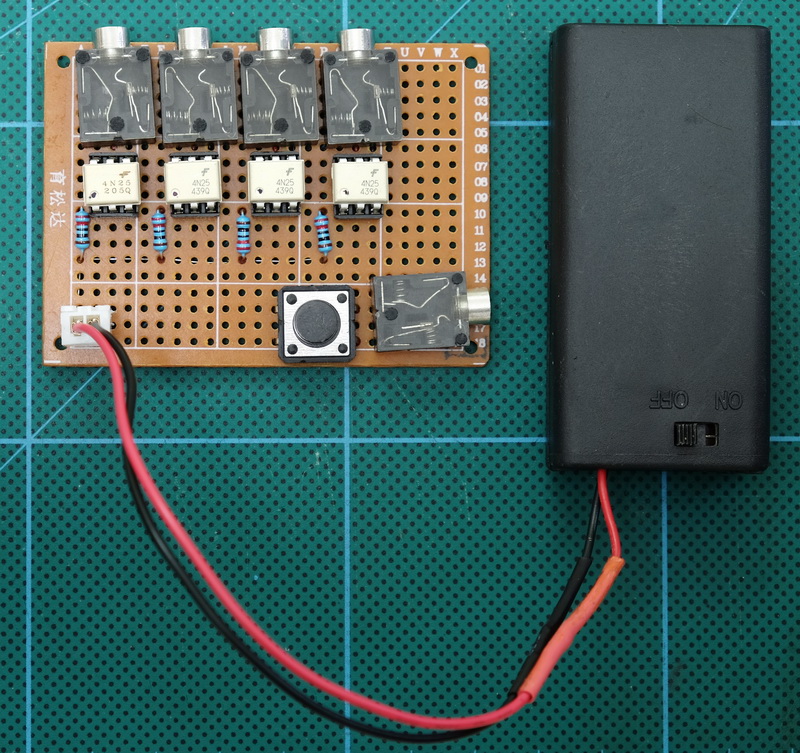
Flash Trigger Multiplier with 3V Battery Pack
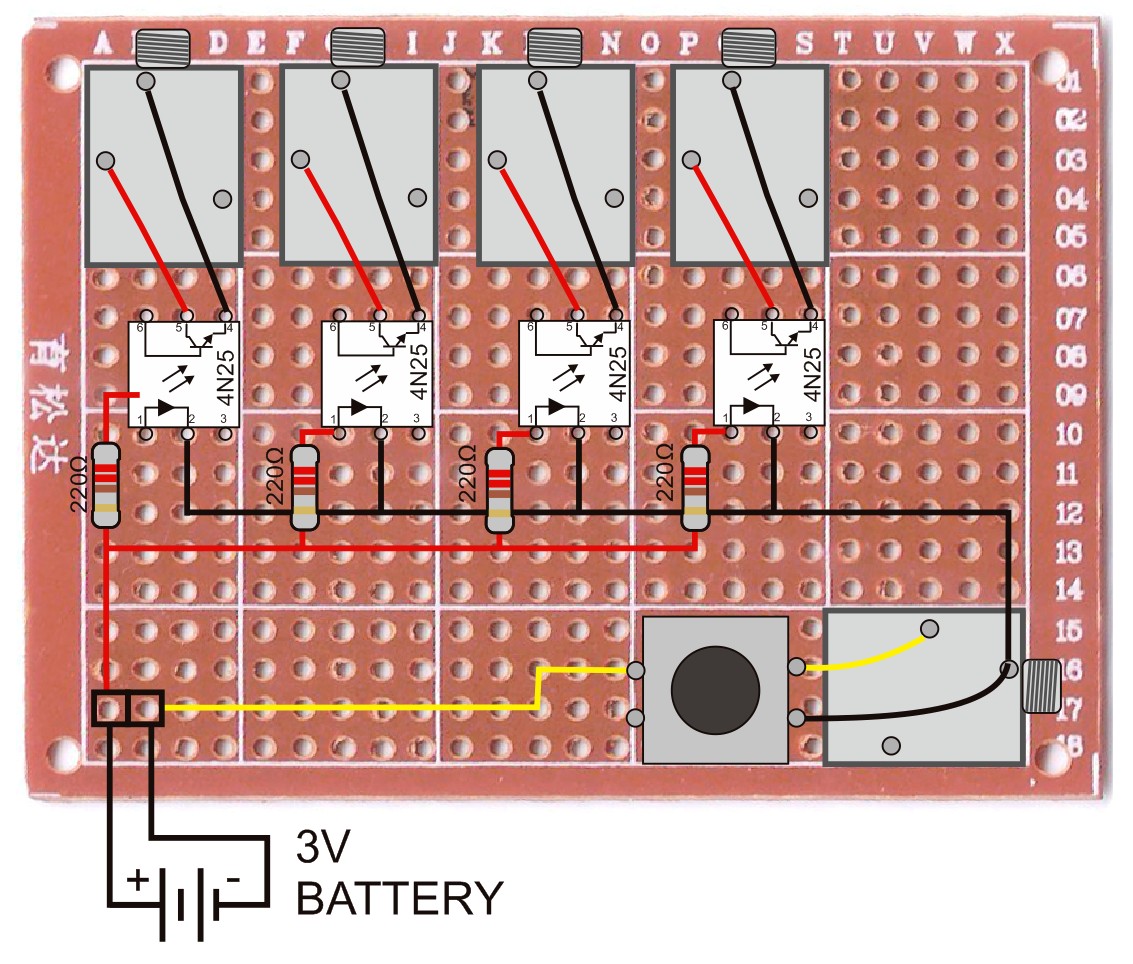
Resistor value.
The 4N25 has a forward voltage of about 1.5V and draws about 10mA. The power source is a 3V battery and so this means 150 ohm resistors can be used (if you want to know why, look up Ohms Law). I didn’t have 150ohm resistors so used the 220 ohms ones I did have.
Hot Shoe Adaptor
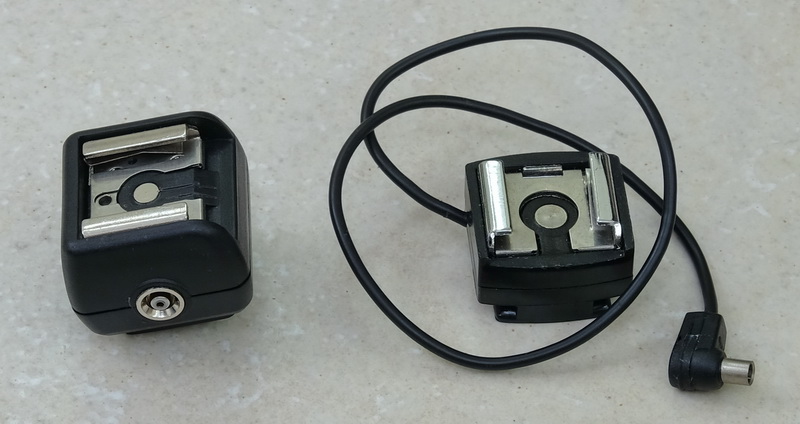
Most flashes have a wired trigger connector; either a traditional PC sync style socket or a 2.5mm or 3.5mm jack socket. If your flash guns don’t have a connection and you prefer a wired connection then hot shoe adaptors are available.
Note: The PC sync port on hot shoe adaptors is not always input, many, especially the ones designed for TTL have output only ports. Double check before buying. Most of the cheaper trigger trigger only (no TTL) adaptors, such as those above, have bidirectional PC sync ports.
Wireless
A wireless system is a little more difficult to set up than a wired one but after doing it a couple of times it becomes straight forward.
For a long time I only had 2 flash guns, 2 Speedlite 580EX IIs. I always wanted to add more flashes but couldn’t justify buying more Canon Speedlites (too expensive) so instead I went with the Yongnuo YN560-II flash guns. I bought a set of four with the trigger fairly cheap from the manufacturers taobao shop.
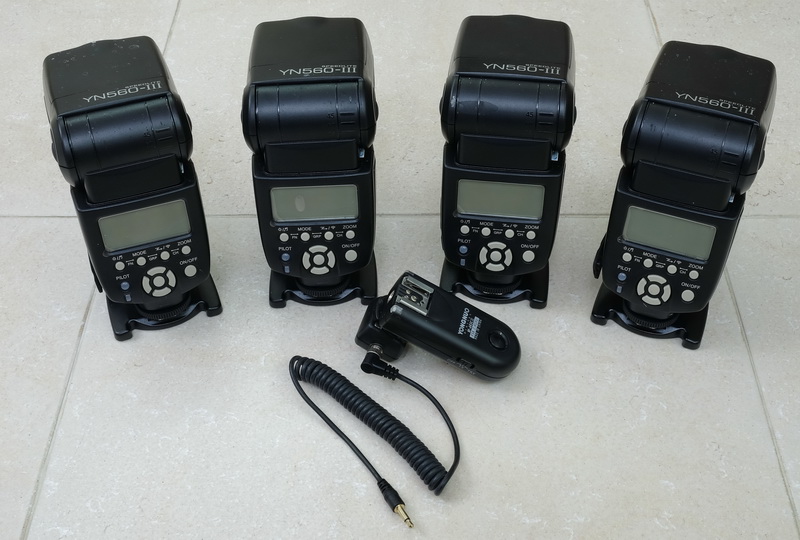
One of the main reasons for getting this model is that they have a wireless receiver built in, so to go wireless I just needed to add the RF-603CII trigger (this is the Canon compatible model). This set up is very convenient. I simply connect the wireless trigger to the dropController and turn the flash guns on. No more messing around with wires.
Small caveat. The remote trigger is designed for on camera use and the only trigger input is through the hot shoe connection. This means adding a hot shoe adapter.