When I first started I only had 2 flash guns and so to connect both of then to the dropController I use a simple head phone splitter/Y connector. This was quick and cheap but had a caveat. Using a headphone splitter connects the flash guns together in one circuit. If all your flash guns are the same make and model this is not a problem as they will all have the same trigger voltage. Headphone splitters should not be used when you have different flash guns, especially older models that may have higher trigger voltages.
To add more flashes just piggy back more splitters.

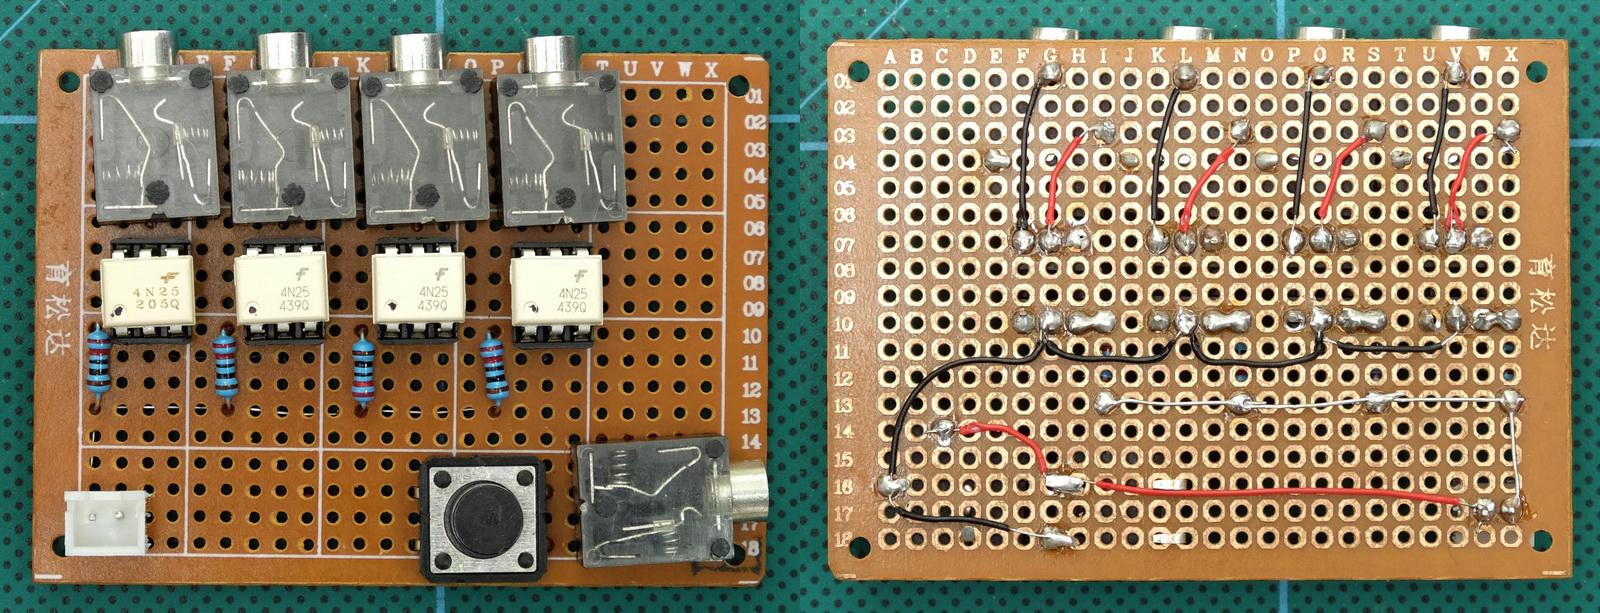
Flash Trigger Multiplier V1
I later built a better flash trigger multiplier that had one signal in and 4 out. To add a little bit of protection the device uses optocouplers. This means the output signal is not connected to the input signal and all flash guns are separate/not connected together. My unit uses 4N25s which switch on fairly quickly and can handle up to 30v on the output side.
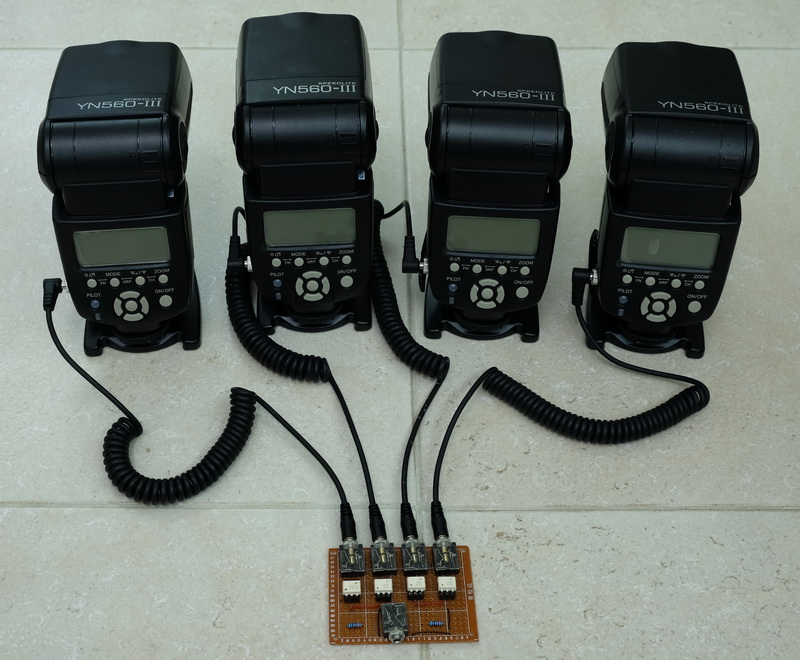
If you have older flash guns with higher trigger voltages a similar (but not identical) circuit can be built using transistors or optocouples + transistors. If using transistors you will need to use different resistors.
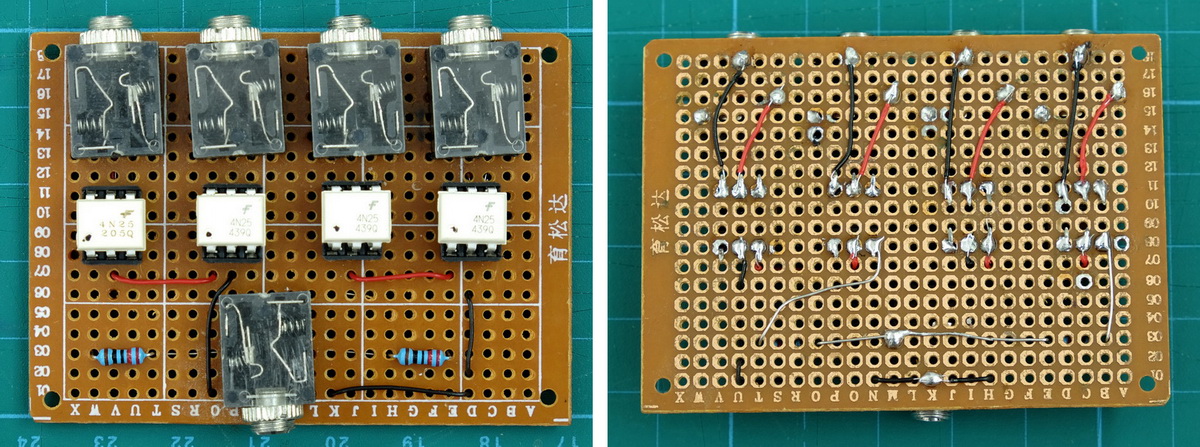
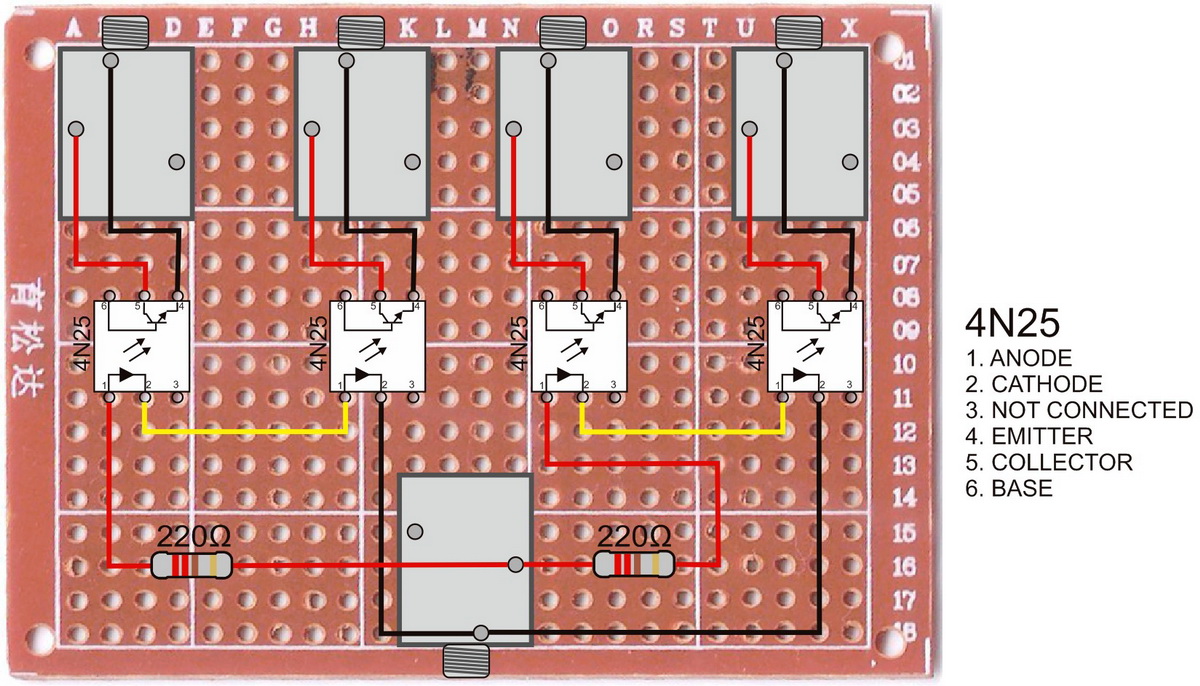
Diagram showing the connections.
Note that the input must be powered, it requires ~5V on the input, so cannot be connected directly to the dropController flash trigger, which is not powered. Extra circuitry is required or you can connect it directly to Arduino pin D12. Or more correctly, attach the 3.5mm socket directly to D12 and then use a headphone extesion cord to connect the flash trigger multiplier.
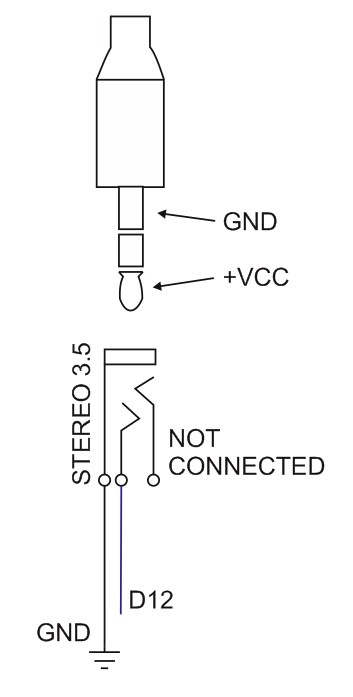 The flash trigger multiplier V1 requires an input voltage. To get this connect directly to Arduino D12
Flash Trigger Multiplier V2
Although version 1 works and I used it for quite a while, the design meant you could not use it with the dropController as published.
Version 2 added its own power, this it can be connected directly to the dropController flash trigger socket.
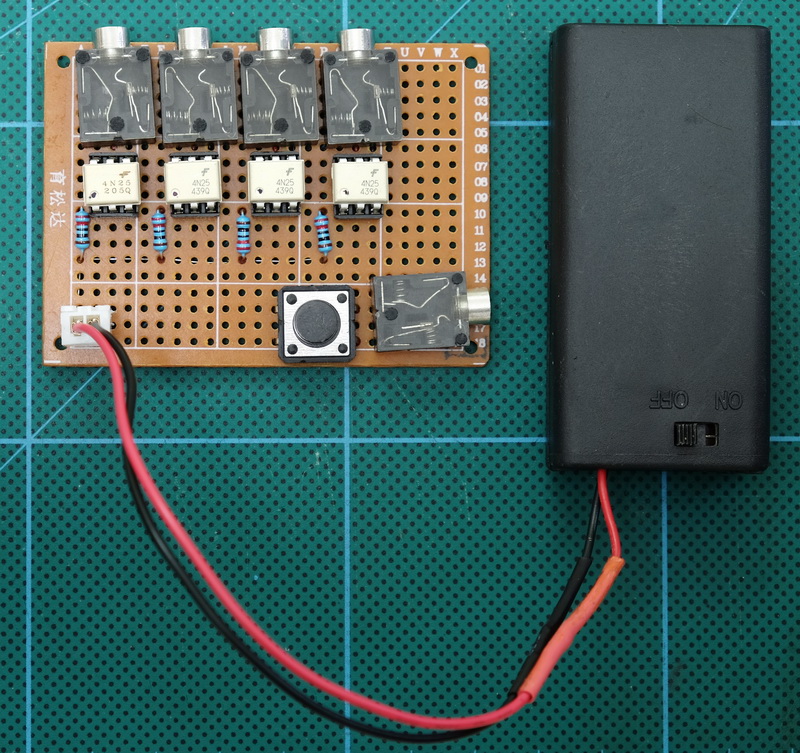
Flash Trigger Multiplier with 3V Battery Pack
The circuit is very similar to version 1 except;
– each 4N25 now has its own resistor
– there is a flash test button switch
– added a battery
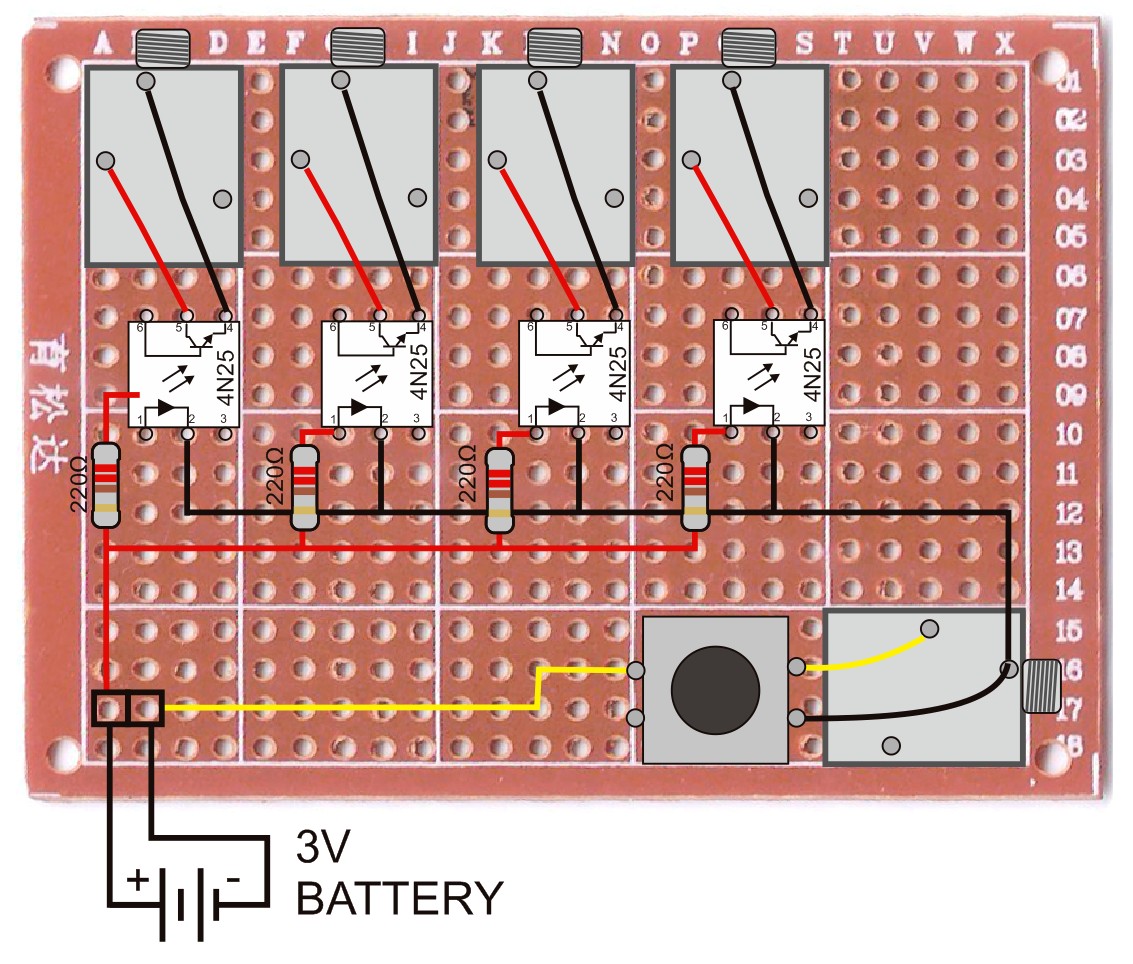
Resistor value.
The 4N25 has a forward voltage of about 1.5V and draws about 10mA. The power source is a 3V battery and so this means 150 ohm resistors can be used (if you want to know why, look up Ohms Law). I didn’t have 150ohm resistors so used the 220 ohms ones I did have.
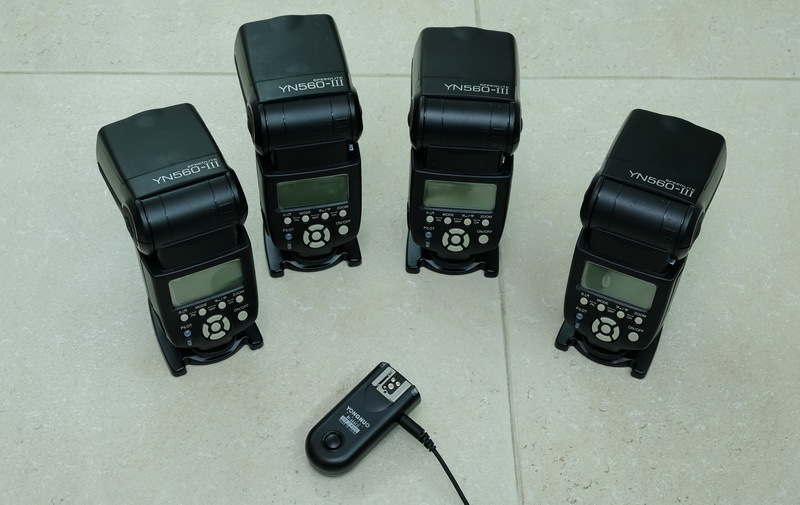
Wireless Triggers
For a long time I only had 2 flash guns, 2 Speedlite 580EX IIs. I always wanted to add more flashes but couldn’t justify buying more Speedlites (too expensive) so instead I went with the Yongnuo YN560-II flash guns. I got these fairly cheap from the manufacturers taobao shop.
One of the main reasons for getting this model is that they have a wireless receiver built in, so to go wireless I just needed to add the RF-603CII trigger (this is the Canon compatible model). This set up is very convenient. I simply connect the wireless trigger to the dropController and turn the flash guns on. No more messing around with wires.