This is experimental and no longer being developed. The code is written on the Arduino Nano using the ATMega 328 and may not perform well (or indeed work) on Arduinos that use others types of microprocessors. Only the Windows app is available.
Sensor Mode is a basic sensor trigger function that allows a camera or flash to be remotely triggered by some kind of event. This could be a noise, a light, an electronic trip wire, or a simple switch.
Two types of sensor can be used; analogue or digital.
Analogue Sensor
An analogue sensor is one that returns a range of values from 0 (fully off) to 1023 (fully on). The trigger can be set to any value.
Digital Sensor
A digital sensor is one that is either on or off. No middle ground.
Circuit
The 2 sensor connections are on Arduino A3 and A3. One is used as a digital input and the other as a analogue input.
Circuit 3.01
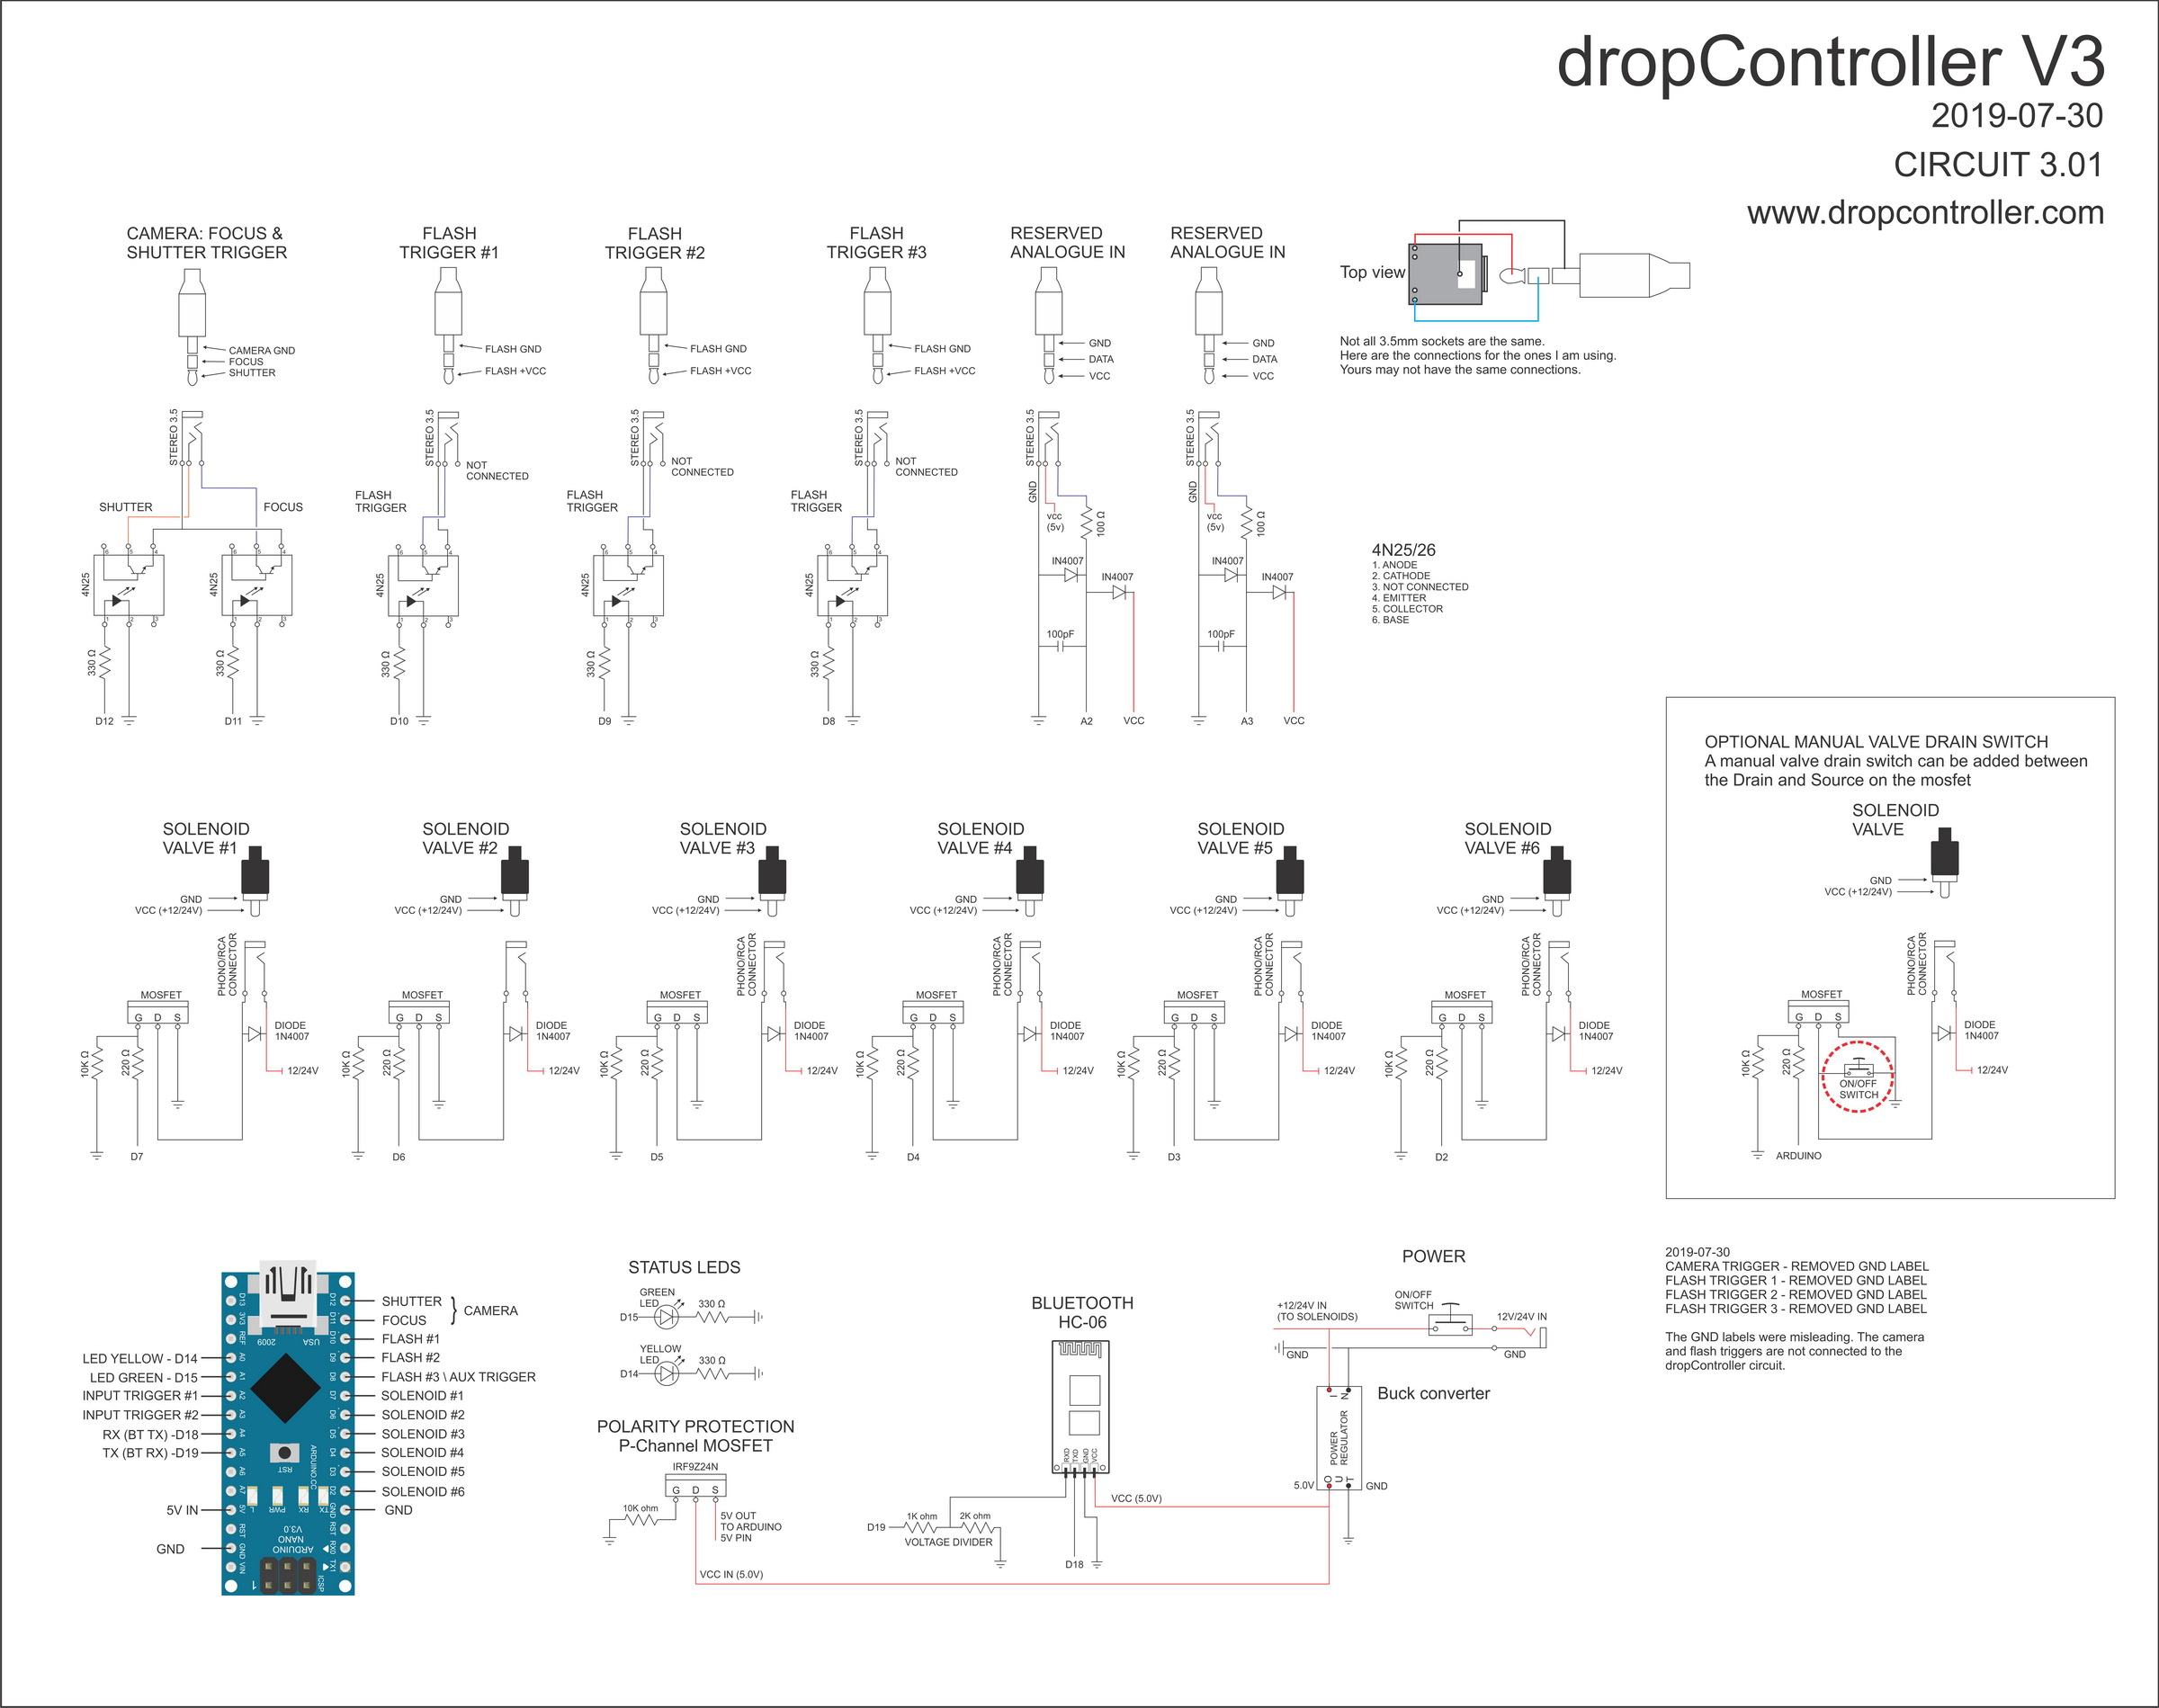
Download a hires image of the circuit
The Sensor Tab
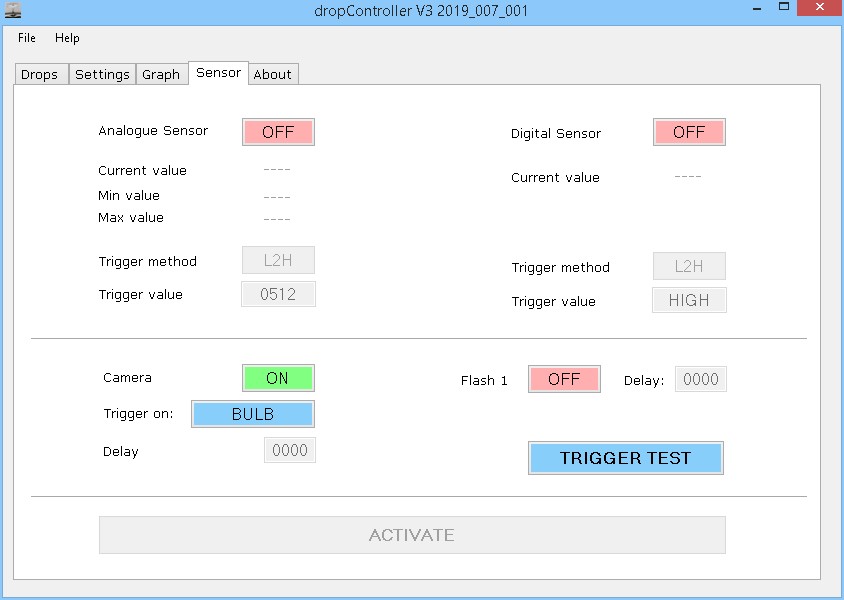
The Sensor Tab allows you to pick the type of sensor, the trigger method and the trigger value. Only one sensor can be used at a time.
Analogue Sensor Controls
  |
Analogue sensor on/off control |
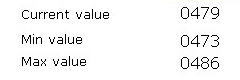 |
Current sensor value, minimum value and maximum value. |
  |
Trigger method: L2H – low to high H2L – high to low |
 |
The trigger value can range from 0 to 9999 but remember the Arduino has a maximum analogue value of 1023. |
OFF/ON
Turns the Analogue sensor on or off. When on the sensor reading becomes live and the ACTIVATE button is enabled. The trigger function is not armed until the ACTIVATE button is clicked.
Current value
This is the current live value from the sensor
Minimum & maximum values
These are the minimum value and maximum value for the current session. Useful is gauging the range of values the sensor is likely to give and aids setting the trigger value.
Trigger method.
There are 2 methods; L2H (low to high), and H2L (high to low).
L2H – used when the normal sensor value is low and you wish to trigger the camera/flash when the sensor reading increases.
H2L – used when the normal sensor value is high and you wish to trigger the camera/flash when the sensor reading decreases.
Trigger value.
The value you want the camera/flash to trigger on.
A note about the current value
The dropController reads the analogue sensor about 25,000 times a second and to help achieve this frequency the dropController does not send every reading to the app. At the time of writing it is set to 1 in 4000. Every 4000th time the dropController reads the sensor it sends the value to the app. This is about 5 times a second. Sending data from the dropController to the app slows down the dropController slightly. By keeping transmissions to a minimum the sensor can be read more. This does not impact the app too much it still looks like it is being updated all the time. More details are at the bottom of the page.
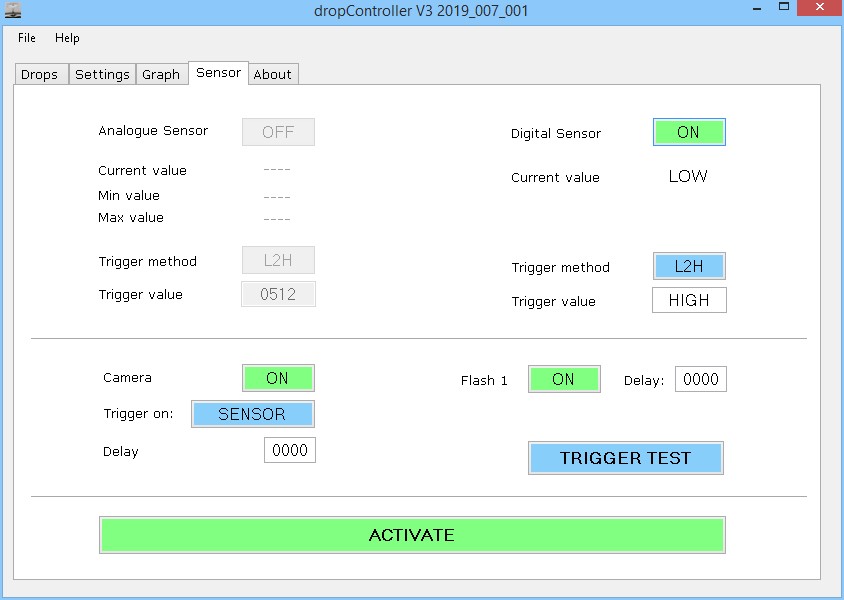
Digital Sensor Controls
  |
Digital sensor on/off control |
  |
Current sensor value, A digital sensor has 2 values only; HIGH and LOW |
  |
Trigger method: L2H – low to high H2L – high to low |
  |
The trigger value is set automatically depending on the trigger method |
Camera And Flash Controls
The camera and flash triggers can be enabled and disabled (on or off) and a delay can be added to the trigger. The camera trigger has two mode of opertaion; bulb and trigger. In bulb mode the shutter is opened when the ACTIVATE button is clicked and closes slightly after the sensor trigger fires. In trigger mode the shutter is opened when the sensor trips.
 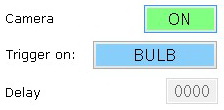 |
Camera on and off |
|
Bulb Mode |
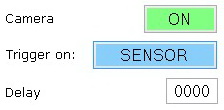 |
Sensor Mode with the delay set to 0 |
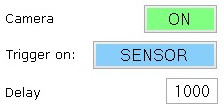 |
Sensor mode with the delay set to 1000ms (1 second) |
  |
Flash off and on
Delay set to 0 |
Caution
The dropController is based on a 5V Arduino Nano. This means the analogue sensor should work at 5V. Sensors should be non powered but are connected directly to the Arduino so care should be taken. There is some protection built in but if you really wanted to kill the Arduino it would not be too difficult. The digital sensor is a simple switch. Close the circuit to trigger.
Using the Sensor Mode
Start the app and head to the Sensor tab. If you have not connected to the dropController the sensor controls will be disabled. On entering the Sensor Tab both LEDs on the dropController turn on.
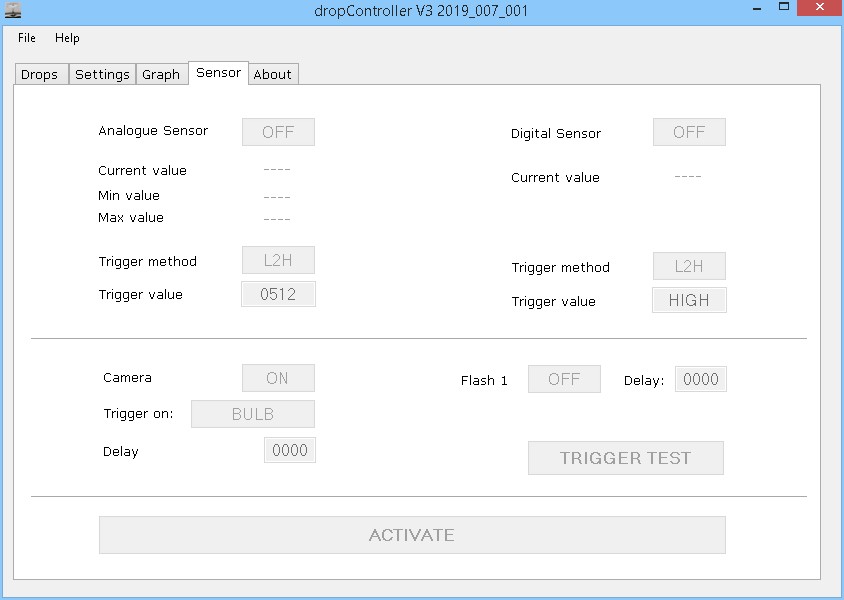
After connecting the sensor on/off controls are enabled.
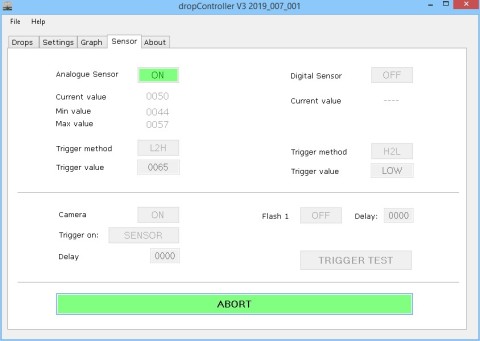
Clicking one of the on/off buttons will turn on one of the sensors. Here the analogue sensor is active.
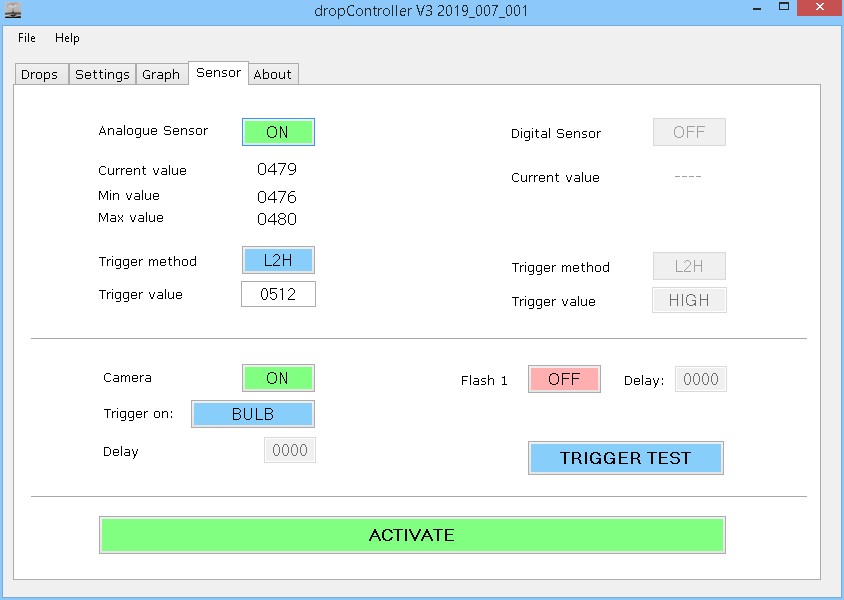
Here the sensor is reading around the 50 mark. The trigger is set to 65. The flash is disabled (OFF) and the camera is set to sensor with no delay. The is means when the reading gets to 65 the camera will fire.

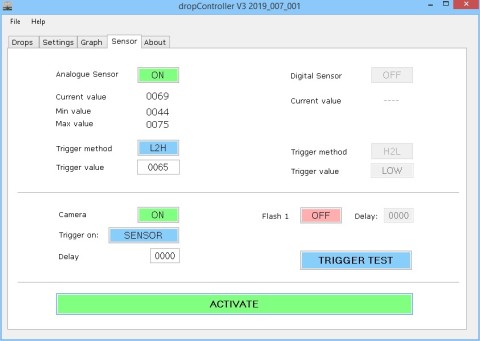
When happy with the setting click the ACTIVATE button. This arms the trigger.
When the sensor readings gets to the trigger value the dropController triggers the camera and the controls become active again.
The process is very similar for the digital sensor except there is only 2 states; HIGH and LOW.
Arduino sketch and code efficiency
The code is experimental and not part of the main development. I am constantly playing updating the code and trying out different methods. The initial preview should work and seems to be fairly reliable but the code is not very efficient and I am sure can be made to run faster.
For the analogue sensor I am using the standard Arduino analogeRead() function with the prescaller at 16. This increases the speed of the ADC but lowers the resolution (you still get 0-1023 but you may not get a smooth 1,2,3,4,5. It may be 1,2,4,5). The code dealing with the sensor reading is top heavy meaning the sensor is read at the top of a loop and read once only in the loop. At present 1 iteration of the loop takes 40µs when the sensor is armed and when not sending data to the app and 44µs when the sensor value is transmitted to the app. At the time of writing I am transmitting 1 sensor value every 4000 loops and only when the value has changed. This is enough for the app to appear like it is being constantly updated (just over 5 times a second). This helps a little with speed but does mean, with fast moving sensors, you may not see the changes in the app quick enough.
40µs is 25000 Hz (25000 times per second) and is plenty fast enough for many applications; balloons popping, lightening, droping fruit in to water, etc. I have not measured the latency between reading a sensor value and triggering the camera/flash yet. If speed is important then use a dark room and use the flash to take the photo (this is what bulb mode is for).
If you want to review the code, I created a new tab title Sensor. The sensor code is self contained meaning some code is duplicated but also means it is faster. I tried to comment the code and it should be fairly easy to follow.
Downloads
Arduino sketch: dropController_Sketch_2019-V3_EXP_SEN_20190619-01.zip
Windows App: dropController_SEN_EXP_20190619_01.zip
Windows app source files: dropController_WinApp_2019-007_001_SENSOR_EXP_20190619_01.zip (17MB)
Footnote
If your interest lies with high speed photography then look at the specialist devices like Cameraxe (look at early versions) and Michael Ross’s High Speed Photo Trigger or simply search online for high speed camera trigger.
For non Arduino start at HiViz.com and especially the tools section that gives details about different triggers/sensors. Note: The Hiviz triggers are designed to be connected directly to a camera or flash and may need adapting for use with the dropController or an Arduino.