This guide will be rewritten.
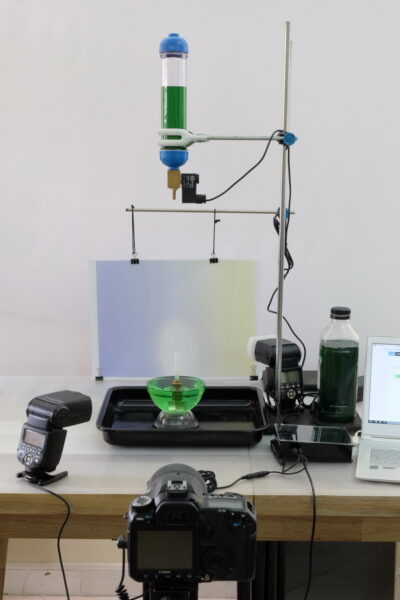
In the previous article I went through my work flow for setting up the equipment and positioning the camera and flash. I finished part 1 with everything in position.
Here I start photographing drops and in doing so hope to explain the basics of how the app works.
First Drops Part 2: Using The App And Capturing Drops
OK, let’s start taking drop photos. The goal of this section is to get used to how the app works by capturing a series of shots that show how a Worthington Jet forms.
A Worthington Jet is the jet or splash that is formed when a drop or object hits a pool of liquid.

Let’s start with taking some simple shots of a drop falling. This will give us an insight in to how long things take and where the drop will be at any given time.
After adding the second bowl, the bottom of the nozzle is now about 35cm above the surface of the liquid. Still a little high and I may (or may not) bring it down a bit depending on the style of the jets I get.
Taking Some Shots
At the end of the last article I left the app with the following settings
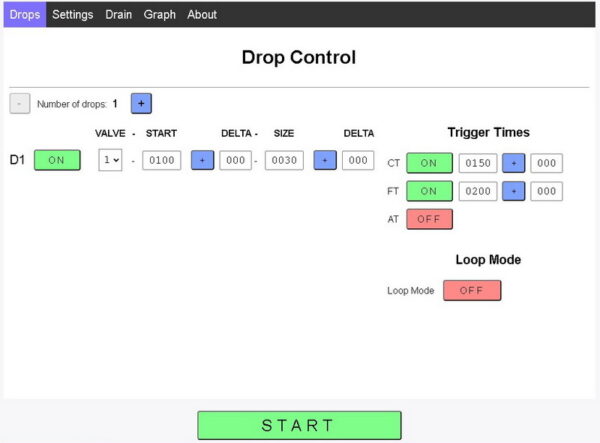
When I take a shot with the flash at 200ms I don’t have a drop in the frame.
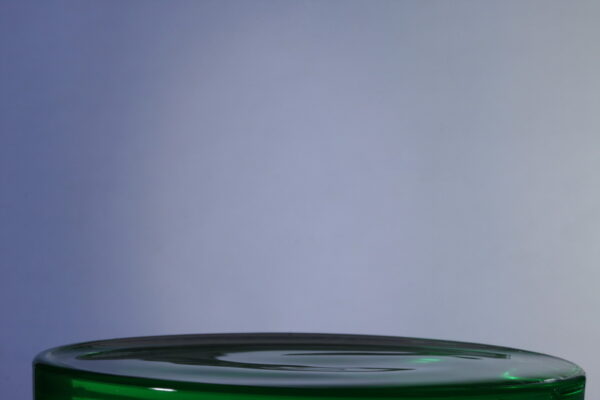
This is because the drop is somewhere above the shot. In fact it is just under the nozzle.
After a while you should become familiar with how long it takes for a drop to fall. It may not be as quick as you expect.
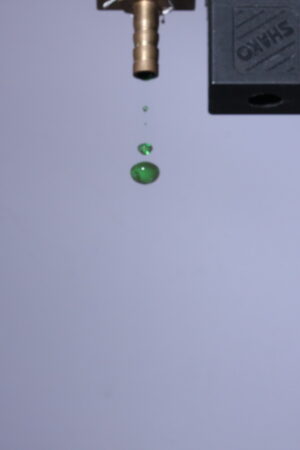
To find the drop, I increased the flash trigger time, took a photo, if no drop, tried again. I won’t bore you with loads of empty shots but did eventually find that the drop enter the frame when the flash fired at 370ms.
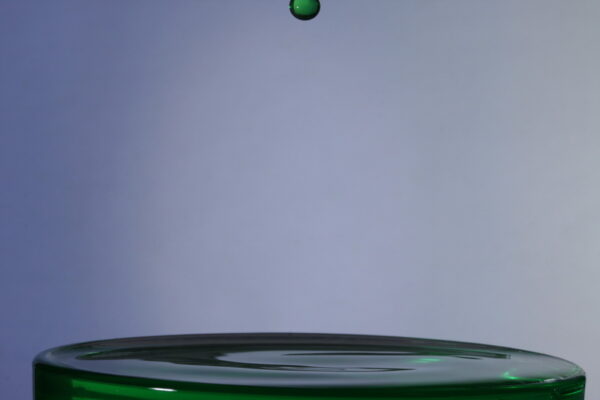
Note that 370ms is the flash trigger time and we need to take in to account the drop start time and drop size. The drop starts at 100ms and is 30ms in size. So, the drop enters the frame roughly, 370 – 100 = 270ms after it starts. Or 370 – (100+30) = 240ms after it drops from the nozzle. This means, very roughly, the drop takes 240ms to fall around 35cm.
Note: all figures are approximations but they give you a general idea.
Finding when the drop enters the frame, or indeed when a drop hits the water, can be very time consuming. In the above, I manually increased the flash trigger time and took another shot until I found the drop, this took quite a few shots. A much more efficient method is to use Loop Mode and let the dropController do the work.
Using Loop Mode to Increase the Flash Trigger Time
Loop Mode allows you to repeat the sequence automatically. Loop Mode loops the same sequence over and over again and while looping certain trigger times can be increased or decreased automatically using delta values. A delta is any value that changes inside a loop.
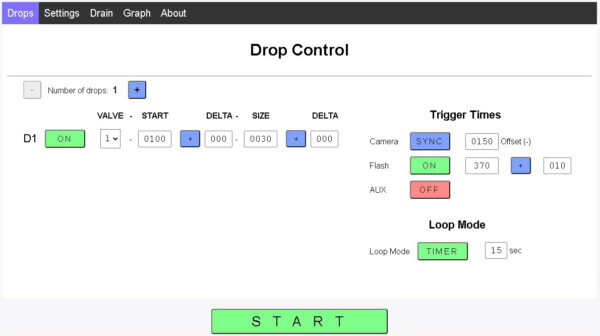
I know the drop enters the frame around a flash trigger time of 370ms, therefore, I have set the flash trigger to 370ms. This is my flash trigger start time.
The delta control and delta value are circled. The + button means the delta will be added. The delta value is 10ms. This means the flash trigger time will increase 10ms every shot.
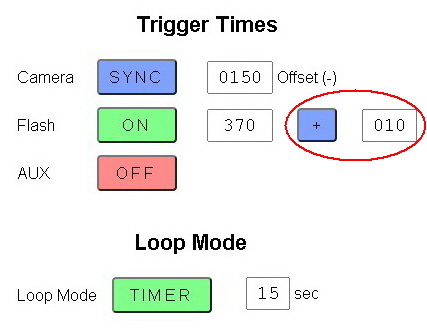
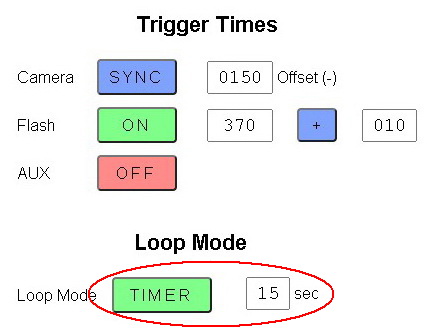
To automate the looping. I have turned Loop Mode on by selecting TIMER with a delay of 15 sec (seconds). This means after each shot, the dropController will wait 15 seconds and take a shot. After the shot is taken the flash trigger time will be automatically updated and the timer starts again.
When in Loop Mode, on clicking the main START button,
![]()
the Loop Page opens.
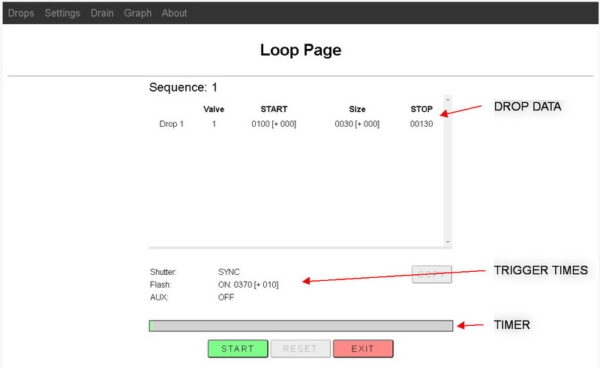
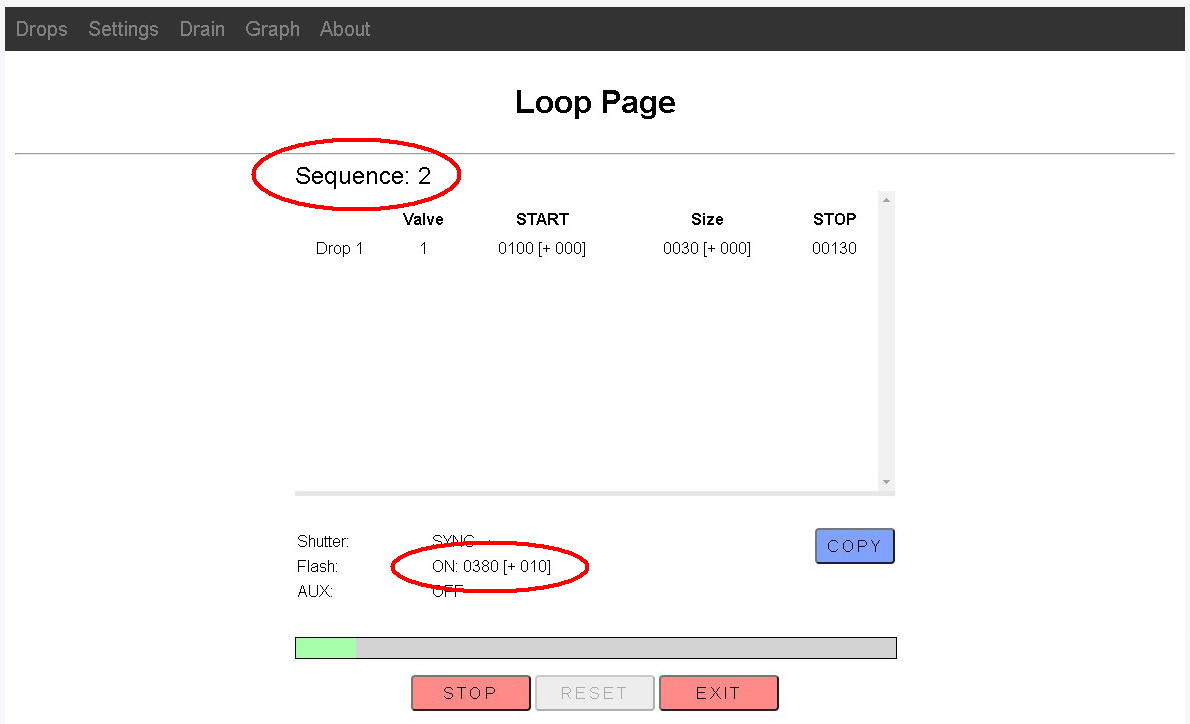
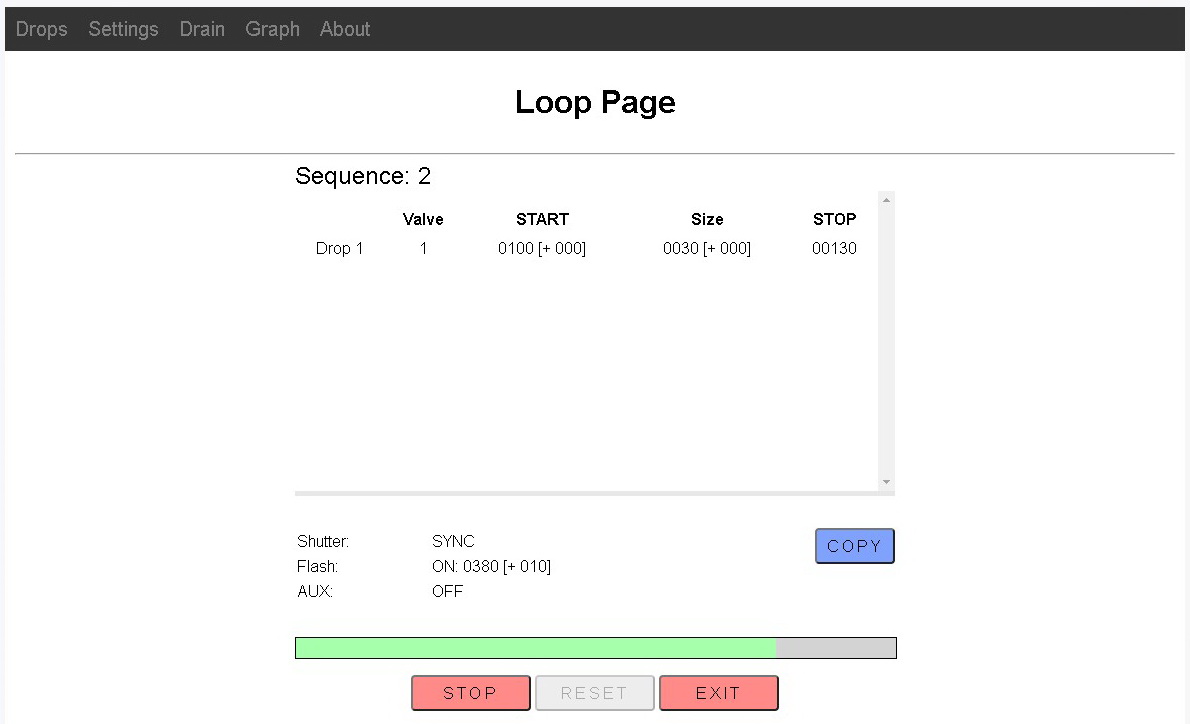
The Loop Page shows a summary of the drop data. You can see that the flash trigger is set to 370 [+010]. This means a trigger time of 370ms with a + delta of 10ms.
Clicking the Loop Page START button starts the process going and the first sequence is started straight away (as soon as the START button is clicked). Subsequent sequences are started after the timer runs out.
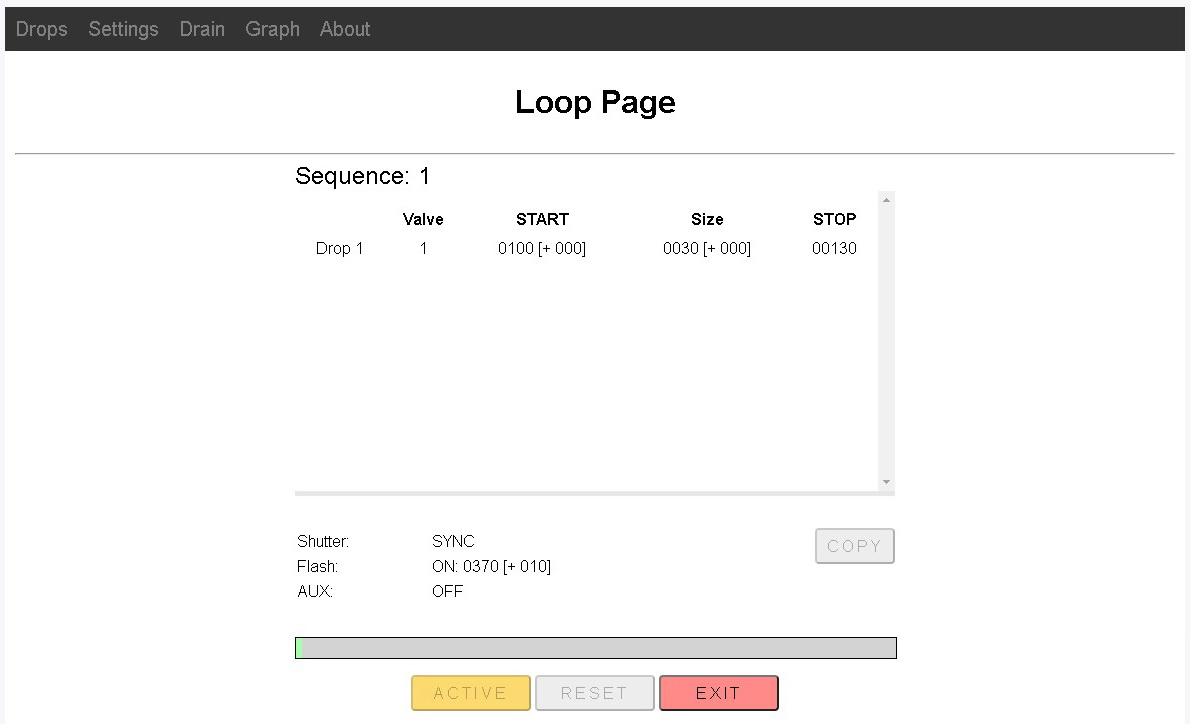 When the START button is clicked the first sequence is started. The START button changes to ACTIVE.
 When the first sequence has finished the drop data is updated ready for the next sequence and the timer is started.
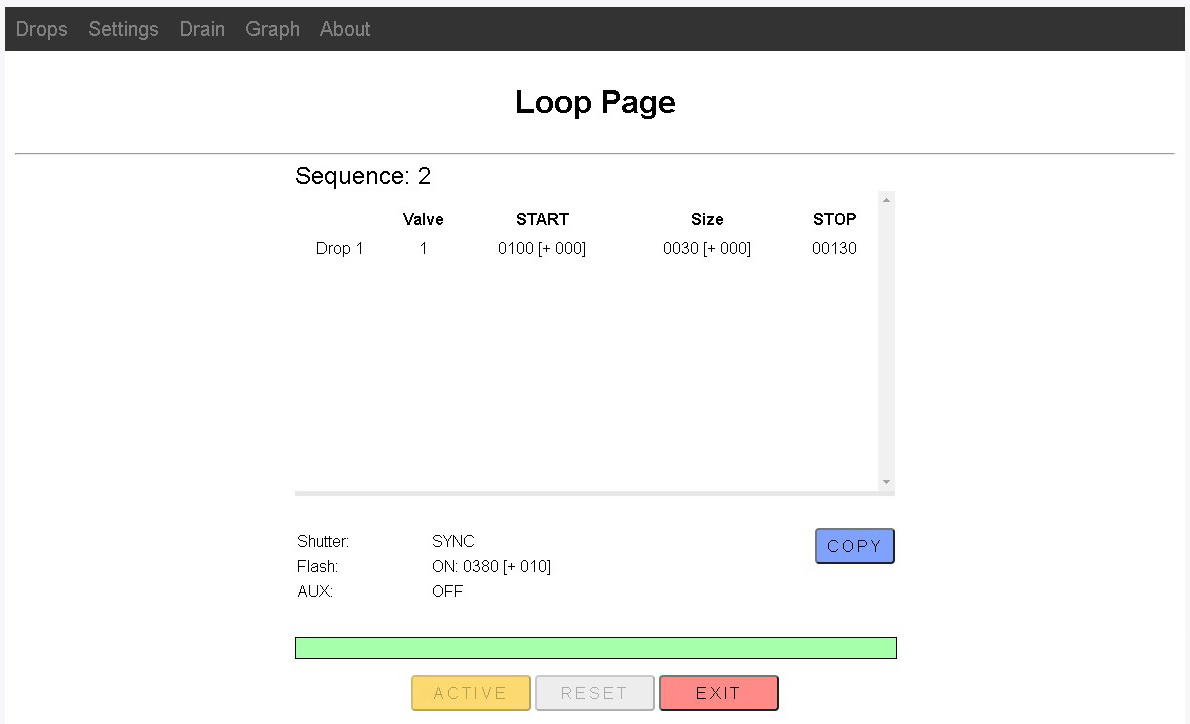 When the timer reaches zero the next sequence is automatically started.
The sequences will continue until either the STOP button or the EXIT button are clicked.
![]()
The STOP button pauses the sequence. The EXIT button leaves the Loop Page and returns to the main Drop Page.
The RESET button is only active when the sequence is paused. Clicking the RESET button sets the sequence number back to 1.
Using Loop Mode To Capture A falling Drop and Worthington Jet
Now that we have an understanding of Loop Mode let’s use it to capture a falling drop and a Worthington Jet. No need to change the drop settings and the flash trigger is already set to 370ms at which point the drop should be at the top of the frame. All we need to do is start the process going, sit back and let the dropController takes some photos.
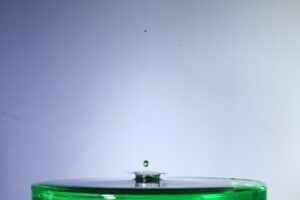
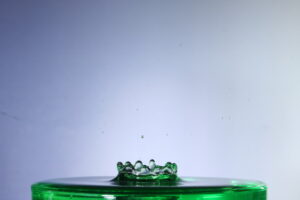
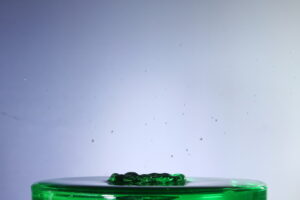
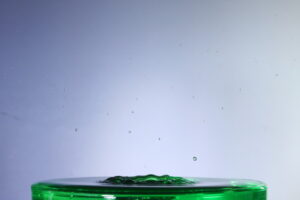
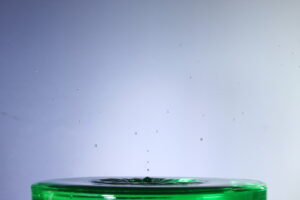
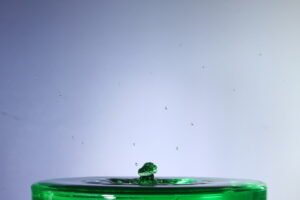
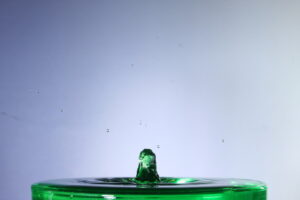
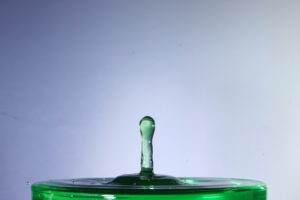
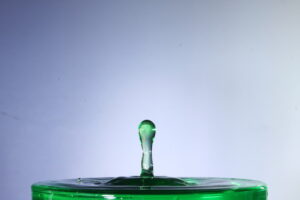
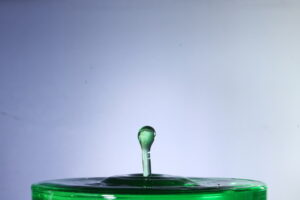
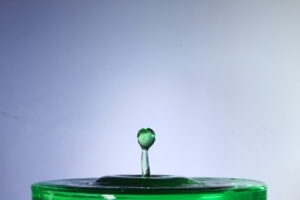
Here are the photos.
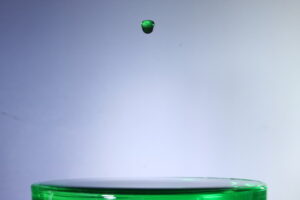
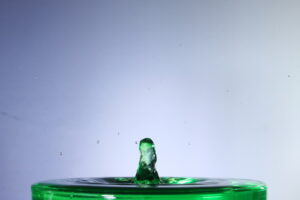
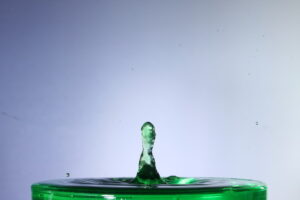
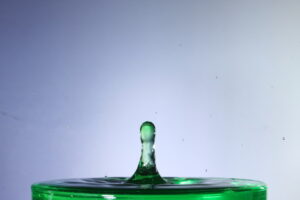
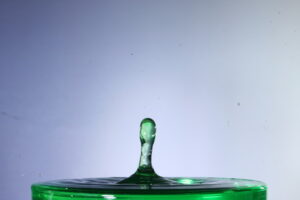
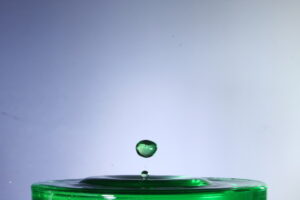
380ms
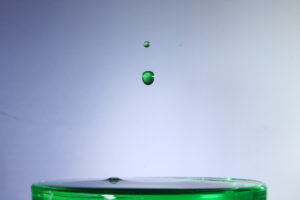
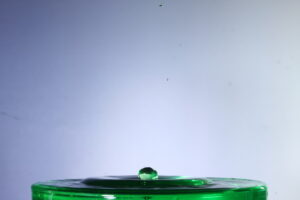
390ms
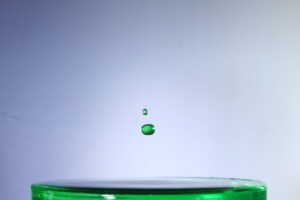
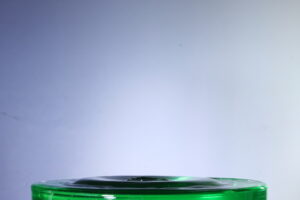
400ms
410ms
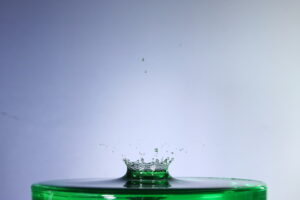
420ms

430ms
440ms
450ms
460ms
470ms
480ms
490ms
500ms
510ms
520ms
530ms

540ms
550ms
560ms
570ms
580ms

590ms
600ms
610ms
620ms
Times are the flash trigger times.
That’s all there is to it; set a delta, turn on Loop Mode, start the drop sequence, and at some point, stop it.
Notes
The above images are not of a single (or the same) drop. They are from sequential drops with a slightly later flash trigger time every shot. In the above there are 25 separate drops.
Delta values can be used with several different properties; drop start time, drop size, shutter trigger, flash trigger, and all can be used at the same time if desired.
Some effects can be achieved is different ways. For example changing the position of the drop. In the above example I use used a delta value on the flash trigger time. I could have also used a delta on the drop start time making the drop start earlier every sequence.
Two or more delta values can be used to balnce or counteract each other (within reason). For example. You can add a delta to a drop size and also add the same delta value to the flash trigger time to keep the position of the drop the same in every shot. The drop falls a little later every time, the flash fires a little later every time.
In the next part I find a nice jet and add a second drop.