This guide uses a dropControllerV3 in an open case. The process and functions are exactly the same for the dropControllerV4.
Set Up
Let’s get started with making some drops and actually using the dropController.
I am using a fairly basic set up. I have one lab stand supporting the valve and bottle and another supporting the background. The background is a piece of black felt. In the bottle I have milk which will have a high contrast against the black felt.
Stand and Connections
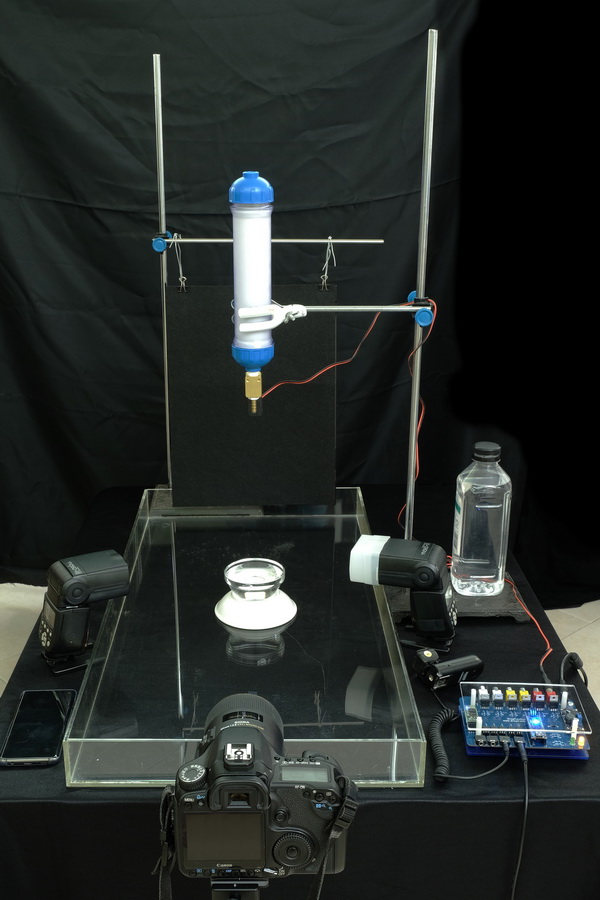 Single valve (PU220-AR-02) which is connected to the bottle and controlled from valve port 1 on the dropController. The valve is about 30cm from the water surface.
In the bowl at the bottom I have water.
I have 2 flash guns, both are at the front and both are pointing towards where the drop hits the water.
The flash guns are set to 1/64. I have the left flash at 105mm, no diffuser and the right flash at 50mm with a diffuser. This should give me slightly harder light on the right hand side and help create some depth in the shapes.
 A Canon 40D is connected to the Camera Trigger Port and a wireless flash trigger is connected to Flash Trigger 1.
The camera is in manual mode, manual focus, the shutter set to bulb, and the aperture is at F16.
The dropController is on and connected to the Android app.
I am using milk as the drop liquid. Milk is opaque and with opaque liquids you (normally) illuminate the liquid. With transparent liquids you light the background. Therefore, I have both flash guns aimed at where the drops hit the water. This is more like a guideline rather than a rule.
Note: Milk goes sour. After using it make sure to wash the valve, the bottle, the tube, and the tray well.
Why Milk
Milk has a thicker consistency than water which makes it a good getting started liquid, not perfect but good when starting. Plain water is too splashy and not very good for drop collision photography. The thicker the milk the better and I have found full cream milk works fairly well.
Bowl Position/Splash Tray Position
When using a large splash tray the exact position of the tray and the spot where the drop hits the water does not really matter but for smaller bowls the position can make a big difference to the Worthington Jet. In these examples I am using a small glass bowl (8cm diameter) and I want the drop to hit at the centre of the bowl. To get the correct position I make a drop and eyeball where it hits the water in the bowl. I then adjust the bowl and make another drop. I then keep doing this until I am happy. I am looking for a straight jet. When using a round bowl (especially with tapered edges) a straight jet usually means the drop is in, or very near to, the centre.
Focus Aid
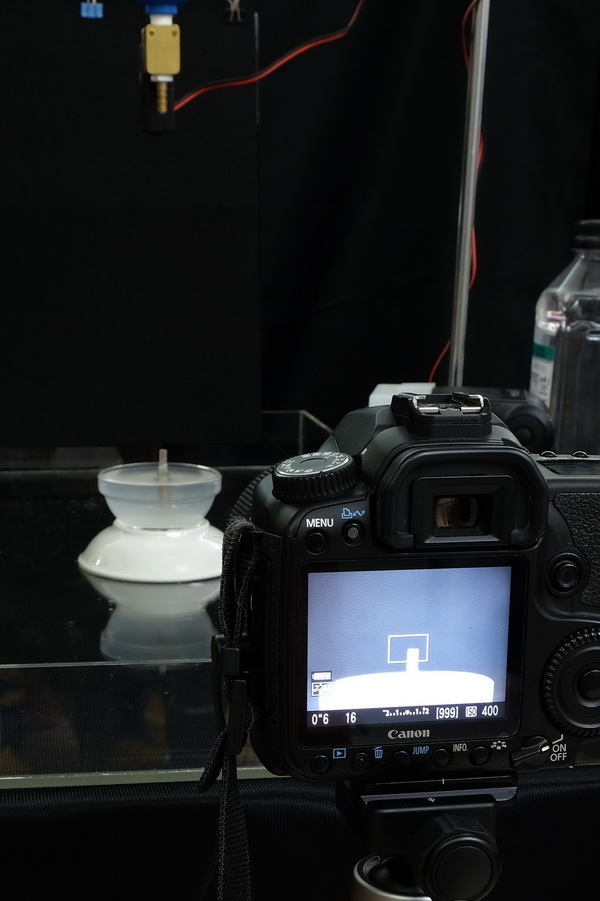 Once I have the bowl position set I put something at the drop contact point to use as a focus aid. In this case it is a nozzle with a piece of tube attached. I then finish setting up the camera and focusing the lens.
Camera and Flash Settings
I am using a Canon 40D with a Sigma 105 macro lens.
The camera is in manual mode.
– Aperture is F16
– Shutter is BULB (and I am using bulb on the dropController)
The lens is set to manual focus and since the camera is on a tripod stabilization is turned off.
Two flash guns.
– Left flash: 1/64 105 zoom no diffuser.
– Right flash: 1/64, 50mm zoom using the built in diffuser.
The dropController is directly (and separately) controlling the camera and the flashes.
The sequence to take a shot is:
– open the shutter
– make some drops
– wait a little bit. Normally for the collision
– fire the flash
– close the shutter
Since I am using a long(ish) shutter speed with flash the exposure of the image is mostly set by the flash not the aperture/shutter combination, although, the camera aperture does effect the depth of field and how much light is required. For example, F16 with 2 flash guns and milk is OK. One flash may be slightly too little.
Ambient Light
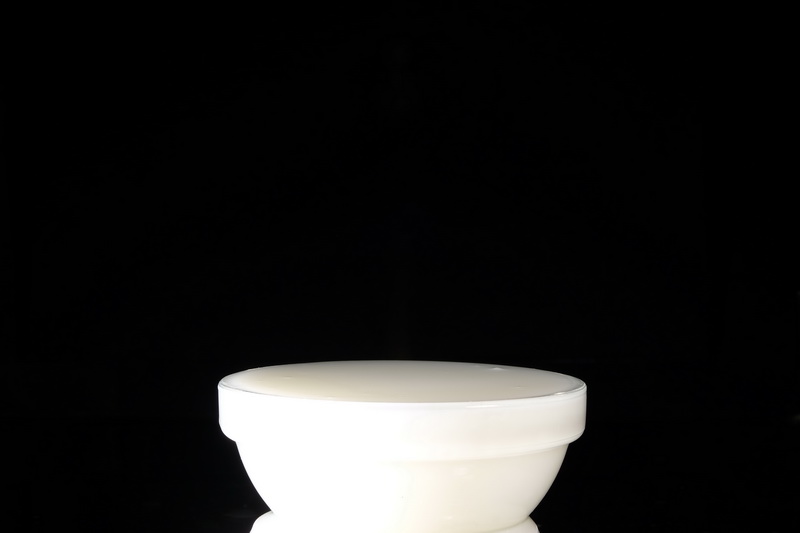
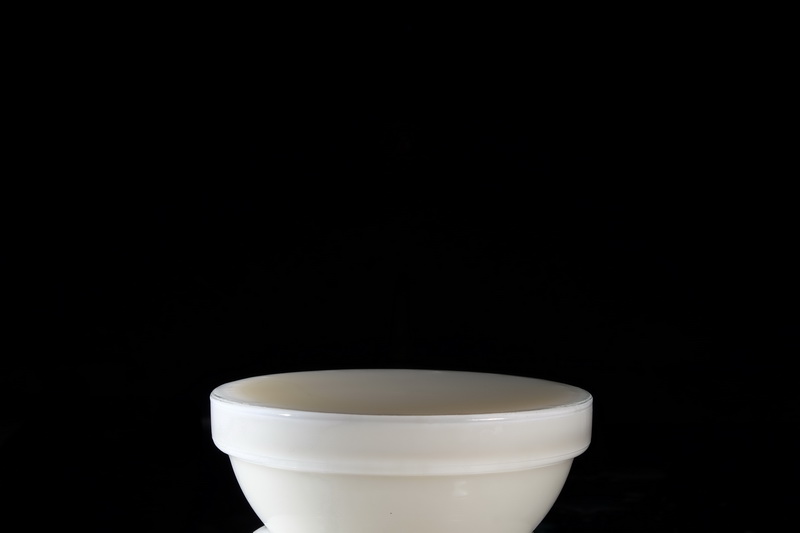
I am working in dim light, not pitch black, and to test the exposure I start with taking a 1 second image.


The first image was taken at F11 and you can still see the bowl. The second image was take at F16 and is (almost) totally black.
Once I have an aperture I take a couple of images with the flash.
The first shot is with the flash at 1/32 which is too much*. The second shot is at 1/64 which is better, not fantastic but OK for the guide.
I didn’t spend much time with the lights as my focus is explaining a Worthington Jet and using the dropController. Normally I would spend more time setting up the flash power and positions. Lighting, like most things with drop photography, is a case of trial and error.
*I dialled back the light because I am using milk (white and reflective) and felt slightly under exposed was better than over exposed.
When using other liquids, especially water with food colouring, I would take a few test shots of the drops or jets to gauge the light. Of course, if you are not happy with the light you can move the flashes any time.
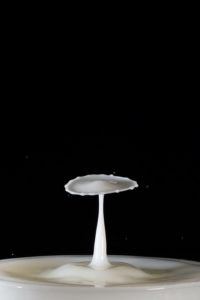
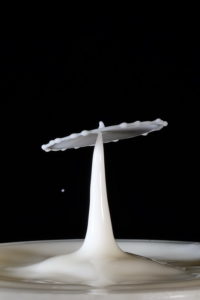
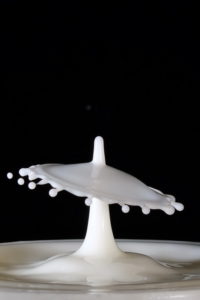
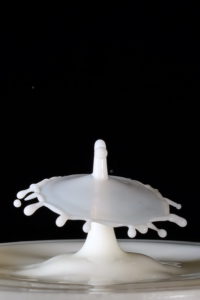
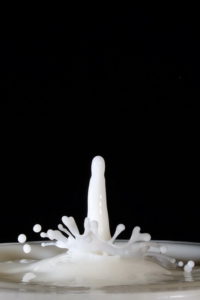
Capturing a Worthington Jet
Now the set up is done let’s try capturing a Worthington Jet.
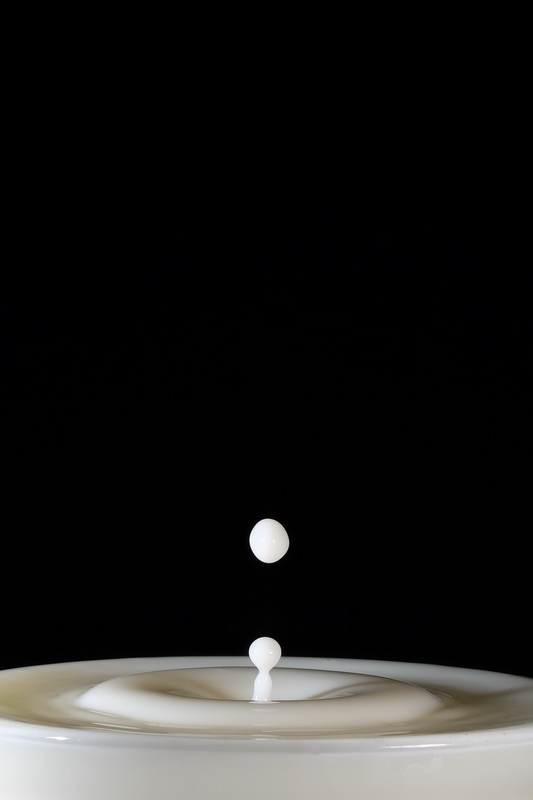
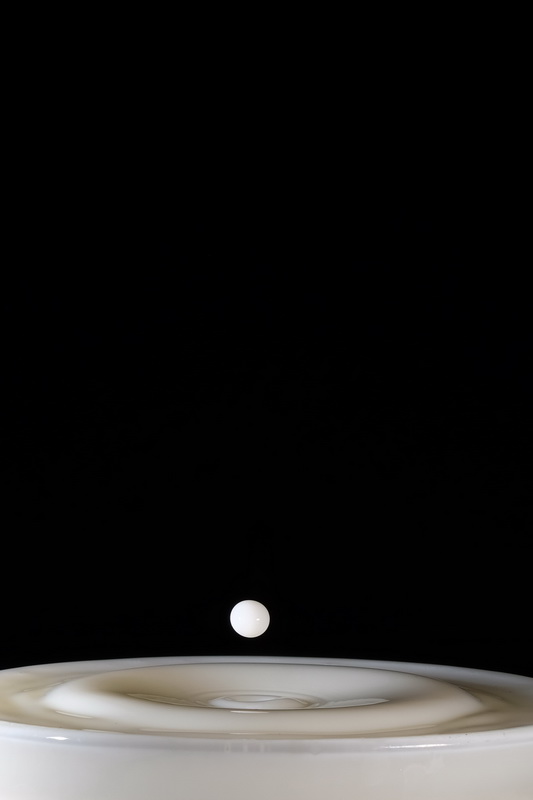
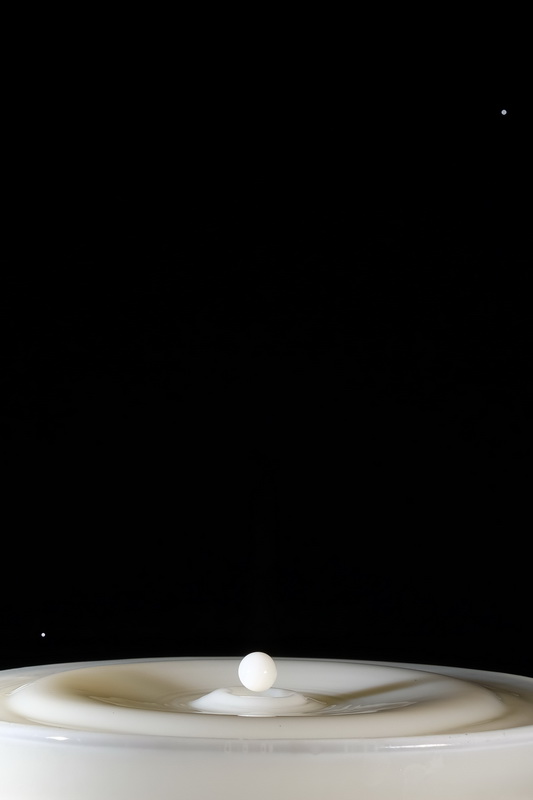
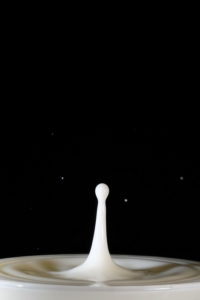
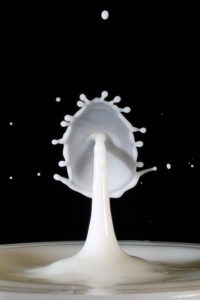
 A Worthington Jet is the splash or bounce that is created when a drop hits a pool of liquid and photographing a Worthing Jet sequence is a case of taking photographs of different drops at slightly different times. In this example I will use a delta value on the Flash Trigger time so that the flash fires slightly later every loop/sequence.
Using Loop Mode we can make a series of drops, use the same drop settings for each drop, and fire the flash at a different time for each drop. In the below example I start with a flash trigger of 200ms and increase it automatically by 10ms each drop. By making the flash fire slightly later each sequence we should see the drop progress from falling drop in to a Worthington Jet.
For this guide I am using the Android app and all settings are the same for the Windows app. I have connected the app to the dropController device. If you are unsure how to do this see either Android App: Getting Started or Windows App: Getting Started.
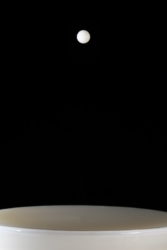
I want to photograph a drop falling, hitting the water at the bottom and then the subsequent Worthington Jet. This involves capturing the drop at the top of the frame.
Depending on how close you have the camera it may take a while for the drop to appear in the frame. When first starting a good exercise is to move the camera back (or zoom out) so that the valve and the splash tray are both in the shot. You can then capture the drop all the way from the valve to the water at the bottom. Once you are familiar with how long it takes for the drop to fall guesstimating when a drop will enter the frame when zoomed in becomes a little easier.
I guesstimated a Flash Trigger start time of 200ms. At this point the drop should either be in the frame or very close to it. If you are not sure take a short a see where the drop is.
Loop Mode
Hopefully you read through the app user guide and have an understanding of how Loop Mode works. If not here is a brief introduction.
Loop Mode repeats the drop sequence and keeps repeating it until you stop it. While repeating, the times of the drops, the drop sizes, the flash trigger, and the shutter trigger can be changed using delta values. delta values are values that change inside a loop. In the below example I am using a delta value on the flash trigger to change the flash trigger time so that I capture a falling drop and a Worthington Jet.
Drop Settings
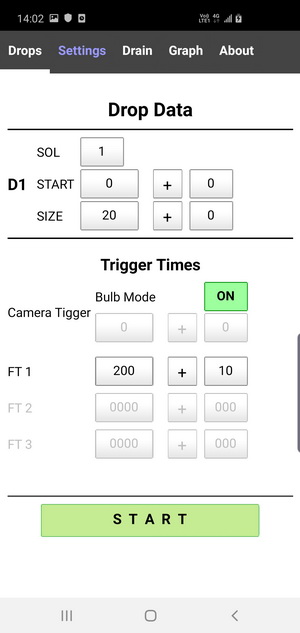
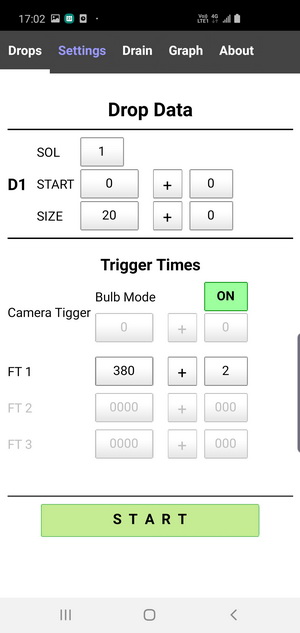
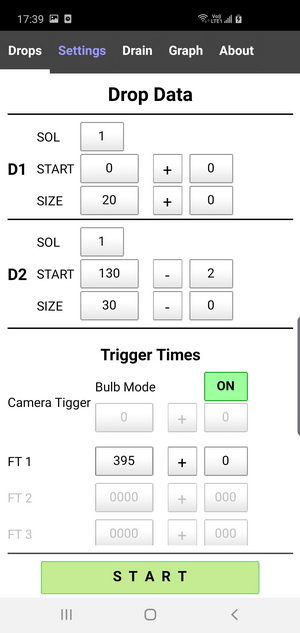
I have one drop on SOL 1 with a size of 20ms. I have no idea if 20ms will be any good but a size of 20ms to 30ms it usually a good place to start.
Settings
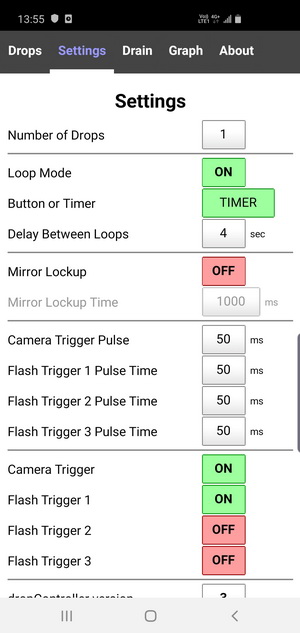
1 drop.
Loop Mode is on using TIMER with a delay of 4 seconds.
Mirror Lockup is OFF
Camera Trigger is ON
Flash Trigger 1 is ON
Flash Trigger 2 is OFF
Flash Trigger 3 is OFF
Drop Settings
Drop1 is on SOL 1
START = 0, no delta value
SIZE = 20ms, no delta
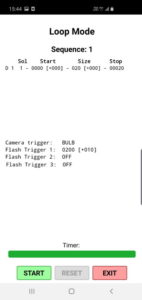
Camera Trigger is ON and set to BULB (I also have the camera set to bulb mode). By using bulb mode I know the shutter will be open when the flash fires. When using a fixed shutter speed/length with Loop Mode, sometimes the shutter can close before the flash fires.
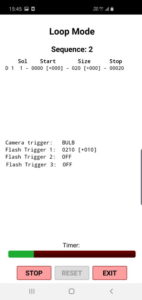
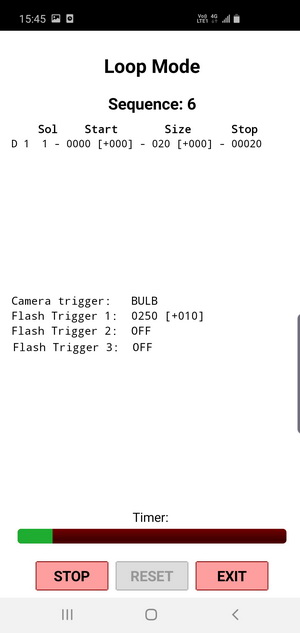
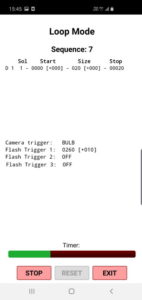
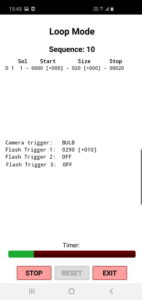
FT1 is set to 200ms with a a delta of +10ms.
A Loop Mode delay of 4 seconds is fairly short but ok when trying to time things.
Flash Trigger 1 has a delta of +10ms. This means the flash will fire 10ms later every loop and the drop should be a little lower.
– Sequence 1 – 200ms
– Sequence 2 – 210ms
– Sequence 3 – 220ms, etc
 On hitting START the Loop Page is displayed and then on hitting the small START button the sequence starts. After this everything was automatic and I went to make a coffee while dropController took the photos 😉
When the drop/Worhting Jet had finished I clicked EXIT to return to the Drop Data page.
On each loop you should be able to see the flash trigger value increase.


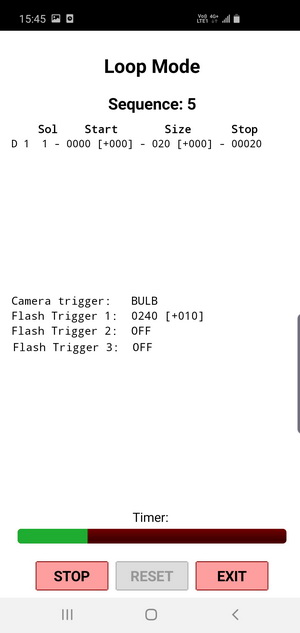


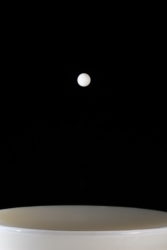
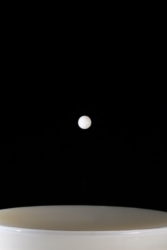
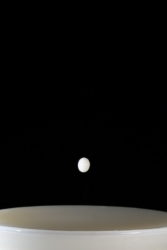
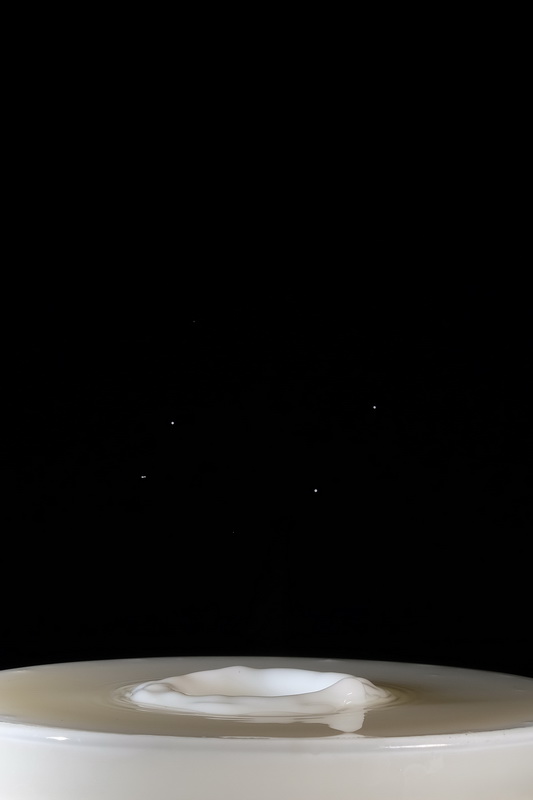
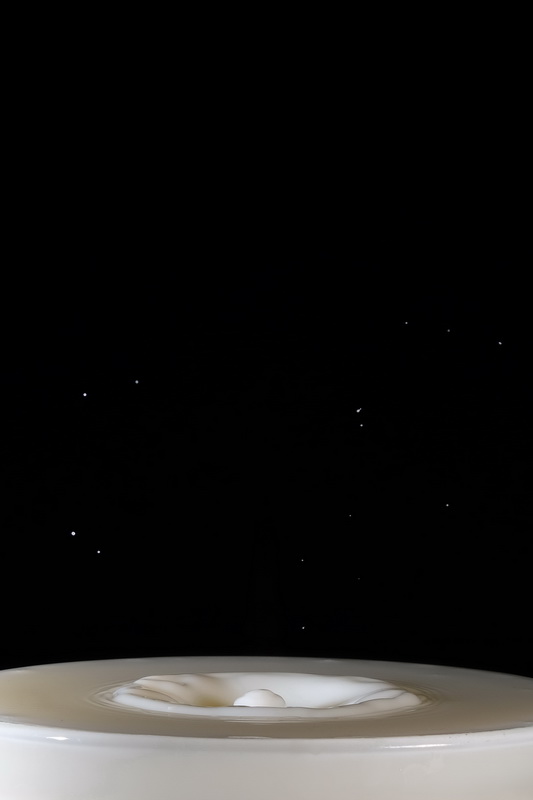
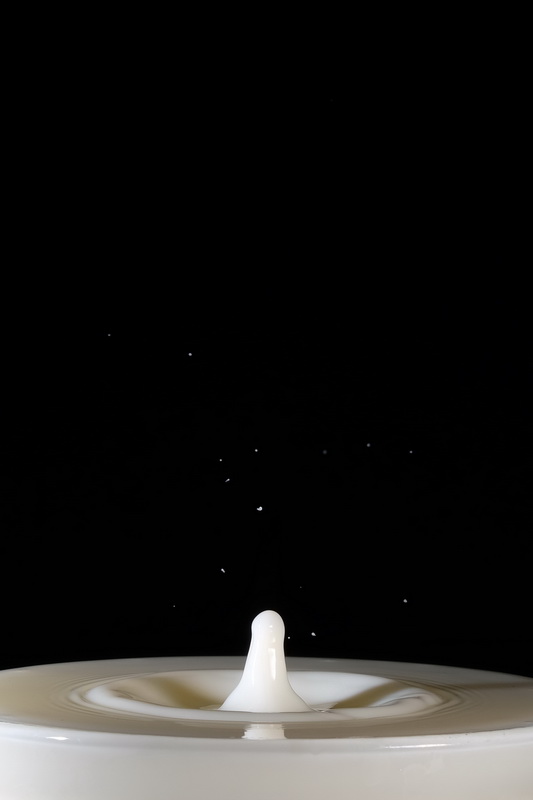
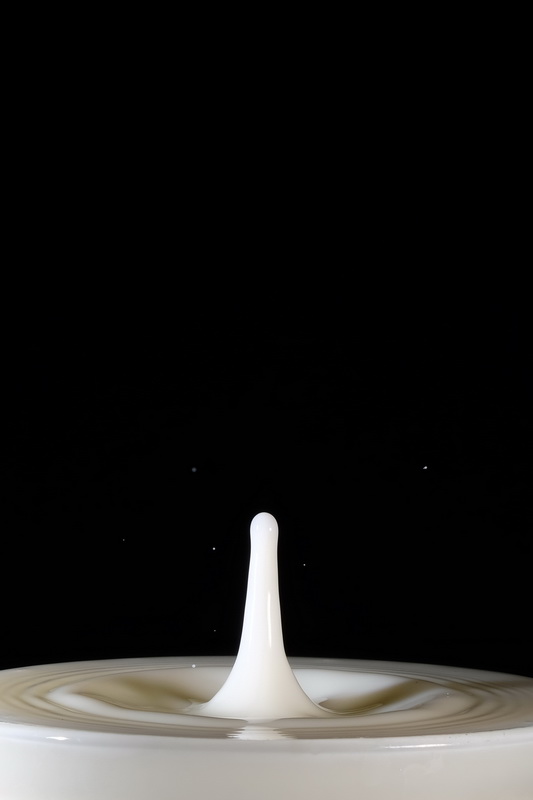
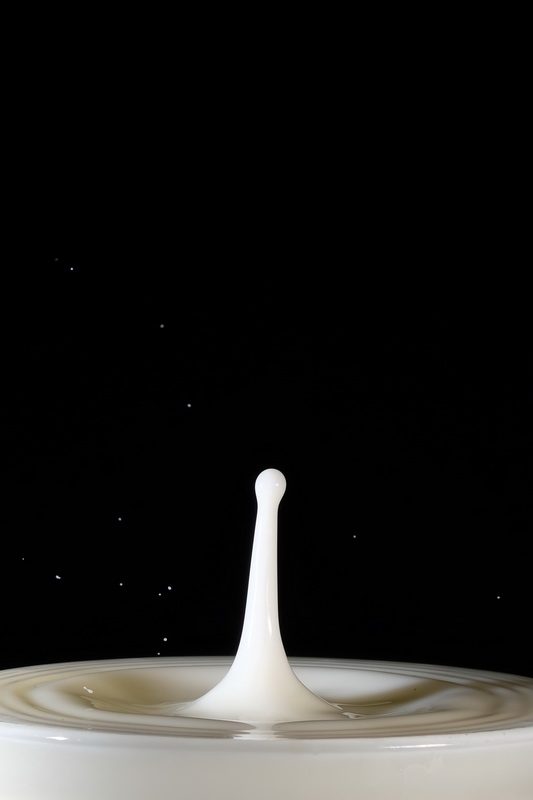
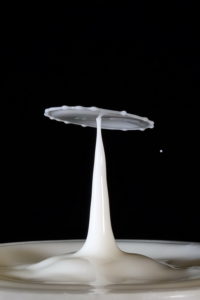
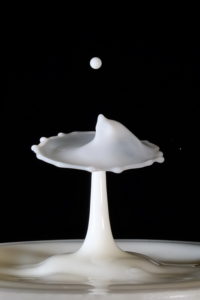
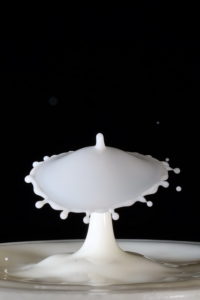
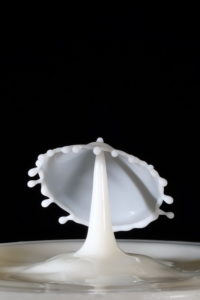
As it turned out 200ms for the flash trigger wasn’t too bad. The drop entered the frame at 240ms. Here are the images.
240ms
250ms
260ms
270ms

280ms

290ms

300ms

310ms
320ms
330ms
340ms
350ms
360ms
370ms

380ms
390ms
400ms
410ms
420ms
430ms
440ms
450ms

460ms
470ms
480ms

490ms

500ms
And that’s all there is to capturing a Worthington Jet. The dropController makes most of the process automatic.
Note:
You are very unlikely to get nice clean drops every time and neither did I. I ran this sequence a few times until I got the above pictures. The first couple of times the jets were not that straight and I had stray drops so I had to adjust the bowl and the nozzle a bit. However, once everything was dialled in I got very consistent results.
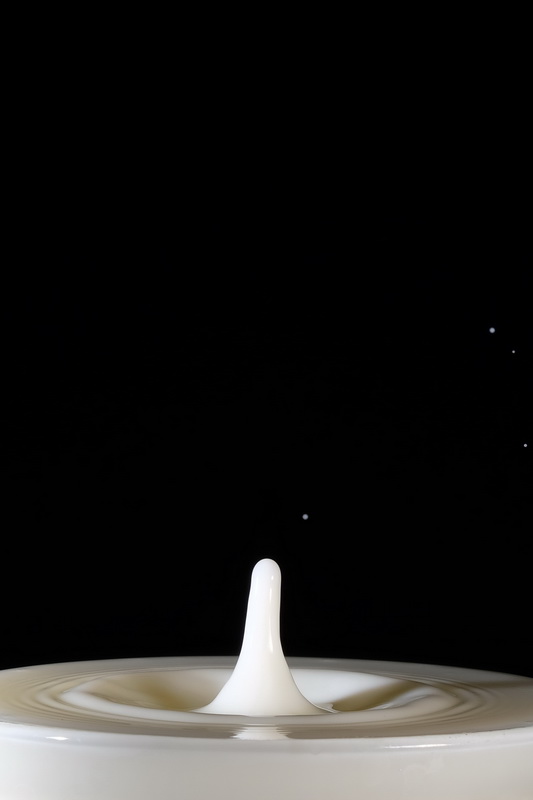
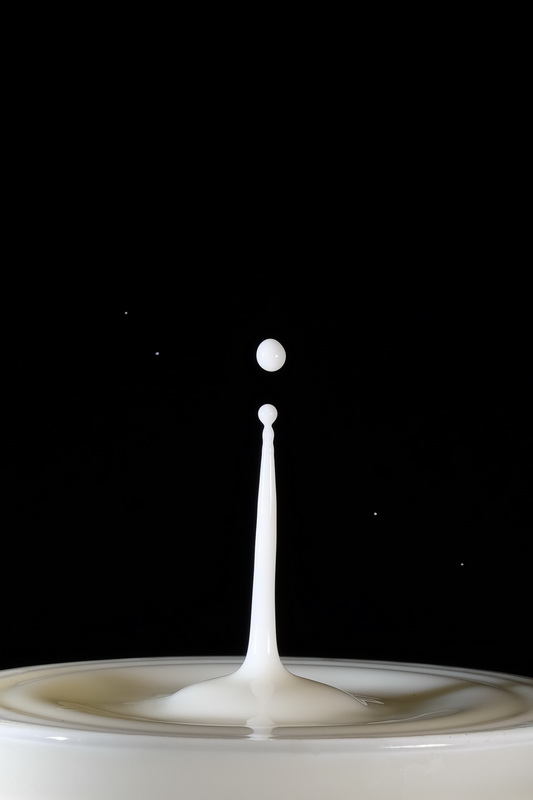
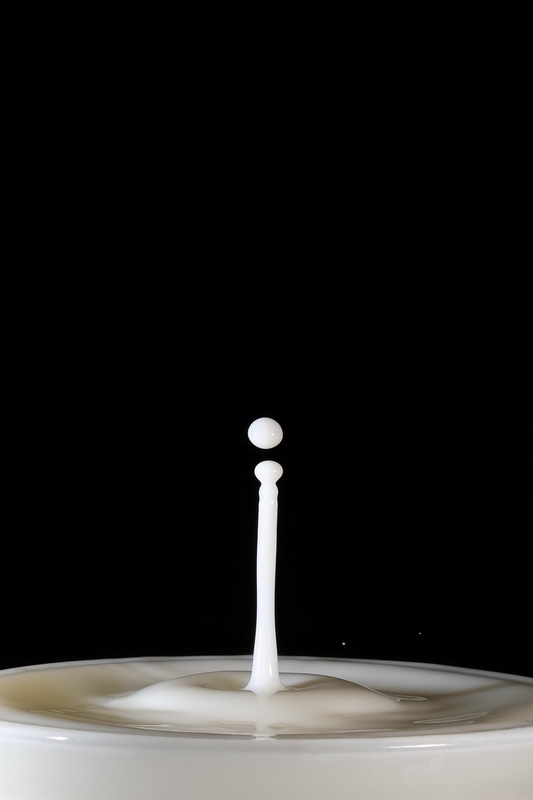
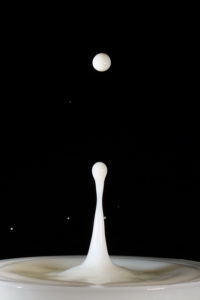
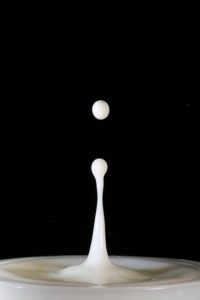
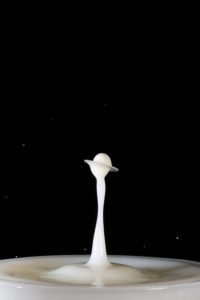
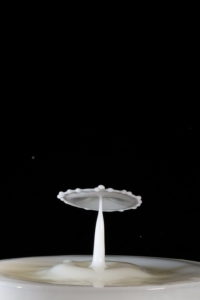
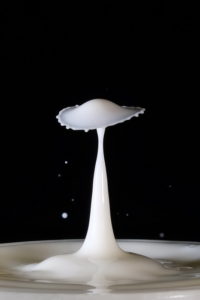
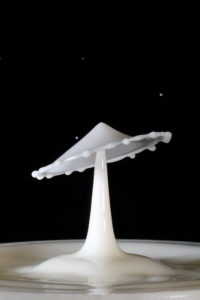
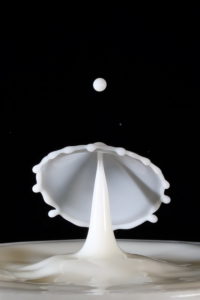
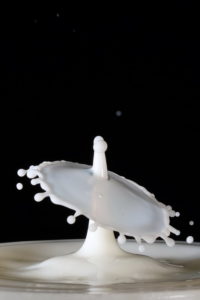
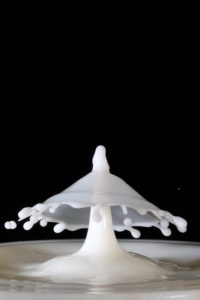
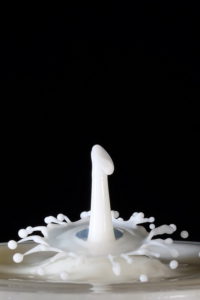
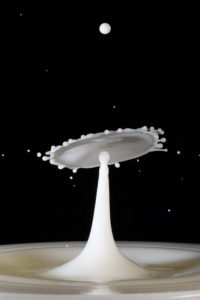
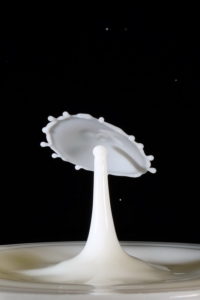
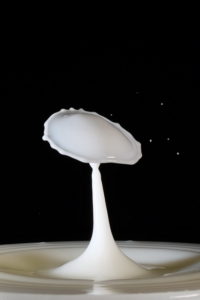
Two Drop Collision
Before adding a second drop I want to find a nice Worthington Jet to use as the foundation of the collision. Based on the images above the jet at 380ms and 390ms look ok. To double check I set the flash trigger to 380ms and ran the sequence again with a +2ms delta value on the flash trigger time. This means I get images at 380ms, 382ms, 384ms, etc
 I have set the flash trigger to 380 and set the delta to +2ms. I have not changed the drop start time or the drop size.
I ran this sequence a few times and all were very similar. Although there is little difference between the jets I decided to go with the one at 380ms.
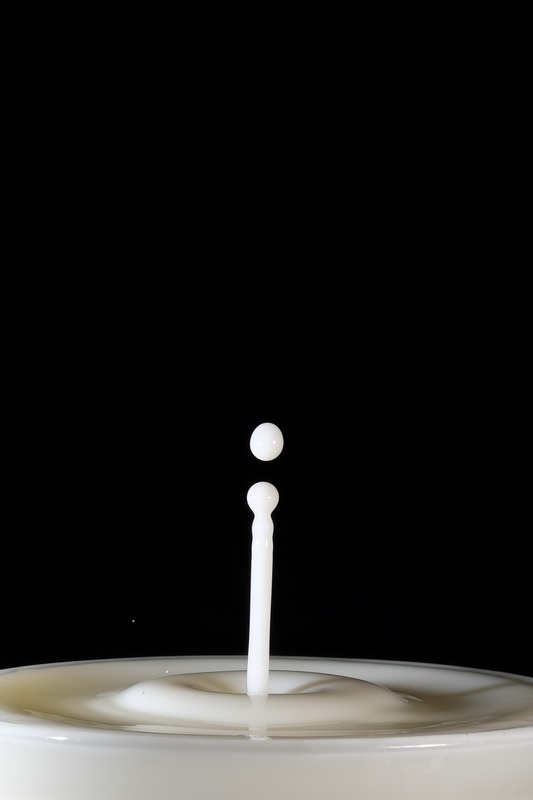
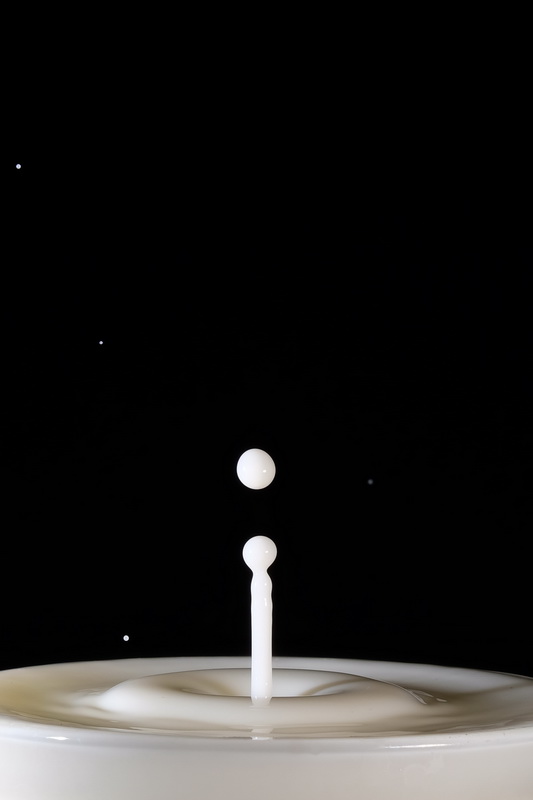
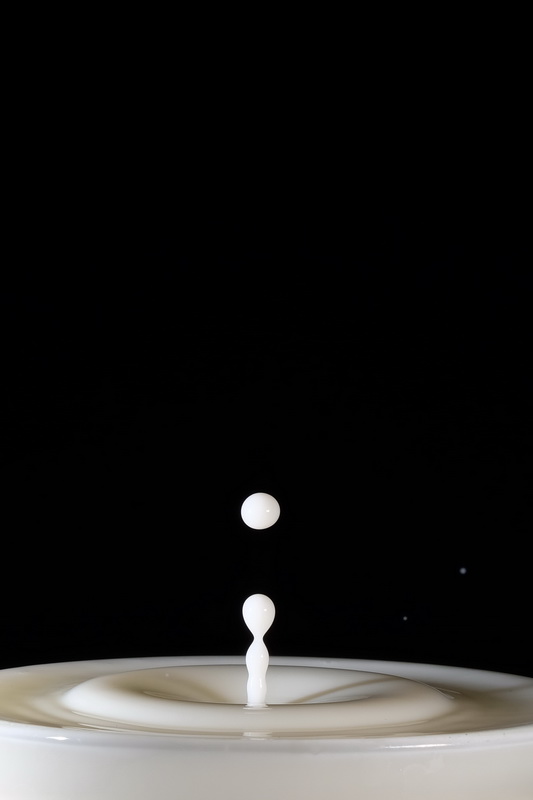
380ms

382ms
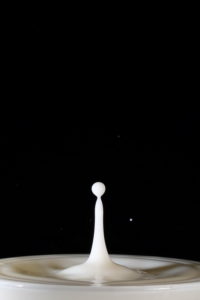
384ms
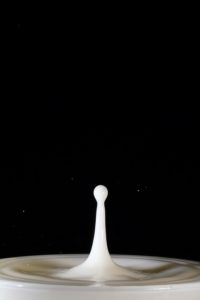
386ms
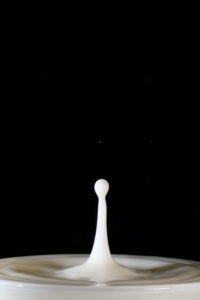
388ms

390ms
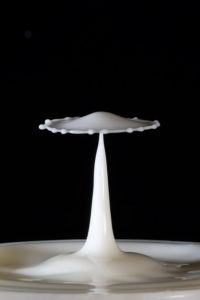
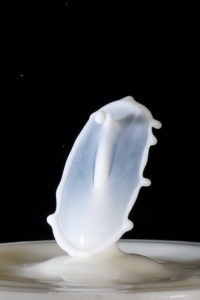
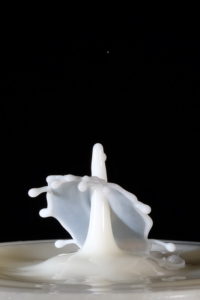
Now I have the Worthington Jet I can add a second drop and try to make it hit the jet. Using the dropController this is fairly easy. Start the second drop later than it needs to be and using a delta value on the drop start time walk the drop backwards in time until it hits the column. By making the drop start time earlier we should see the drop slowly descend.
To capture the Worthington Jet I used Loop Mode and a positive(+) delta value to make the flash trigger a little later every sequence/loop. This time I am using Loop Mode and a negative(-) delta on the 2nd drop start time to make the start time a little earlier every loop.
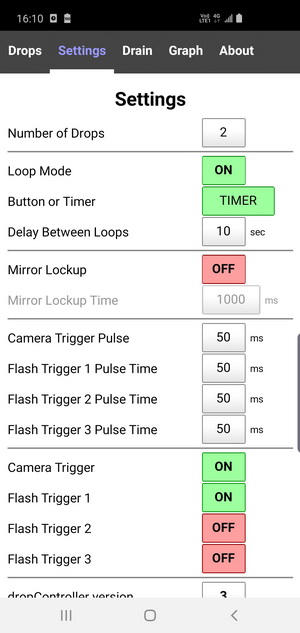

On the Settings tab change the number of drops to 2.
On the Drop Data tab there is now a second drop.
Drop 2
Start Time = 150ms, Start Time Delta = -5ms.
Size = 30ms, no delta.
Flash Trigger 1
Time = 380ms and I have removed the delta value. This means the flash will fire at the same time every sequence.

150ms
145ms
140ms
135ms
130ms
125ms
120ms
115ms

110ms

105ms
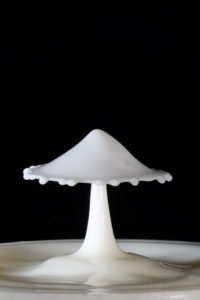
From the photos I can see that the collision starts somewhere between 135ms and 130ms. If running this sequence again 135ms would be a good starting point.
Why 30ms drop size?
This is down to experience. With these settings I know expect the collision to be close to a flat saucer shape which I thought would be good for the guide.
Why 150ms start time?
I found 150ms after a couple of trial runs. With a start time of 150ms the second drop is just entering the frame. I actually started with a different time but didn’t want to bore you with lots of empty photos.
I picked 150ms because I wanted images for the guide and wanted to show the descending drop. When I do this for myself I start with the drop closer to the jet. In this case it would have been around the 135ms mark.
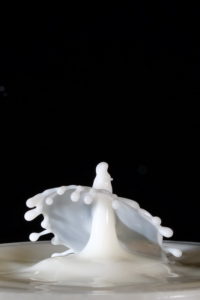
The next step is to fine tune the drop 2 start time and maybe play with the flash trigger time.
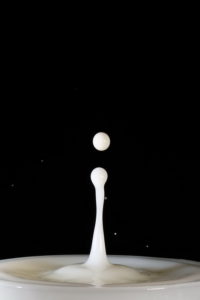
The next sequence starts with a drop2 start time of 130ms and the start time has a delta value of -1ms. As the sequence progresses you should see the collision get very slightly lower.
 <
<
130ms
129ms
128ms
127ms
126ms

125ms
124ms
123ms
122ms
121ms
120ms
119ms
118ms
117ms
116ms
115ms

114ms
113ms
112ms
111ms
110ms
109ms
108ms
107ms
106ms

105ms
Once you know when the collsions are you can experiment with changing the other times. For example I like the collsion at 126ms so I might set the drop start time 126ms, remove the delta, and then increase the drop size. I may also add a delta to the flash trigger time to compensate for the changing drop size.
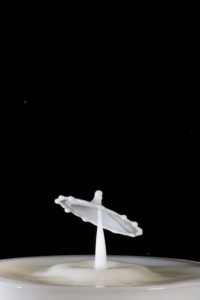
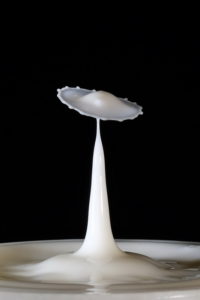
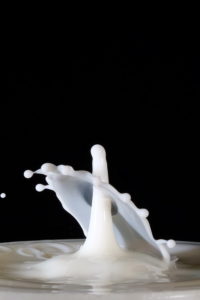
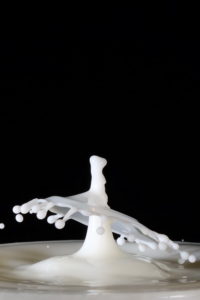
Bonus Exercise
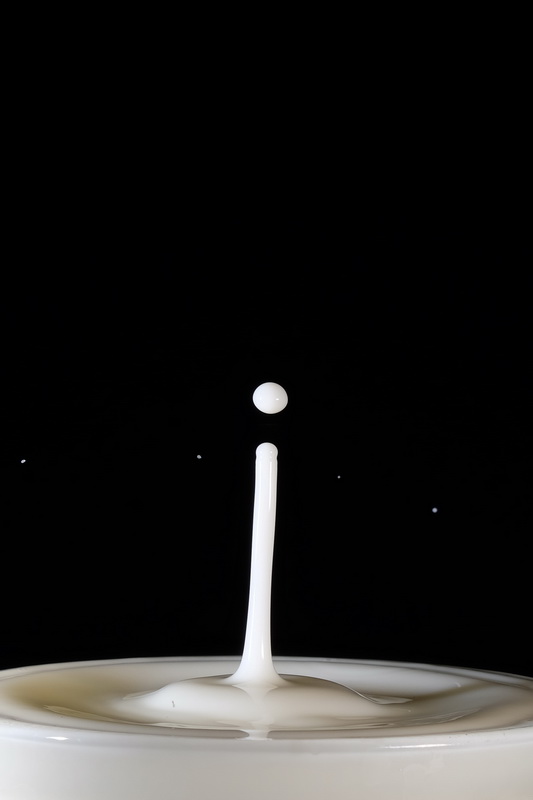
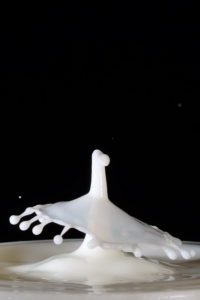
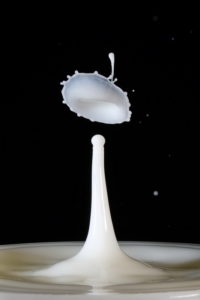
If you go back to the original Worthington Jet, at 390ms & 400ms you can see that the top of the jet has separated and become a floating drop. What I want here is to hit this drop without hitting the column. Using delta values this is not so difficult.
 I have changed the flash trigger time to 395ms.
Drop 2 start time is at 130ms with a start time delta of -2ms.
Drop sizes are the same.
I wont post all the images but here are some of the better ones from the first couple of tries.

That’s the end of part 1. Hopefully this gives a good foundation to using the dropController and creating drop collisions. In the next part we take 2 drop collsions a stage further.